Agent Management Settings to Execute the Process With an Automation
- How to create an Agent Attribute in the tenant.
- How to add the attribute to your agent.
- How to add the attribute to your project.

Prerequisites
- Access to a SAP BTP tenant with SAP Build Process Automation
- Install and set up the Desktop Agent 3 to run the automation
Agent attributes allow you to sort agents registered within the same tenant and make sure that a specific agent executes the job of your choice.
- Step 1
After you have installed the desktop agent, you need to add your agent so that it is able to run an automation.
-
Navigate to SAP Build lobby. Select Control Tower and Environments under Tenant Configuration.

-
Choose Create Environment.
-
In the Create Environment window do the following:
- Give your environment a name
- Select a color
- You may enter a short description
- Choose Create

-
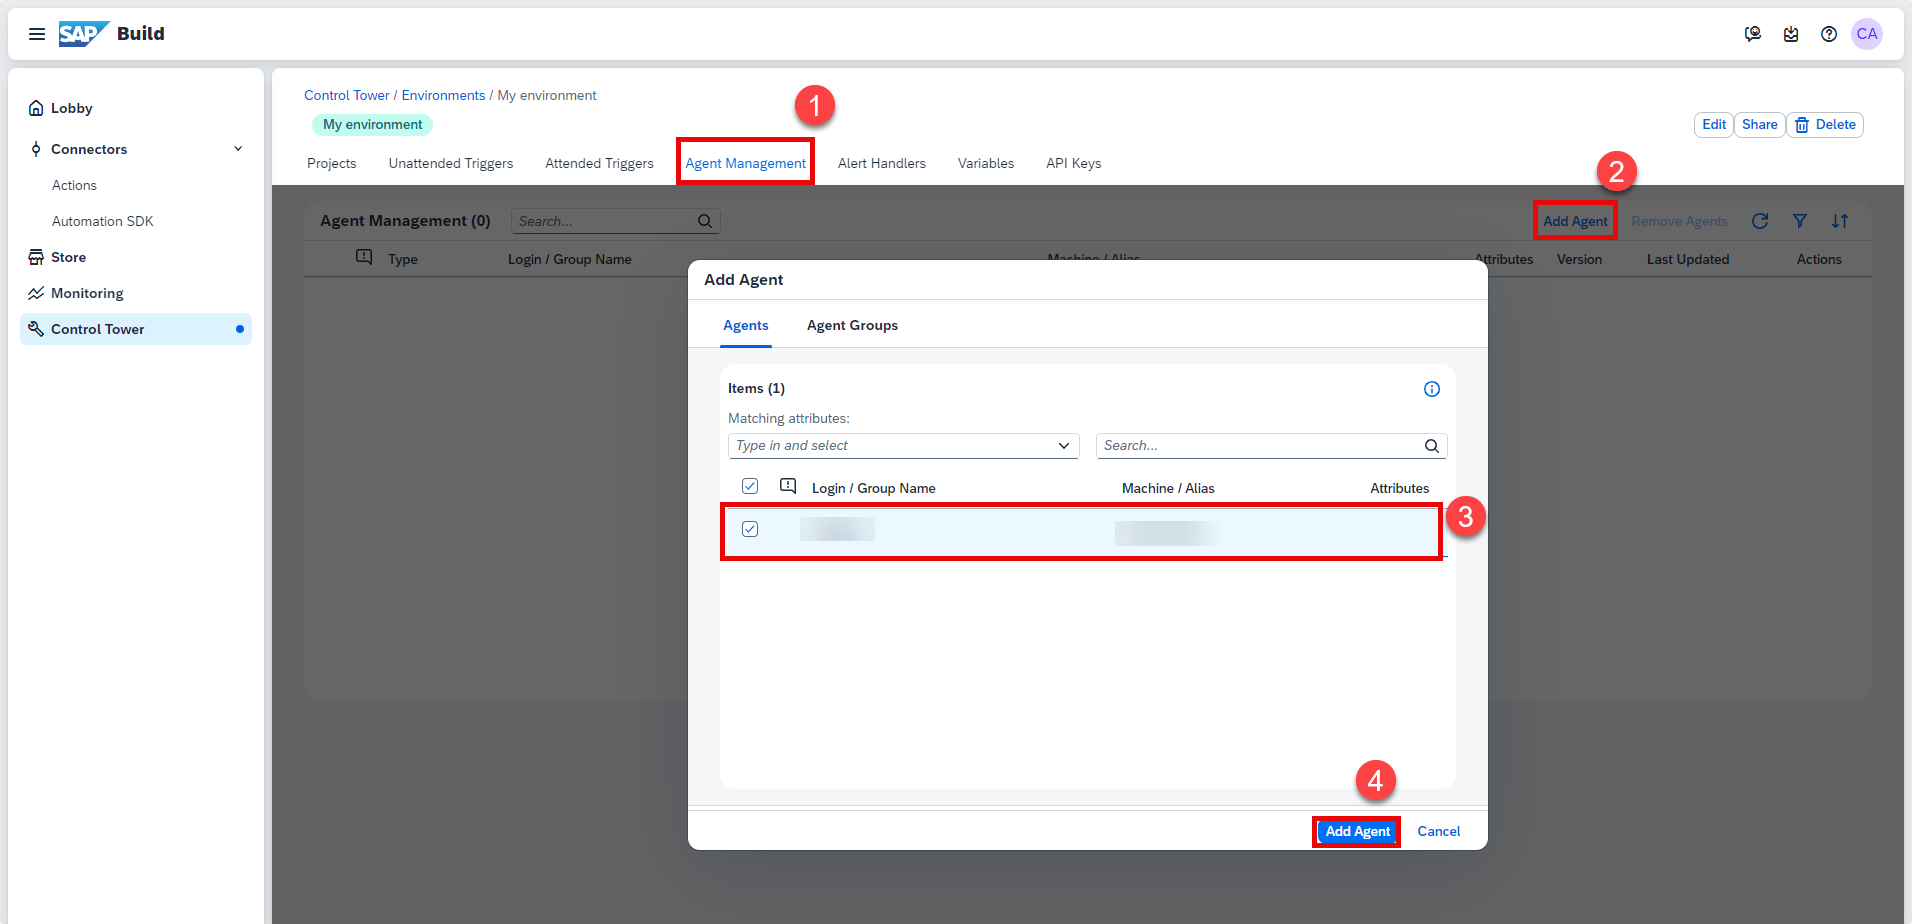
Select the created environment to add your agent in it.

-
Select Agent Management > Add Agent.
-
In the Add Agent window, select your agent and choose Add agent.
-
Your agent is now added and ready to run.

-
- Step 2
Now that you have your project free of errors, ready to be released, you need to add an Attribute to your project. But first, you need to create an Agent Attribute.
To do so, please follow these steps:
-
In SAP Build lobby, select Control Tower > Agent Attributes.

-
Choose Create Attribute.
-
In the Create Agent Attribute dialog box, please enter My Agent Attribute in the Name field.
-
From the Type dropdown list, select Predefined if you wish to add values or else leave Free as Type.
- Free – With this type of attribute, you won’t be able to add any predefined value. Whenever you want to use this attribute, you will be able to parametrize the value of this attribute.
- Predefined – With this type of attribute, you will be able to populate values for any specific attribute.
-
In the Values field, you may enter any value you wish (i.e. employee ID).
-
Choose Create.

-
- Step 3
-
Navigate back to Control Tower and choose Agents under Agent Configuration.

-
Search for your agent.

-
Verify that it is idle or ready and connected in unattended mode.
If your agent is not in unattended mode, you will be able to set it to unattended mode at step 5.
-
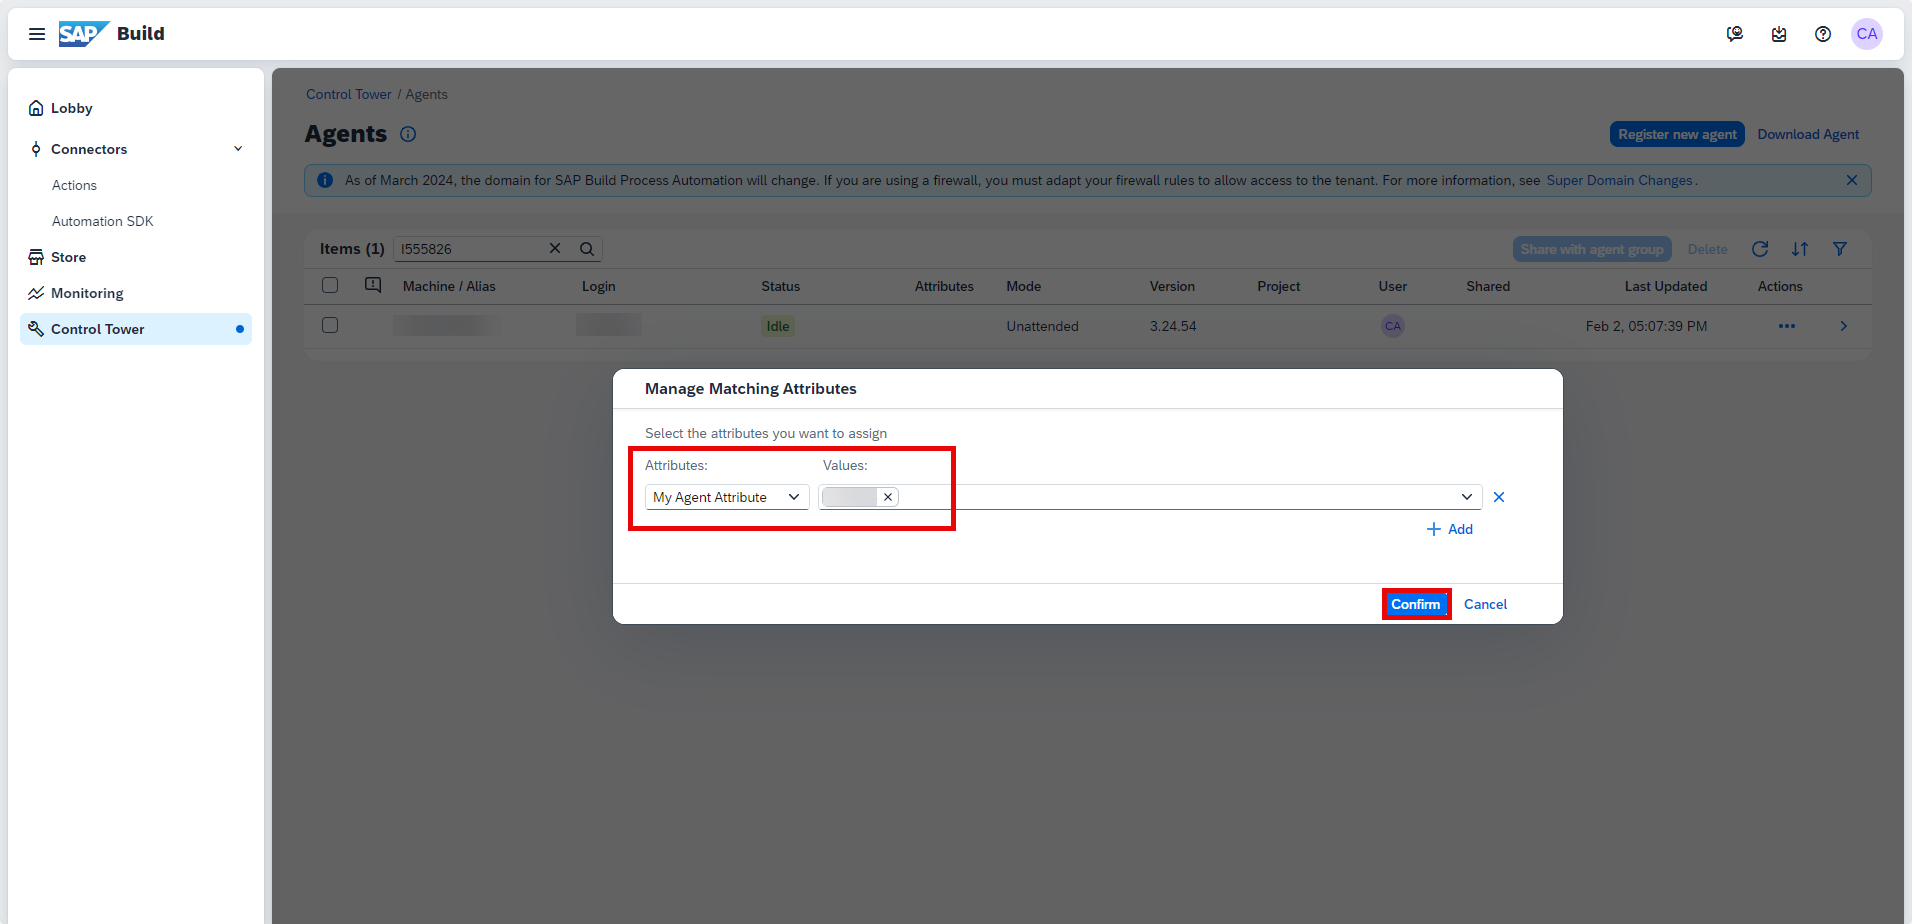
Select the three dots and choose Manage Attributes.

-
In the Manage Matching Attributes dialog box, add your attribute:
- From the drop-down list, select My Agent Attribute
- Enter the value you selected previously in the Values field and press ENTER
- Choose Confirm
Why do you need to add an agent attribute to your project?
-
- Step 4
-
Navigate back to your project in the Process Builder.
-
Choose Settings.
-
Select Attributes.
-
From the dropdown list, select My Agent Attribute.
-
Enter your value in the Values field and press ENTER.
-
Choose Save.
-
Choose Close.

-
- Step 5
When you are running the process make sure to have the Desktop Agent in unattended mode.
-
Open the Desktop Agent 3 from the
systray.
-
Select Settings in the Menu and choose Mode.

-
Set the Desktop Agent 3 to Unattended mode by selecting Activate.

-