Build Your Automation Using Microsoft 365 Cloud SDK of SAP Build Process Automation
- How to use Microsoft 365 Cloud Office SDK activities


 Chaitanya Priya Puvvada
 khushiyadavsap
Prerequisites
- A Windows PC
- If you are using a MAC, please install a VDI
- Access to a SAP BTP tenant with SAP Build Process Automation
- Install and Setup the Desktop Agent
- Configure Azure Application
- Download and save Sales Order Data on your SharePoint or OneDrive.
IMPORTANT: Please refer to sample Automate Microsoft Office 365 applications in the SAP Build Store if you face any issues while following the tutorial. To retrieve the sample refer to step 9 of this tutorial.
After completing this tutorial, you will be able to search for an Excel file on SharePoint or OneDrive, download it and store it on your local machine, read Excel data for a given range and send an email via Outlook Online with the new Excel file as an attachment.
- Step 1
Once you have successfully configured the Azure Application as mentioned in Pre-requisites, you are now ready to create an external authentication in SAP Build Process Automation Tenant.
-
Log in to SAP Build Process Automation Tenant.
-
Navigate to Control Tower > External Authentication.

-
On the External Authentication page, click Create New Authentication.

-
On the Create Authentication popup window, select Microsoft 365.
-
Enter a name in the Name field such as Office 365.
-
Optional: Enter a short description in the Description field.
-
Enter the Client ID received at step Configure Azure Application > Find Relevant IDs that Define the Application > Application (client) ID.
-
Enter the Client Secret received at step Configure Azure Application > Create a Client Credential.
-
Enter the Tenant ID received at step Configure Azure Application > Find Relevant IDs that Define the Application > Application (tenant) ID.
-
Select the desired scope in the Scope field.
-
Choose Create.

-
- Step 2
Once the external authentication is created, you can see it on Agent 3.
-
Open the Desktop Agent. Once you are connected to the tenant, choose Settings > External Authentication.
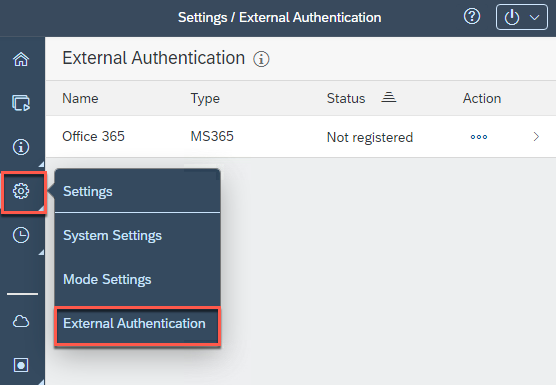
The agent receives and shows a list of registration items defined in SAP Build Process Automation External Authentication settings.
-
Select Office 365 Authentication.

-
Enter the email address of the identity in the Email field to authenticate the identity.
The authentication of the activities is done with that identity.
-
Choose save.

Each registration item can be registered or unregistered given a user email address.
-
Select Register button.

-
In the newly opened window, consent for agent to use your ID with the activities.
-
The confirmation of registration will appear.

-
- Step 3
-
Go the SAP Build lobby. Choose Create button.

-
Select Build an Automated Process.

-
Choose Task Automation.

-
Provide a Name for the project such as Microsoft 365 and choose Create.

-
Choose Create > Automation.

-
Select the agent version that is registered on your system.

-
Provide a name for the automation such as Automation send email, and choose Create.

-
- Step 4
You will be navigated to the automation editor where you can build your automation. In order to use Microsoft 365 activities, you need to add the Microsoft 365 Cloud SDK to your project.
-
Choose Settings.

-
In the Project Properties window, select Dependencies > Add dependency > Add a Business Process project dependency.

-
Under Add Dependency search for Microsoft 365 Cloud SDK and Add it.

-
Close the window.
-
- Step 5
-
Under Automation Details panel, under Tools, look for Select 365online Authentication activity.
-
Drag and drop the activity into the workflow below Start.

-
Under Automation Details panel, under Tools, look for Get Remote File Information activity. Drag and drop the activity into the workflow.
Get Remote File Information activity gets information about a remote file using its source URL.
It will generate a log message within the tester and the trace file.

-
Select the Get Remote File Information activity. In Input Parameters, under
sourceURL, you need to copy and paste the URL provided by Microsoft to open the file. You will retrieve the file URL in the step below.CAUTION: It is not the downloaded URL.
-
To retrieve the needed URL, please follow these steps:
- Go to your One Drive.
- Choose My Files.
- Find the Orders excel file that you downloaded and saved in your One Drive as mentioned in the pre-requisites, and check it.
- Choose Copy link.
What’s going on?: This is the URL you will copy and paste under
sourceURLinput parameter.
-
Now that you have copied the URL, you may paste it under
sourceURLinput parameter.
-
Under Automation Details panel, under Tools, look for Log Message activity. Add it to the workflow under Get Remote File Information.
-
Select the Log Message activity. In the Input Parameters, under message choose
fileInformation.
-
Save the automation. Test the automation.

-
Once the Test is done, go to Info in the Test Console where you will find the
driveIdandfileIdvalues.The
driveIdis the ID of the remote SharePoint Drive where the file is located and thefileIdis the ID of the workbook.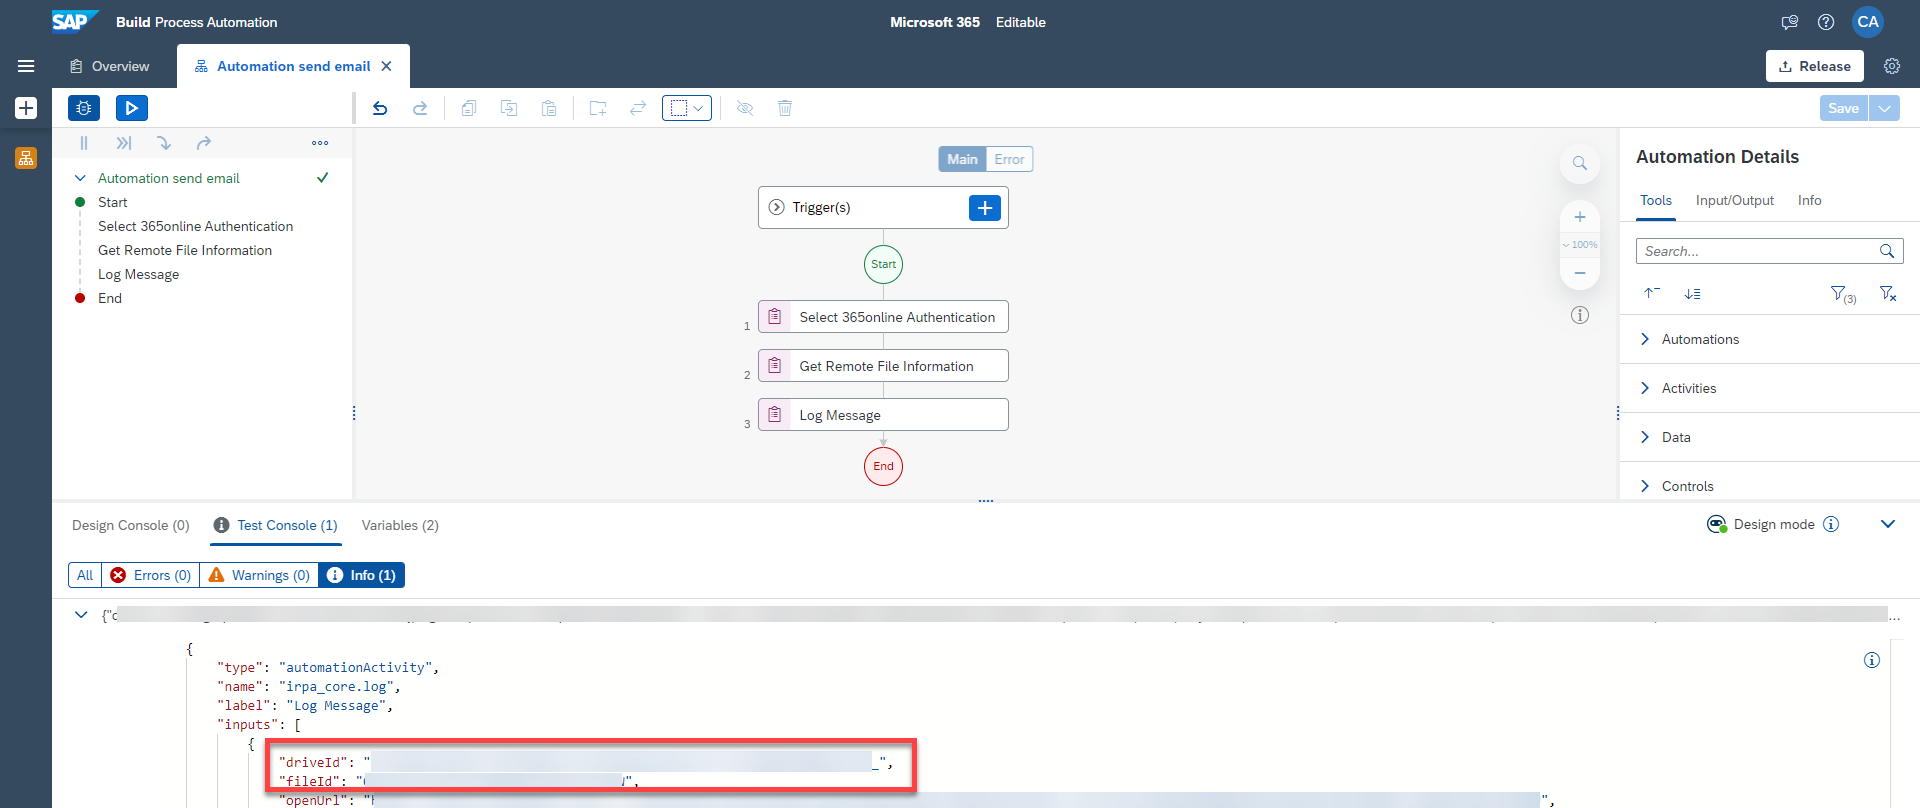
Which activity retrieves the details of a file which is on SharePoint or One Drive?
-
- Step 6
An input or output parameter is a variable that is passed, received, or sent from one automation, SDK activity or control to another. This variable allows you to manipulate data that you can use in your workflow. Input or output parameters have a name (optionally a description) and data that complies to a type.
For the purpose of this tutorial, you will create an input parameter for the
pathto the excel file which will be downloaded locally in your system.-
In your automation, on the right-hand side panel, go the Input/Output section and click Add new input parameter.

-
Perform the following:
- Enter a name: path
- Enter a description: Path to the excel file
- Select String as type
-
Choose Save.

Which activity retrieves the values, formulas or numberFormats from the current worksheet?
-
- Step 7
-
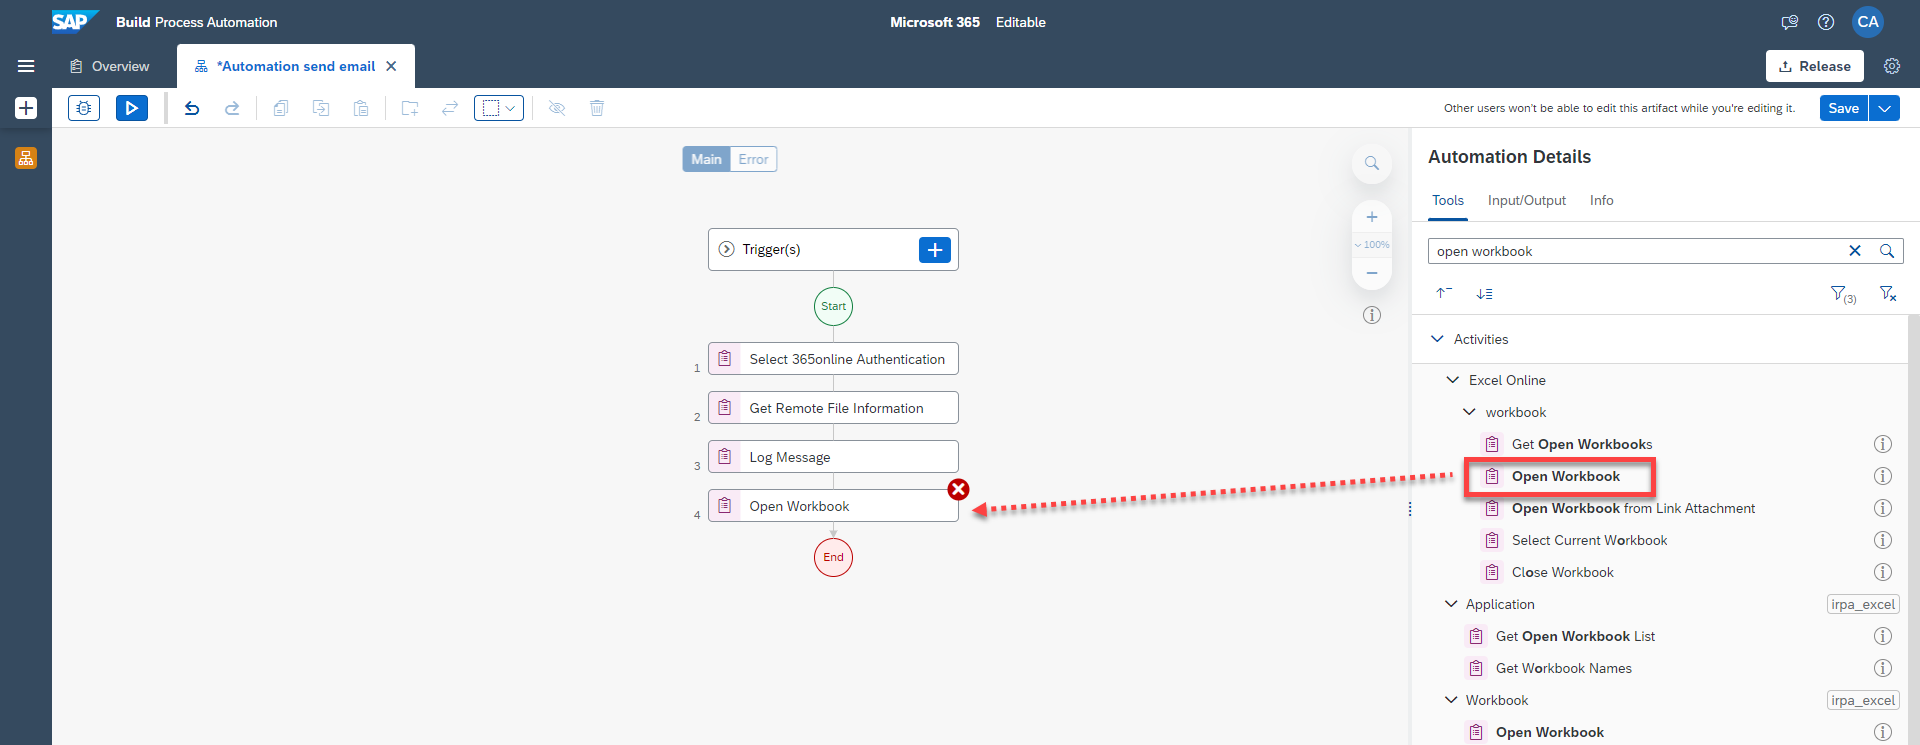
Under Automation Details panel, under Tools, look for Open Workbook activity. Drag & drop it into the workflow.
This activity opens Excel Workbook.
-
Select the Open Workbook activity.
-
Under Input Parameters, for
driveId, perform the following steps:- Open the expression editor
- Select Variables
- Select the variable
fileInformationfrom Step 2 and choosedriveId - Choose Save Expression

-
In the same way, for
pathOrFileId, perform the following steps:- Open the expression editor
- Select Variables
- Select the variable
fileInformationfrom Step 2 and choosefileIdId - Choose Save Expression

-
Under Automation Details panel, under Tools, look for Get Values activity. Drag & drop it into the workflow.
This activity retrieves the values, formulas or
numberFormatsfrom the current worksheet.
-
Select the Get Values activity. Under Input Parameters for:
-
range Definition, enter: A1:F11 and select the expression in quotes.
What’s going on?: The range definition of the excel file has values up to this range therefore you need to specify those values.

- format choose:
objectsHeadersOnFirstRow.
This corresponds to the format of the result that will appear in the Test Console.

-
-
Under Automation Details panel, under Tools, look for For Each control. Drag & drop it into the workflow.

-
Select the For Each control. Under Parameters in Set looping list, choose result.

-
Under Automation Details panel, under Tools, look for Log Message activity. Drag & drop it into the workflow inside the For Each loop.

-
Select the Log Message activity. Under Input Parameters in message choose
currentMember.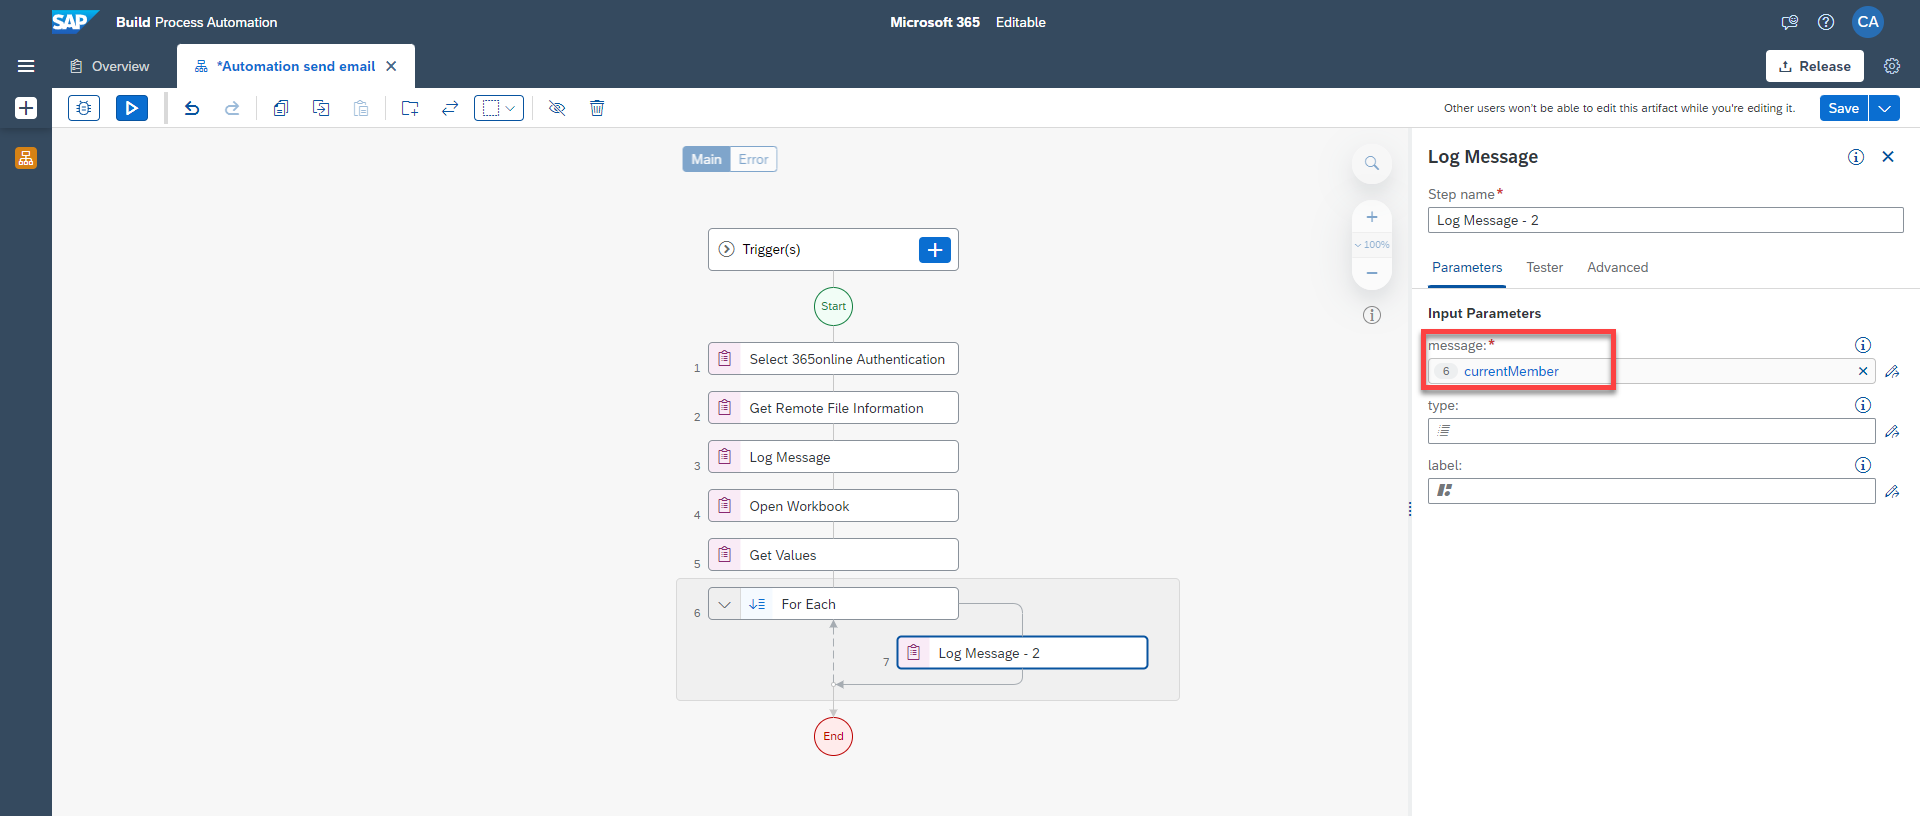
-
Under Automation Details panel, under Tools, look for Download File activity. Drag & drop it into the workflow outside the For Each loop.

-
Select the Download File activity.
-
Under Input Parameters, for
driveId, perform the following steps:- Open the expression editor
- Select Variables
- Select the variable
fileInformationfrom Step 2 and choosedriveId - Choose Save Expression

-
In the same way, for
pathOrFileId, perform the following steps:- Open the expression editor
- Select Variables
- Select the variable
fileInformationfrom Step 2 and choosefileIdId - Choose Save Expression

-
For
localFilePath: select parameterpath.localFilePathcorresponds to the path to the file which will store the data on your machine.
-
Under Automation Details panel, under Tools, look for Send E-mail activity under Outlook Online. Drag & drop it into the workflow just below Download File activity.
This activity will send an email using Outlook Online.

-
Select the Send E-mail activity. In Input Parameters under
mailDescriptionchoose Create Custom Data.
-
Customize the Email:
- Under subject enter: Your list of orders and select expression in quotes.
- Under body enter: Hello, Your list of orders is ready for you. and select expression in quotes.
- Under
toRecipients, select + and add your email address. Select the expression in quotes.

- Under attachments, select + next to Description of a mail.attachments
- Under attachments, select Create Custom Data to add the name and
pathparameter: - In the name field, enter ListOfOrders.xlsx and select the expression in quotes.
- In the path field, select parameter
path.
pathcorresponds to the path of the file which will be added to the email message.
-
Under Automation Details panel, under Tools, look for Remove File/Folder activity. Drag & drop it into the workflow.

-
Select the Remove File/Folder activity.
-
Under Input Parameters, for path, select the parameter
path.pathis the path of the file that will be removed once email is sent. -
Save your work.

-
- Step 8
-
Once the automation is saved and ready you can test it. Choose Test button.

You will be prompted to enter the value of Input parameters.
-
For
path: enter the path to the excel file. Your path would be likeC:\temp\ListOfOrders.xlsxThe file will be saved with the name
ListOfOrdersin the above-mentioned folder and would be deleted after the mail is received. -
Choose Test.

The BOT opens the Orders excel file in your share point, reads the value from the excel, downloads the file to you system and sends an email with
ListOfOrdersexcel file as an attachment via Outlook Online.
-
Check your Outlook Inbox to see the email that was send with the attachment.

-
- Step 9
This sample project can be downloaded from the SAP Build Store.
To retrieve this sample, please follow these steps:
-
From the SAP Build Lobby, navigate to Store.
-
Search for the sample project: Automate Microsoft Office 365 applications.
-
Choose Create from Template to retrieve the sample and save it as a new project in your lobby.

-
Choose Create.

Your project gets created in editable version. You may release and deploy it and run the project.
-
Navigate back to the lobby by clicking on the SAP logo.

You can see your project is available in the lobby.
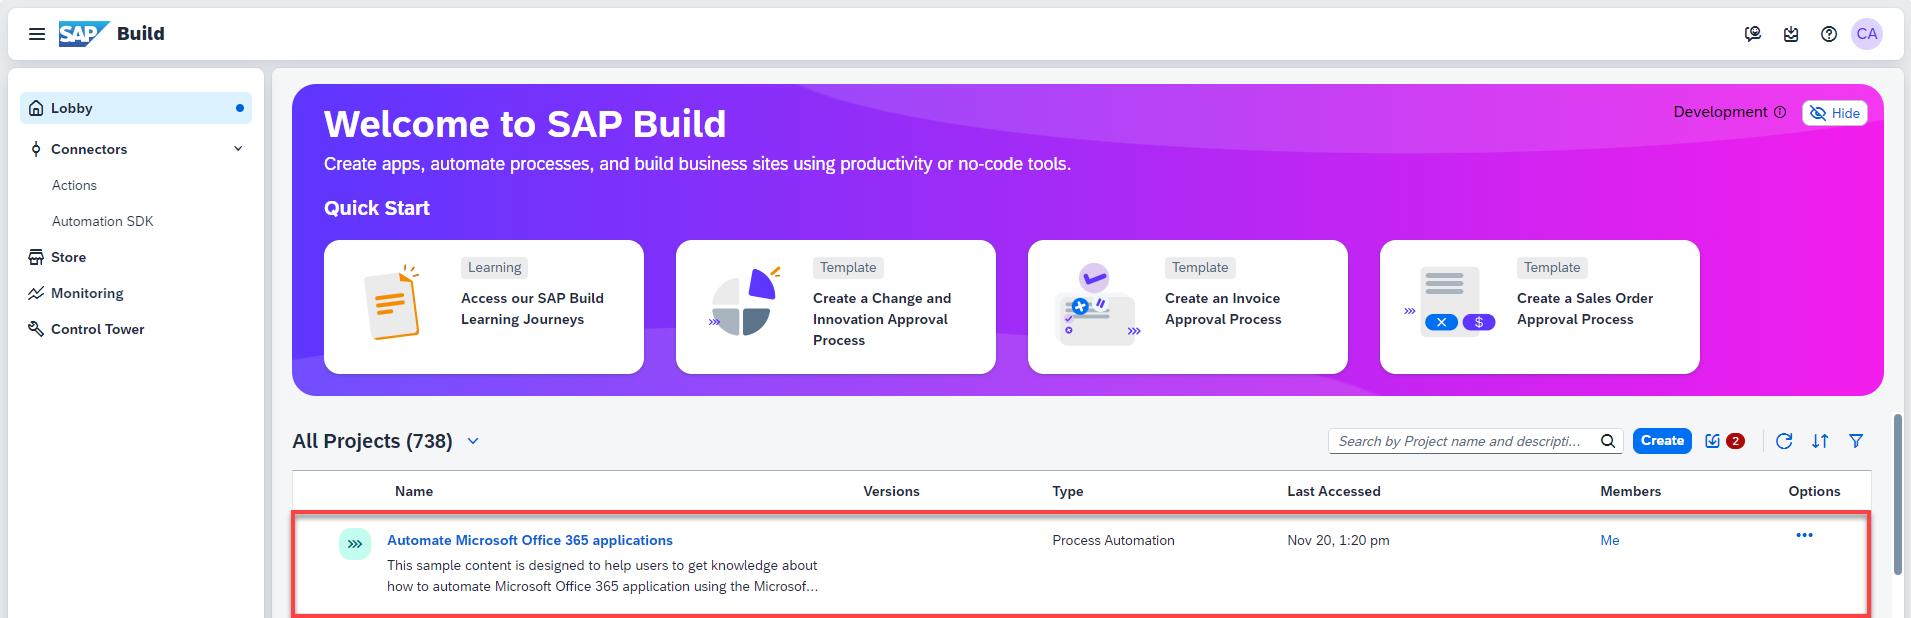
-