Build Your First Automation Using Excel SDK of SAP Build Process Automation
- How to use Excel SDK of SAP Build Process Automation to read and process data in an Excel.


Prerequisites
- Complete the tutorial: Subscribe to SAP Build Process Automation
- Install and Setup the Desktop Agent
- Basic understanding of SAP Build Process Automation
SAP Build Process Automation has native integration to several Microsoft Office products including Outlook, Excel SDK. In this tutorial, you will explore how to use Excel SDK in your automations.
- Step 2
- From the SAP Build Process Automation Lobby, create a new automation project.
- Provide an appropriate name to your project such as Excel Sample and relevant automation such as
excelLink. - Select your active desktop agent version to be used during design and development of your automation.
- By default Excel and Core SDK are added to the automations and your automation opens in a new browser tab. You have a couple of ways to read Excel data:
- Using the activity Excel Cloud Link to achieve Excel Data Mapping.
- Traditional step by step approach to read / write Excel data.
In this tutorial, you will explore both ways.
What is Excel Data Mapping?
Excel Data Mapping allows you to transform columns-based data from an Excel sheet into datatype that can be used in your automation. The data from the Excel sheet stays the same but the structure becomes a data type structure, making it possible to use throughout your project.
-
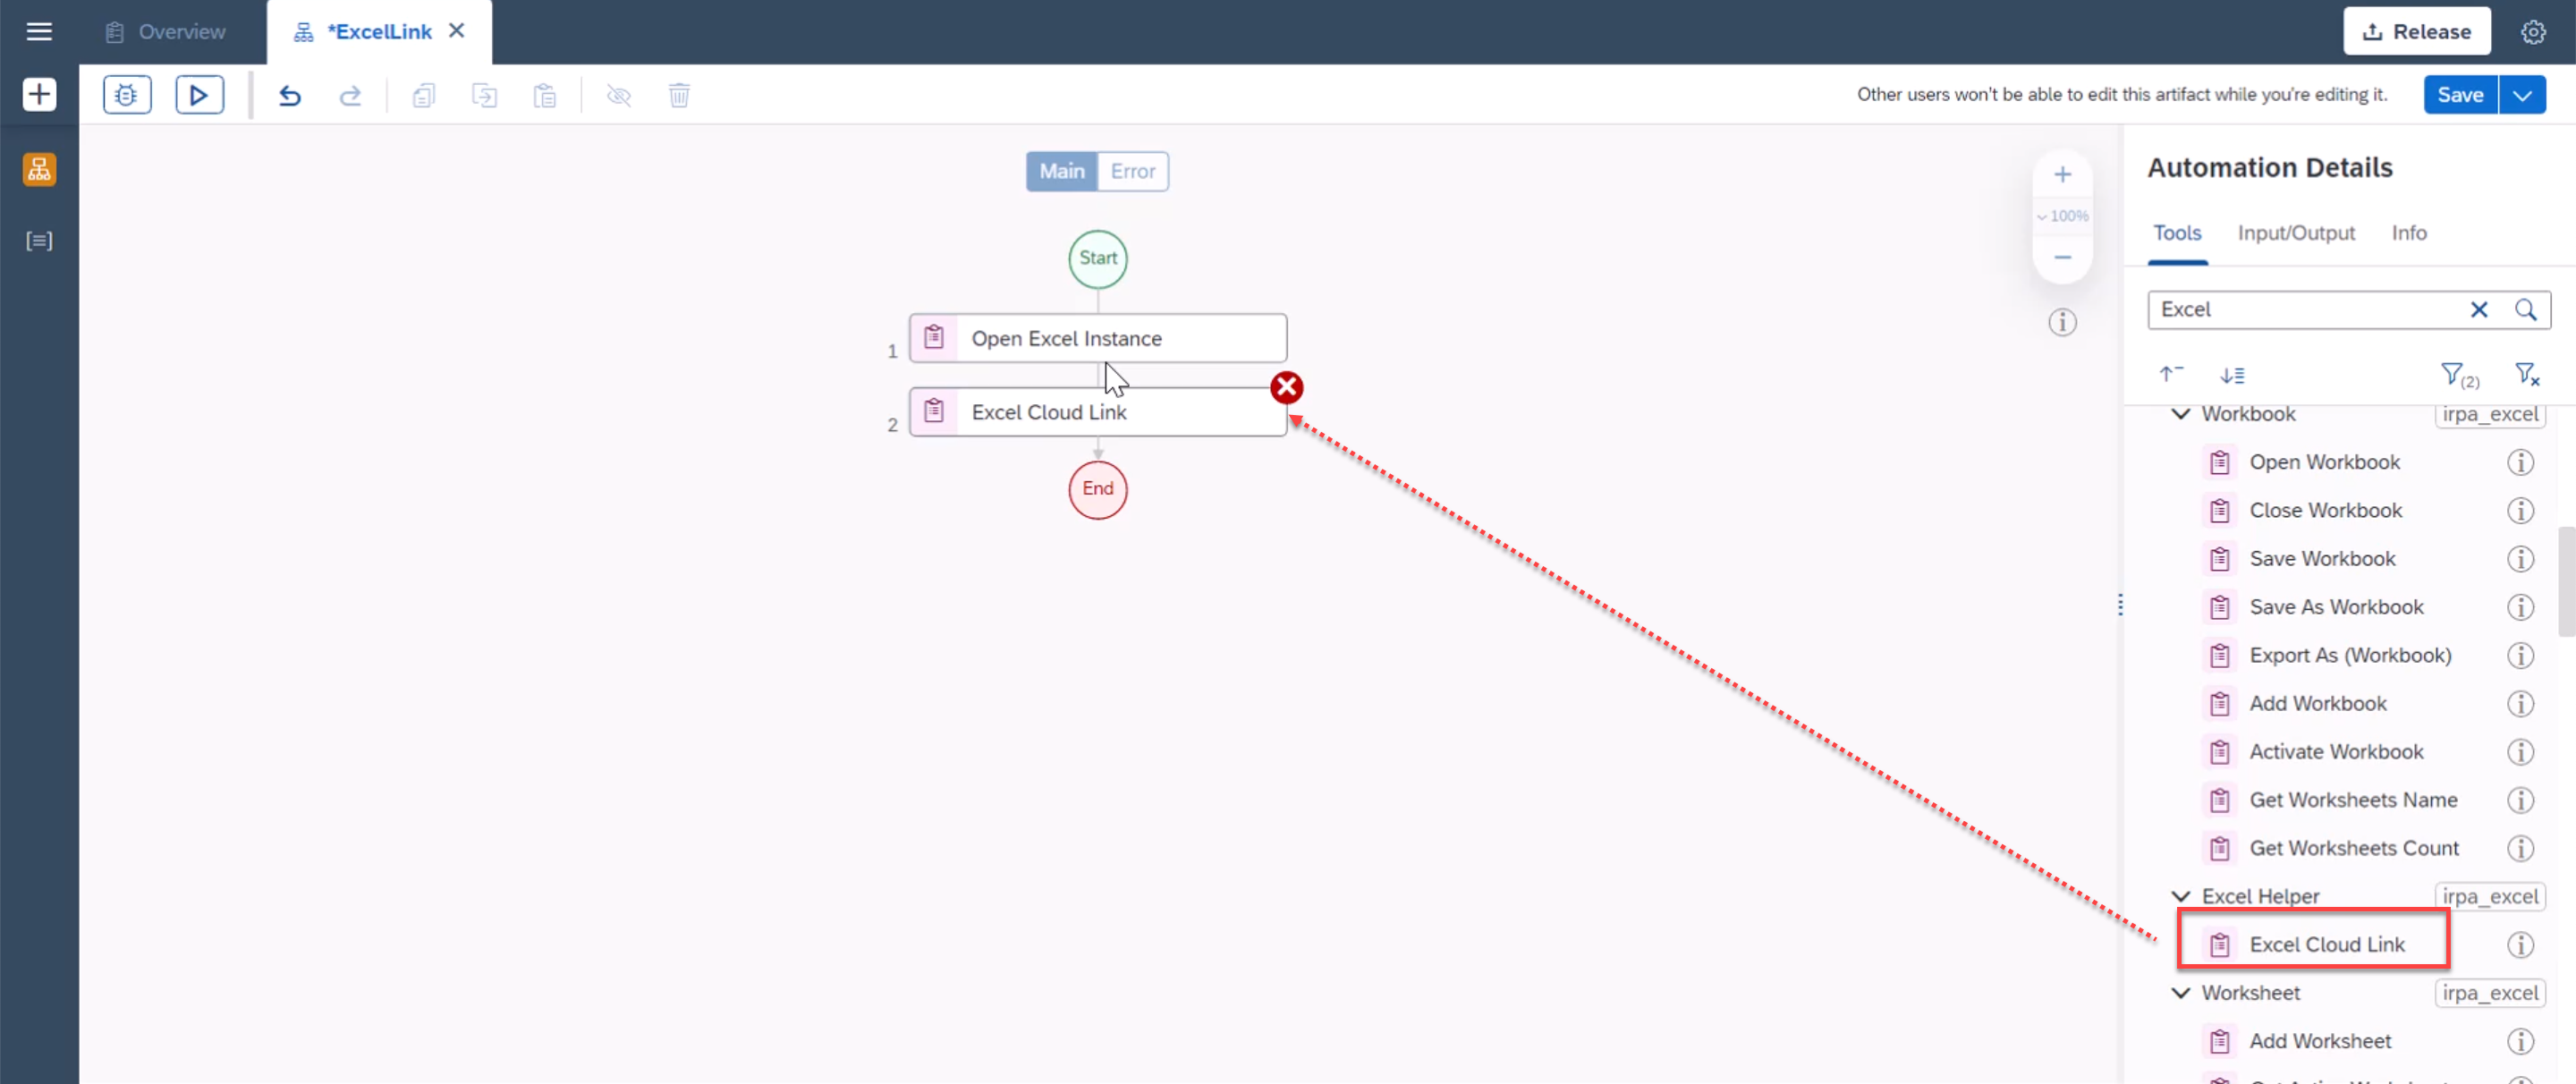
As a first step, locate and add Open Excel Instance activity to the automation flow.

-
Similarly locate and add Excel Cloud Link from the activity pane.
-
Now edit the properties of Excel Cloud Link activity. In the flow chart, select the Excel Cloud Link activity, on the right side menu, choose Edit Activity button.

-
Within the edit activity screen, you can either use the file picker or drag and drop your test Excel.

-
As you can see, with the Excel cloud link capabilities, it already pre-selects the first sheet, it groups data by column names, it also finds out in few seconds the complete range of the Excel.

While Excel cloud link is great in processing the data, it still needs for runtime reference, the path of your Excel. Typically, you need the full path of the Excel.
-
Under Workbook Path, provide the path of the workbook that will be used during the automation execution.

-
SAP Build Process Automation has data type functionality to logically group and process your data. You can create a data type out of the added Excel by using the Excel data structure.

-
Provide a data type name such as Sales Orders and choose Create.

Excel Cloud Link will identify field names using the first row of each column in your Excel and will determine the field type based on the type of data present in each column below the first row.
The activity is also a helper function to read a given range of data in your Excel. This will be returned through the Output Parameter.
-
If you wish, you may edit the output parameter name on the right side to
salesOrders. -
Save and close the activity screen.

-
Now you will see the benefit of using Excel cloud link by printing output parameters. For this you will use a loop activity For Each.

-
As a loop variable, add the Output Parameter
salesOrdersfrom the Excel Cloud Link activity.
If you are using the sample data provided in this tutorial you can print Order Number.
-
Drag and drop a Log Message activity into the workflow.

-
Select the Log Message activity and change the Step name to Log Order Number.
-
Under the message input parameter, choose the Open the expression editor icon.
-
In the Edit Expression window, type:
"Order Number is " + -
Then select
currentMember>orderNumberfrom the list of Variables. -
Choose Save Expression.

-
Add Close Excel Instance after the For Each loop as you added Open Excel Instance in the first step.
-
Choose Save to save your project.

-
Now you can test the output.

- SAP Help Documentation IRPA SDK V2 on Excel Cloud Link
- Excel Cloud Link How to use the Excel Cloud Link activity helper
- Community Quick automation with SAP Intelligent RPA – Excel SDK | SAP Blogs on Excel SDK
In the next step, you will take a more traditional approach to process the Excel data.
What input information is required to use Excel Cloud Link activity?
- Step 3
-
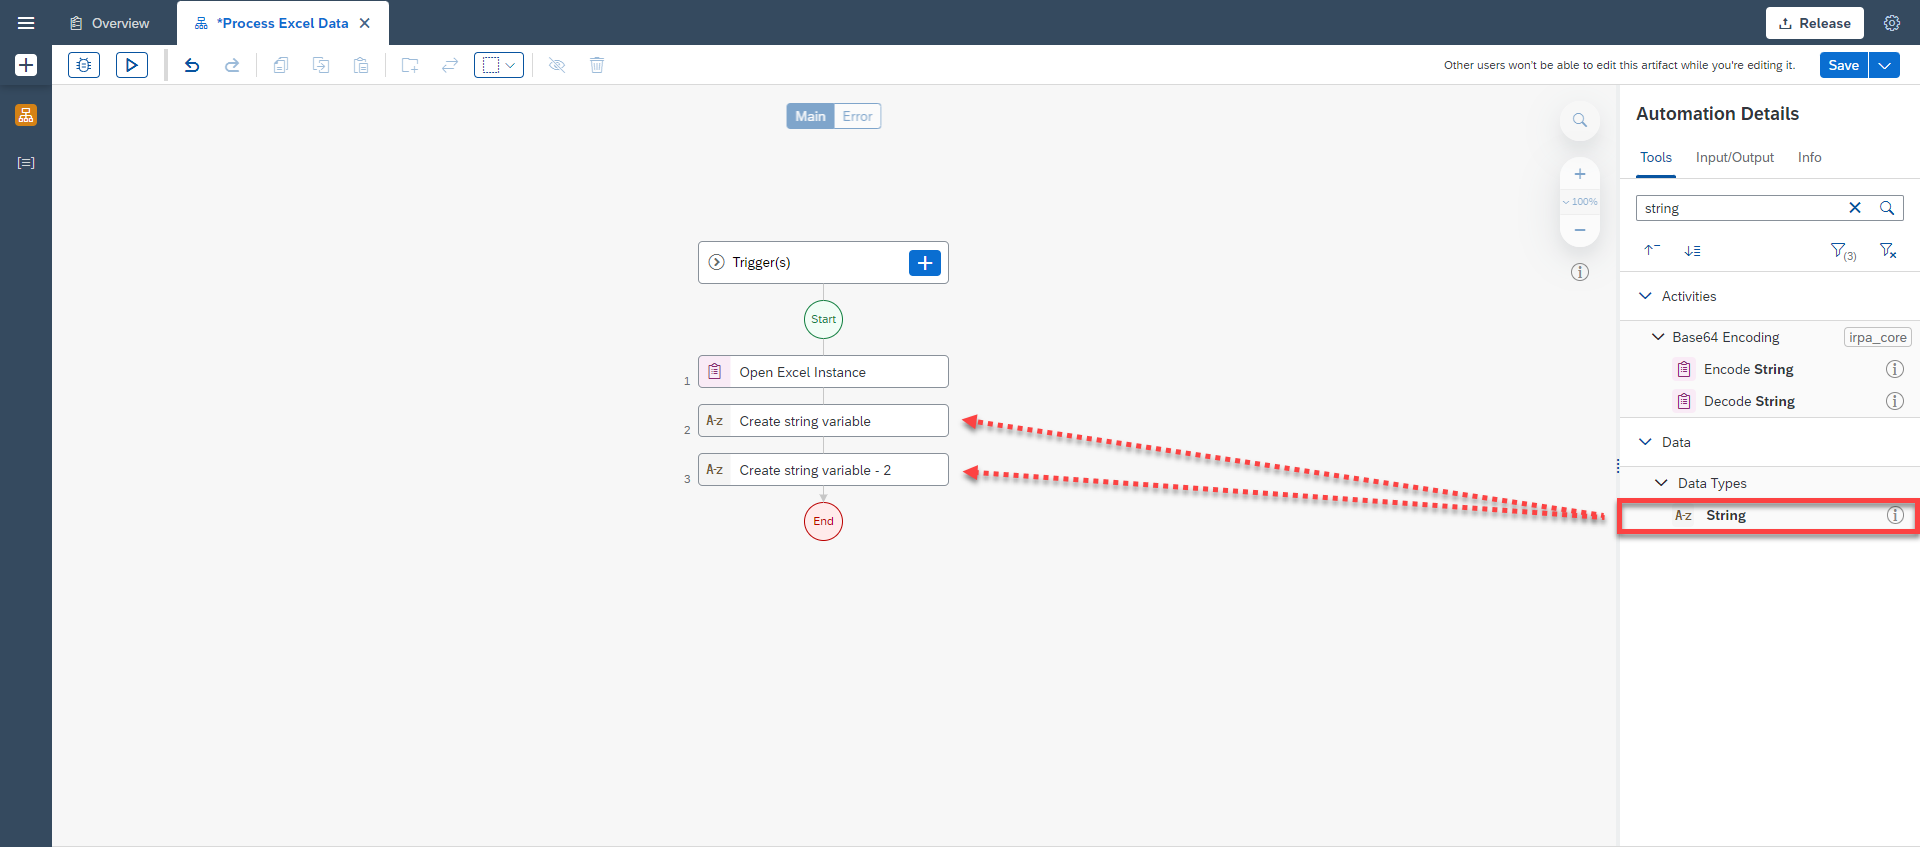
Start by adding a new automation to the Excel Sample project. Name the new automation Process Excel Data and add Open Excel Instance to the flow.

-
You will create two string variables. Search for String and drag and drop it into the flow twice.
-
Select the first Create String Variable and change the Step name to Create Workbook Path Variable.
-
Under Input Parameters as value, enter the full path to the workbook.
-
Under Output Parameters, change the name to
WorkbookPath.
-
Select the second Create String Variable and change the Step name to Create Excel File Name Variable.
-
Under Input Parameters as value, enter the name of the excel file.
-
Under Output Parameters, change the name to
FileName.
Creating the variable in this form, helps to use them in subsequent activity types.
-
Now add an Open Workbook activity.

-
Under
workbookPathinput parameter, select the full path2 WorkbookPathof the Excel file. This will open the specific Excel file.
-
To activate the workbook and the first worksheet, do the following:
- In the Automation Details panel, search for the activities Activate Workbook and Activate Worksheet.
- Drag and drop the activities into the canvas.

- Under
workbookNameinput parameter, select3 FileName.

-
Under
worksheetNameinput parameter, enterSheet1and select the expression in quotes. -
Save your work.

You can use variables or hard coded values for now. If you are trying a different Excel, use these values appropriately.
Now that Excel sheet is open, you can apply filters, hide columns or get values from a range of cells or add a new sheet and copy a range of values to the newly created sheet.
-
Drag and drop a Filter Range activity into the workflow.

-
Select the Filter Range activity.
-
Under Input Parameters, specify:
-
the data range, where the filter needs to be applied such as
A1:E11. -
the column on which the filter needs to be applied such as column
B. -
a filter condition such as
<1000000

You add a new Excel sheet to your workbook and copy this filtered data onto that, just for demonstration purpose.
-
-
Subsequently add a Hide columns activity to hide a specific column in the result.

-
Select the activity and under
rangeReferenceinput parameter, enterC1.
You will then copy the result of filter to a new sheet. For this you add a sheet through Add Worksheet activity.
-
Drag and drop a Add Worksheet activity into the workflow.

-
Under
worksheetNameinput parameter, enter the name Result.
-
Add Activate Worksheet activity to activate the new worksheet.
-
Select the activity and under
worksheetNameinput parameter, enter the name of the first sheet of your original excel file such asSheet1.
-
Add a Copy Range activity, select the activity and provide the following input parameters:
-
the
rangeDefinitionasA1:A11. -
the
destinationRangeasA1. -
the
destinationWorksheetasResult. -
the
destinationWorkbookas3 FileName.

-
-
Now add Save As Workbook activity to save the new sheet as another file.
You have the option to save workbook as an Excel file or a CSV file. In order to save as a new CSV file, you will need a file path to store this CSV file. This will be of the format
folderName+fileNamewithout extension where it needs to be saved.
-
Finally, you need to include Close Excel Instance to conclude the step.

-
Save the project and test it to validate the result.

-
At the end, when this tutorial will be tested, for example the below source data will be used:

-
After the automaton is executed, it has filtered the data, hidden a column (Column C) and resultant Excel will look like this.

A new worksheet named Result will be created:

Excel SDK of SAP Build Process Automation offers a wide variety of activities you can consider for business processes.
Review the below resources:
-
Microsoft Excel Best Practices from the SAP Build Process Automation documentation
-
Excel Email Best Practices Automation from the SAP Build Process Automation Store
-
What input information is required to use Filter Range activity?
-