Create an SAP Fiori App and Deploy it to SAP BTP, ABAP Environment
- How to assign role collections
- How to create dev spaces
- How to set up organization and space
- How to create list report object pages
- How to run SAP Fiori applications
- How to deploy applications
- How to check BSP library in Eclipse
- How to create IAM apps and business catalogs

Prerequisites
- Trial: You need an SAP BTP, ABAP environment trial user or a license.
- Licensed system:
- The business catalog
SAP_A4C_BC_DEV_UID_PC(Development - UI Deployment) needs to be assigned to a business role of the developer user. For an existing ABAP systems, the business catalog needs to be added manually to the existing developer business role. - You need to be a member at the used global account
- You need to be an organization manager at the used Cloud Foundry subaccount
- You need to be a security administrator at the used Cloud Foundry Subaccount
- The business catalog
- You have created the Travel App Mission. Mandatory is only the first tutorial of this tutorial mission Create Database Table and Generate UI Service.
- Step 1
-
Login to SAP BTP Trial cockpit and click Enter Your Trial Account.

-
Select your subaccount trial.

-
Now you are in the trial overview page. Click Users and >.

-
Select the menu and click Assign Role Collection.

Hint: If you are using a licensed system, make sure you have the trust administrator role assigned to your user.
-
Select
Business_Application_Studio_Developerand click Assign Role Collection.
-
Check your result. Now your user should have the
Business_Application_Studio_Developerrole collection assigned.
-
- Step 2
-
Select trial.

-
Select Service Marketplace and search for SAP Business Application Studio. Select actions and click Go to Application.

-
Check the privacy statement and click OK.

-
Now the SAP Business Application Studio has started. Click Create Dev Space.

-
Create a new dev space:
- Name: Fiori
- Type: SAP Fiori
Click Create Dev Space.

-
When your status is Running, select your dev space Fiori.

-
- Step 3
-
Now you are in your Fiori dev space in SAP Business Application Studio.
Select the menu on the left side and click Open Folder to set your workspace.
-
Select
/home/user/projects/and click OK.
-
- Step 4
-
Switch to SAP BTP Trial and select your trial subaccount.

-
Copy your Cloud Foundry Environment API endpoint for later use.

-
Switch to SAP Business Application Studio, select the menu on the left side and click View > Command Palette.

-
Search for CF: Login to Cloud Foundry and select it.

-
Paste your Cloud Foundry API endpoint, enter your credentials and click Sign in.

-
Now you can see, that you are logged in. Set now your cloud foundry target:
- Cloud Foundry Organization:
<your_global_account> - Cloud Foundry Space: dev

Click Apply.
- Cloud Foundry Organization:
-
- Step 5
-
Select the menu on the left side and click View > Command Palette.

-
Search for Fiori: Open Application Generator and select it.

-
Select List Report Page and click Next >.

-
Configure data source, system and service:
- Data source: Connect to a System
- System:
<your_abap_trial_system> - Service:
ZRAP100_UI_TRAVEL_O4_### (0001) - OData V4
Click Next >.
-
Select your main entity
Travel, check Yes for adding automatically table columns and click Next >.
-
Configure project attributes:
- Name:
ZRAP100_### - Title: Travel App ###
- Description: A Fiori application.
- Add deployment configuration: Yes
- Add FLP configuration: Yes
- Configure advanced options: No
Click Next >.
Hint: Your application name must begin with a
z letterand must be in lowercase letters. - Name:
-
Configure deployment:
- Target: ABAP
- Destination:
<your_abap_trial_system> - SAP UI5 ABAP Repository:
ZRAP100_### - Package:
ZRAP100_### - Transport Request:
<your_transport_request>

Click Next >.
Hint: If you want to copy your transport request, please do following: Open Eclipse, search your package
ZRAP100_###and open it. Open your transport organizer to see your transport request. The transport request of the superior folder needs to be chosen. Copy your transport request for later use. You can find your transport request underneath the Modifiable folder.

-
Configure Fiori Launchpad:
- Semantic Object:
ZRAP100_### - Action: display
- Title: Travel App ###

Click Finish.
- Semantic Object:
-
Now all files have been generated.
-
- Step 6
-
On the Application Information overview page select Preview Application.

>**Hint.** You can open the Application Information through the menu > View > Command Palette > search and select Application Information.
-
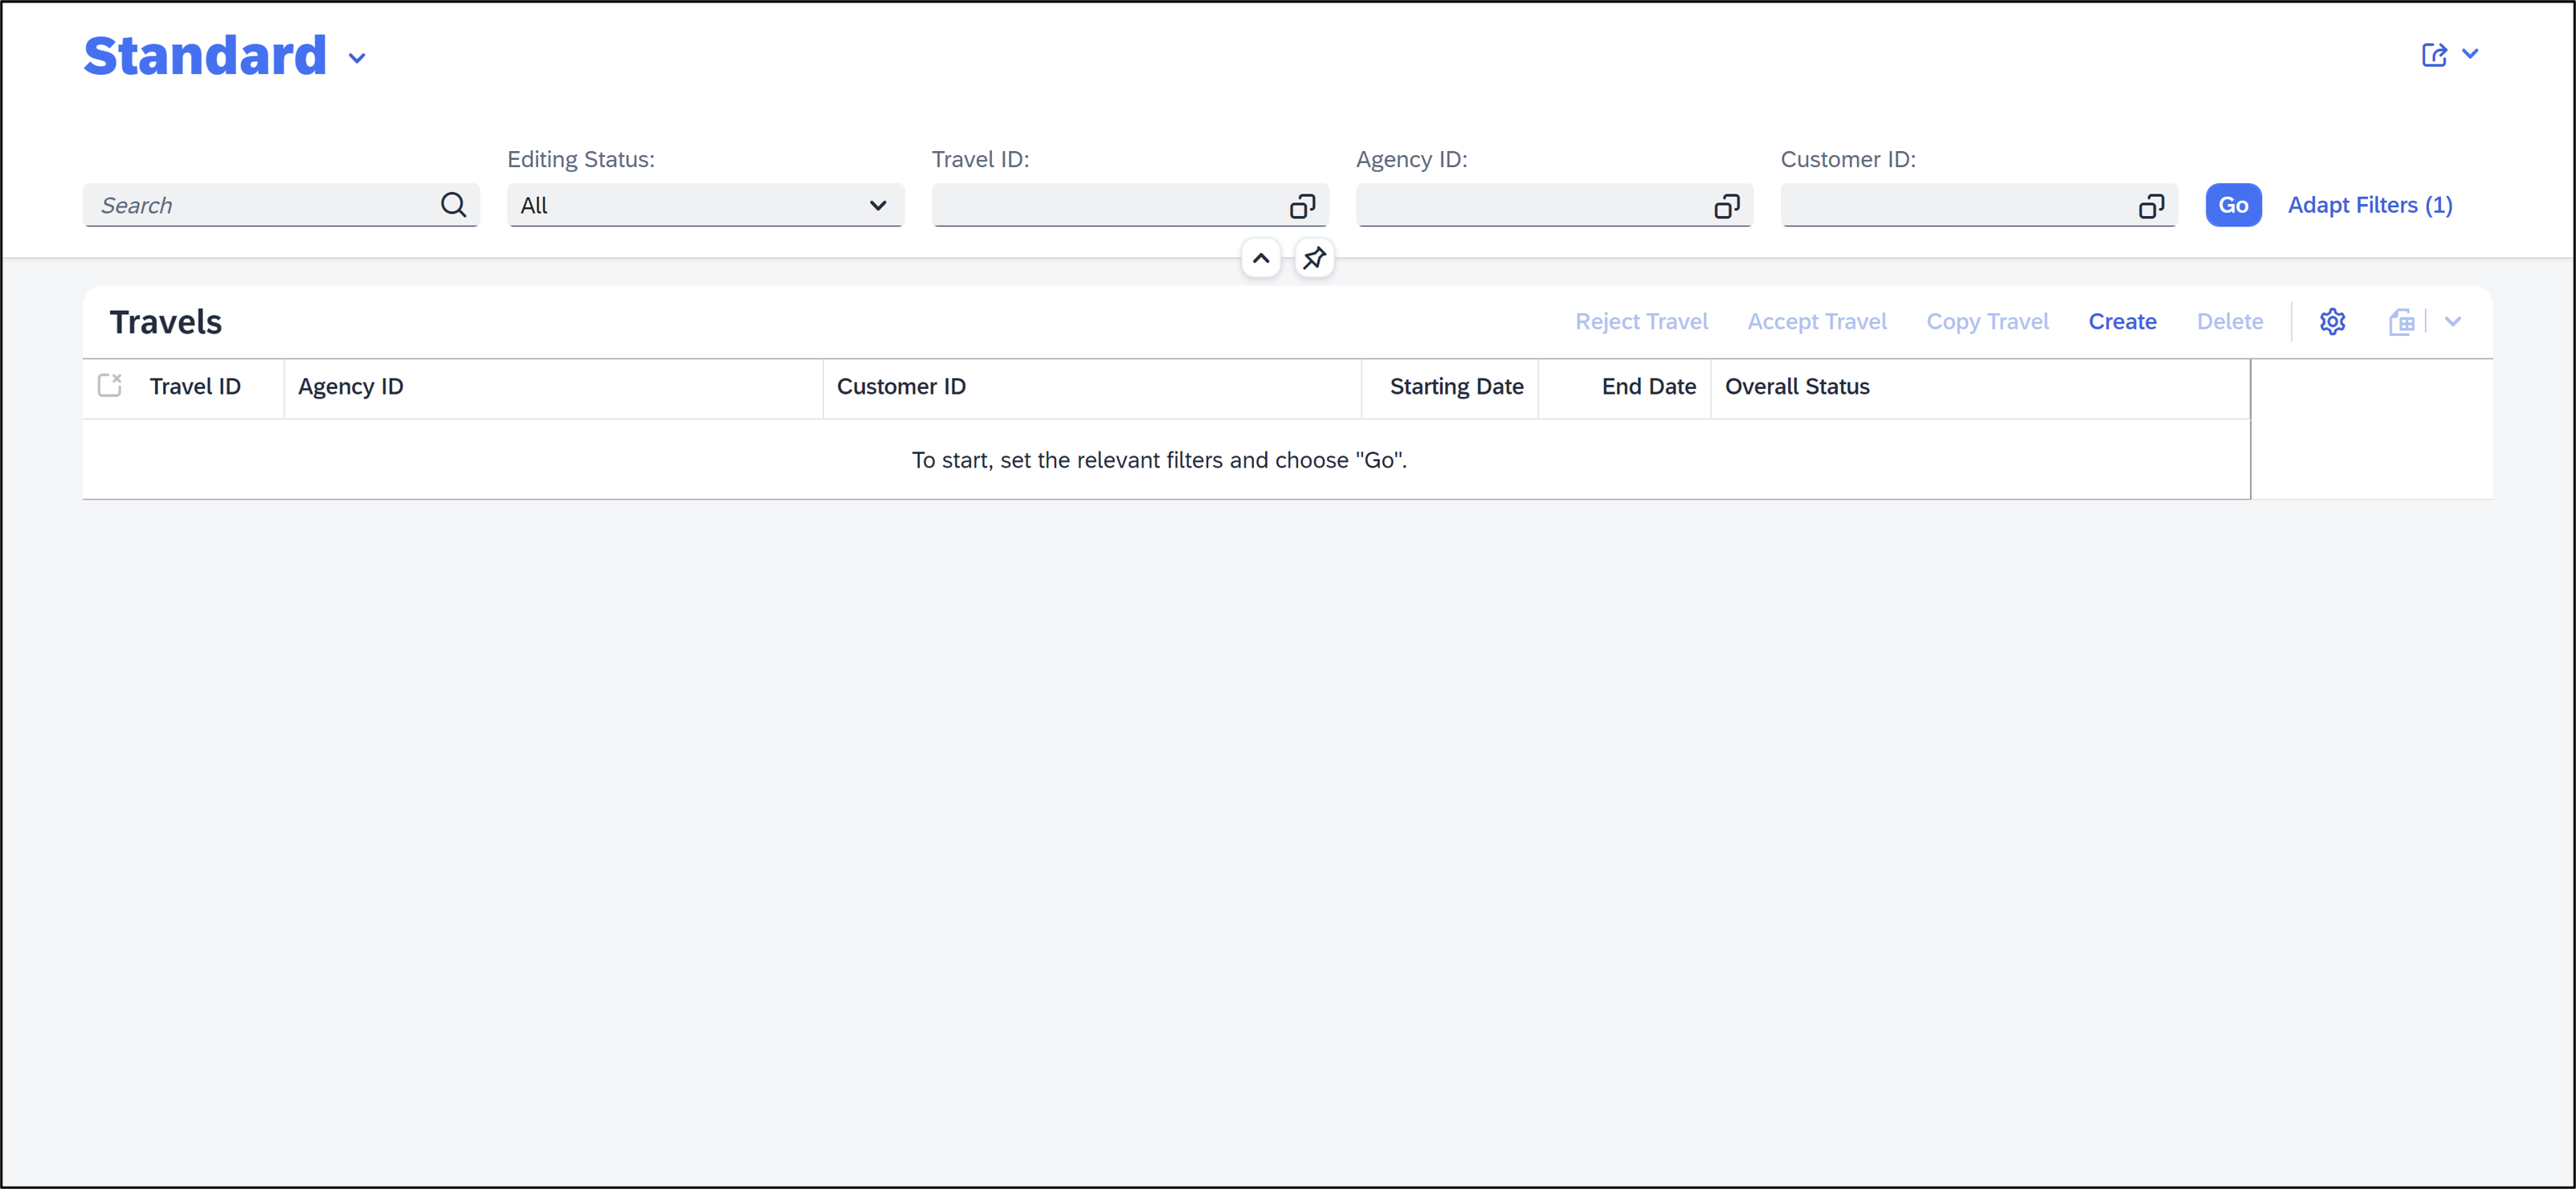
Select the first entry.

-
You browser opens. Click Go and check your result.
-
- Step 7
-
On the Application Information overview page select Deploy Application.

-
When prompted, check deployment configuration and press y.

-
When the deployment is successful, you will get these two information back as a result: UIAD details and deployment successful.

-
- Step 8
- Open Eclipse and check the BSP library and SAP Fiori Launchpad app descriptor item folder in your package
ZRAP100_###. If you are not able to see BSP applications and SAP Fiori Launchpad app description items, refresh your packageZRAP100_###by pressingF5.
- Open Eclipse and check the BSP library and SAP Fiori Launchpad app descriptor item folder in your package
- Step 9
-
In Eclipse right-click your package
ZRAP100_###and select New > Other Repository Object.
-
Search for IAM App, select it and click Next >.

-
Create a new IAM App:
- Name:
ZTRAVEL_IAM_### - Description: IAM App for travel app
Click Next >.
- Name:
-
Click Finish.

-
Select Services and add a new one.

-
Select following:
- Service Type:
OData V4 - Service Name:
ZRAP100_UI_TRAVEL_O4_###

Hint: With CTRL + Space you can search for your Service.
Click OK.
Save and activate your IAM app.

- Service Type:
-
- Step 10
-
Right-click your package
ZRAP100_###and select New > Other Repository Object. -
Search for Business Catalog, select it and click Next >.

-
Create a new business catalog:
- Name:
ZTRAVEL_BC_### - Description: Business catalog for travel app
Click Next >.
- Name:
-
Click Finish.

-
Select Apps and add a new one.

-
Create a new business catalog:
- IAM App:
ZTRAVEL_IAM_###_EXT - Name:
ZTRAVEL_BC_###_0001 - Description: Business Catalog to IAM App assignment
Click Next >.
- IAM App:
-
Click Finish.

-
Click Publish Locally to publish your business catalog.

-
- Step 11
-
On the Application Information overview page select Deploy Application.

-
When prompted, check deployment configuration and press y.
-
Press
CTRL and click the following linkto open the URL in a browser.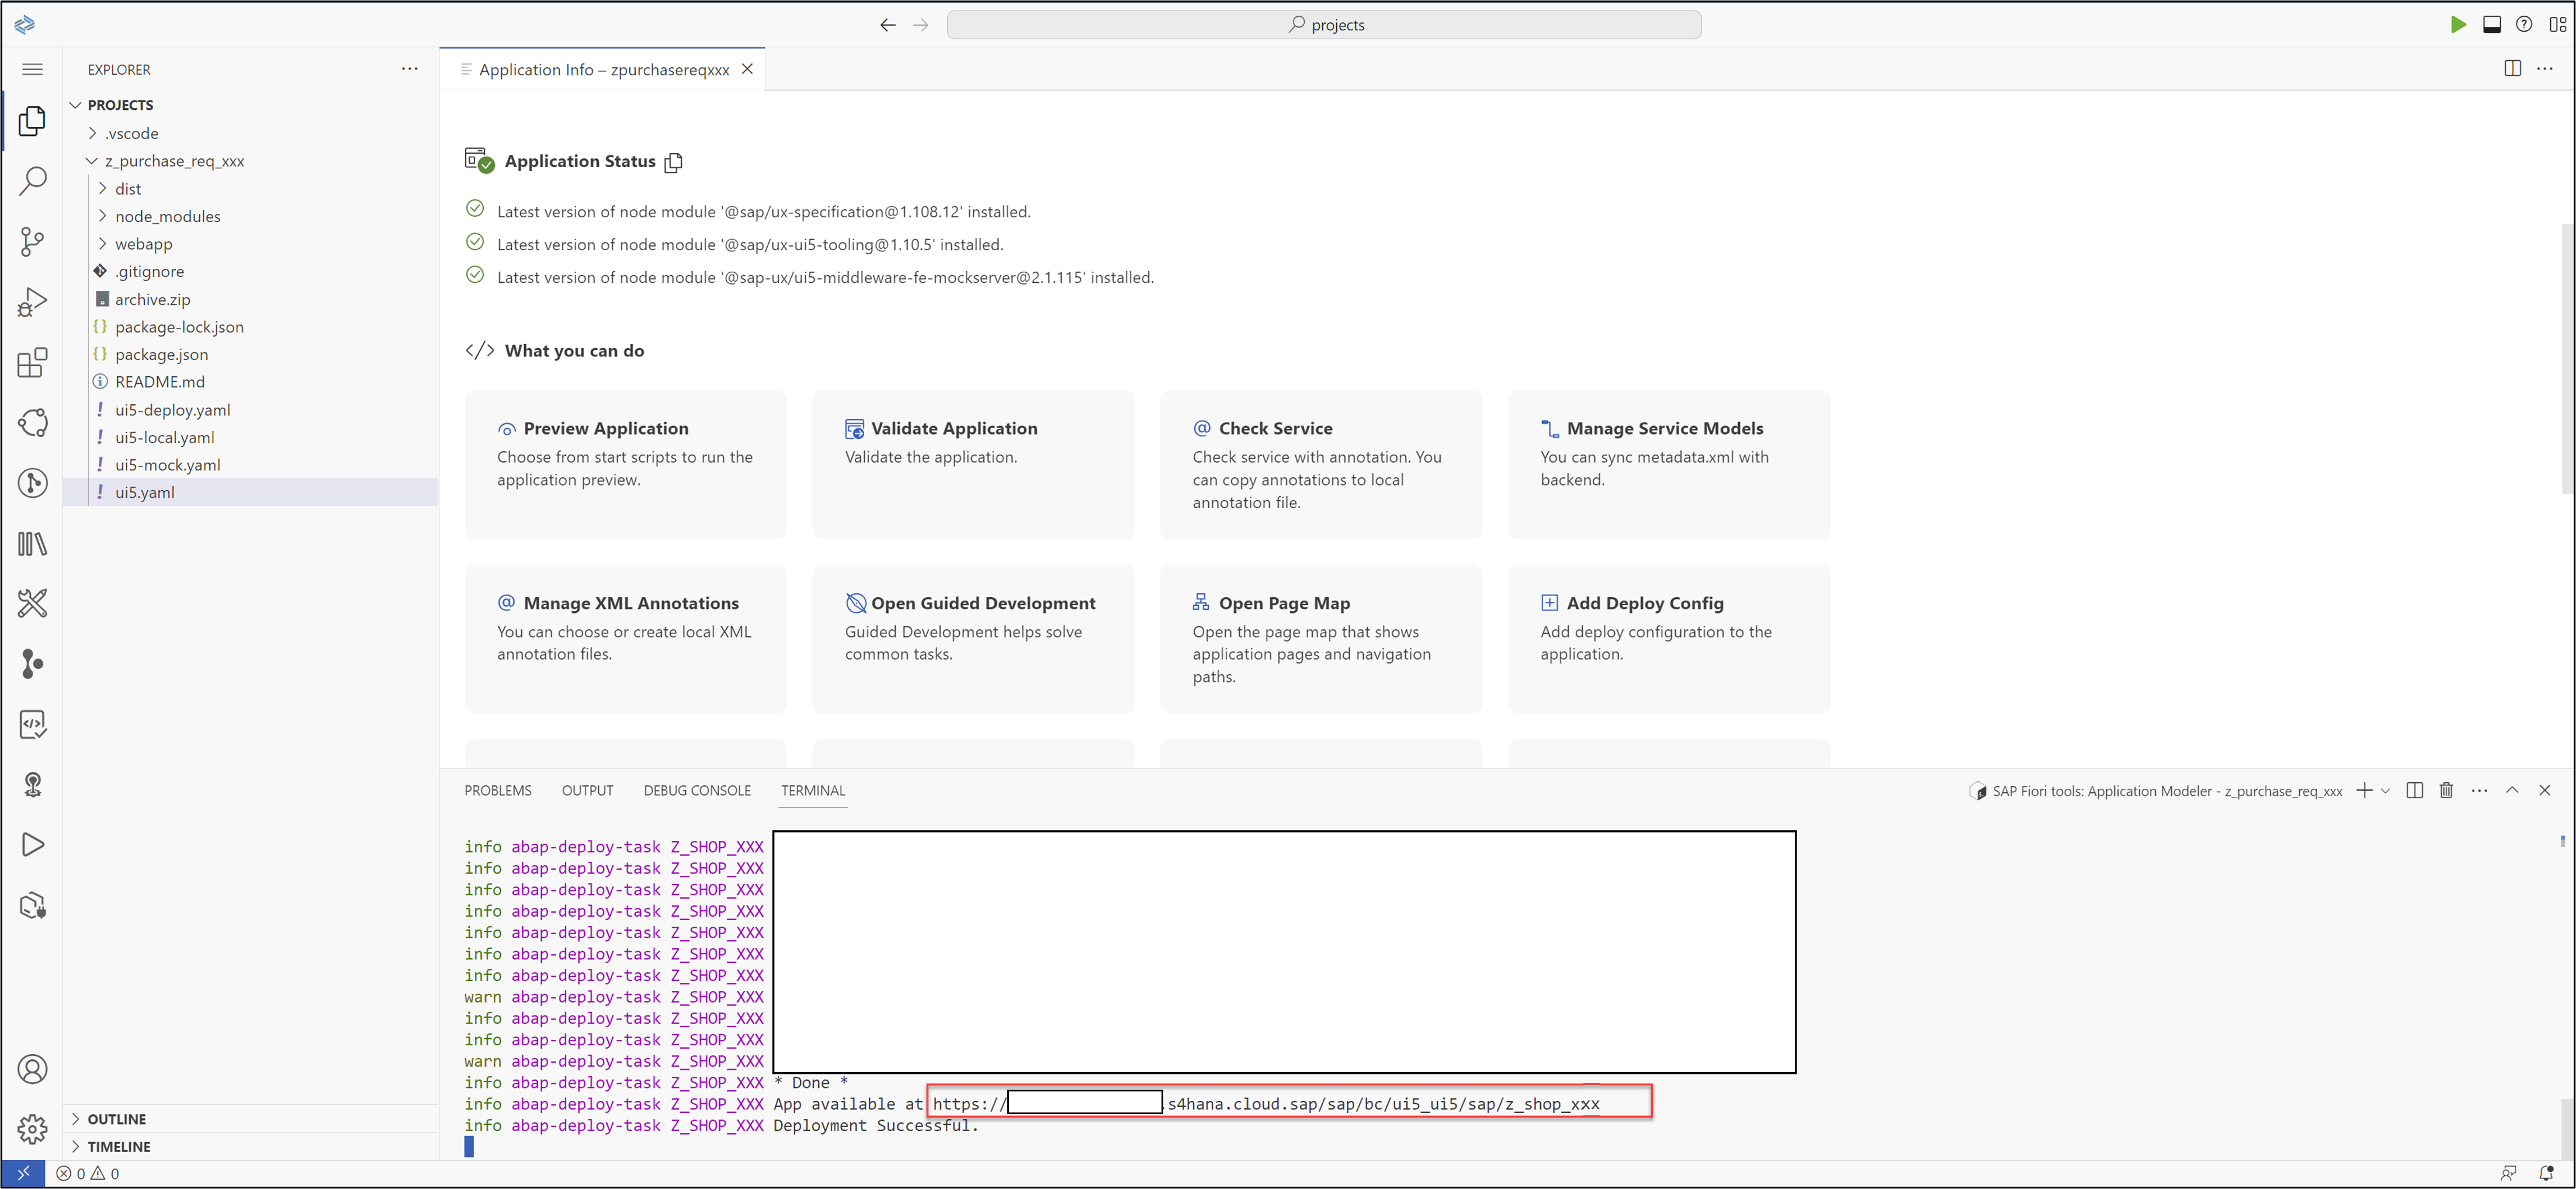
-
Log in to your system.

-
Click Go and check your result.

-