Add a Subprocess to an Automation
- How to add a subprocess in a process.
- How to add a subprocess in an automation.
- How to send tasks to multiple participants.


Prerequisites
Using subprocess in your automation enables you to easily reuse existing code segments in various processes. This re-usability eliminates the need for duplicating the same code multiple times, saving you valuable time and development efforts.
Furthermore, incorporating subprocess in your automation allows you to divide your tasks into smaller and more manageable units. This simplifies the comprehension and maintenance of your automated system.
- Step 1
You will incorporate a subprocess within a primary process.
After completing the prerequisites, your process will look like this:

-
Navigate to the Overview tab. From the editable version of your project, click the Create dropdown and choose Process.

-
In the Create Process dialog box, do the following:
- Enter a Process Name such as Manage Trainees Learning Journey.
- Choose Create.

Your new process opens in the process builder. You will now create a trigger form that will start the process.

-
Choose Add a Trigger in the Trigger settings.

-
Select Submit a Form.

-
Choose Registration Form.

-
Choose Save.

-
Navigate back to the Overview tab. Select the Learning Path process.

-
Choose the three dots of the Trigger form and select Remove.
-
Choose Save.

-
Go back to Manage Trainees Learning Journey process, select + under Registration Form.

-
Choose Subprocess.

-
Choose Learning Path.

-
Save the process.
Now you have an optimized process that incorporates a subprocess, making it more efficient and streamlined.

-
- Step 2
-
To release and deploy a process, please refer to step 1 and 2 of the tutorial on how to release and deploy a process Run the Business Process.
-
In the Overview section, open the process Manage Trainees Learning Journey process of the deployed version, choose Registration Form and select the Copy Link icon next to the Form Link field.

-
Now paste the Form Link into a browser. When the form opens in the browser, you will have the course presentation fields that you defined in the Registration Form. Click on Start.

Now, you will receive the training materials directly in your inbox, just like you did in the Add Links to Forms tutorial.
In the next steps, you will cover the usage of a subprocess within an automation and also demonstrate how to distribute the learning path to multiple learners simultaneously.
-
- Step 3
After completing the steps above, your process will look like this:

-
From the editable version of your project, select the Registration Form, choose the three dots and select Open Editor.

-
Add a Table with Learners as title.

-
Choose the + icon in the table and select Text.

-
Enter First Name as the field name.

-
Choose the + icon next to the First Name field and select Text.

-
Enter Last Name as a field name.

-
Similarly choose the + icon next to the Last Name field and select Text.

-
Enter Emails as a field name.

-
Save the form.
-
- Step 4
-
Navigate back to the Manage Trainees Learning Journey process.
-
Select the three dots next to the Learning Path subprocess and choose Remove.

What’s going on?
You will remove the subprocess from the main process. Our objective is to create an automation that utilizes the Learning Path subprocess to send the learning path to multiple users at once.
-
Now choose +.

-
Select Automation.

-
Select Blank Automation.

-
A pop up will appear to configure the Desktop Agent version. Do the following in the pop up:
- From the dropdown, select the version of the Desktop Agent installed on your machine. It would be displayed with suffix as Registered.
- Select your platform.
- Choose the Confirm button.

-
A new pop-up will appear to create the automation. Do the following in the pop-up:
- Under Name enter: Assign Learning Journey.
- Choose the Create button.

An automation Assign Learning Journey will be created successfully.
-
Choose Save.

What is a subprocess in the context of automation?
-
- Step 5
-
Go to the Overview Tab. Choose the Create button. Create an artifact of the type Data Type.

-
A new pop-up will appear.
- Enter Name of the data type: Learner.
- Choose Create.

-
In the Data Type Learner add 3 new fields as such:.
Field Name Type emailString firstnameString lastnameString 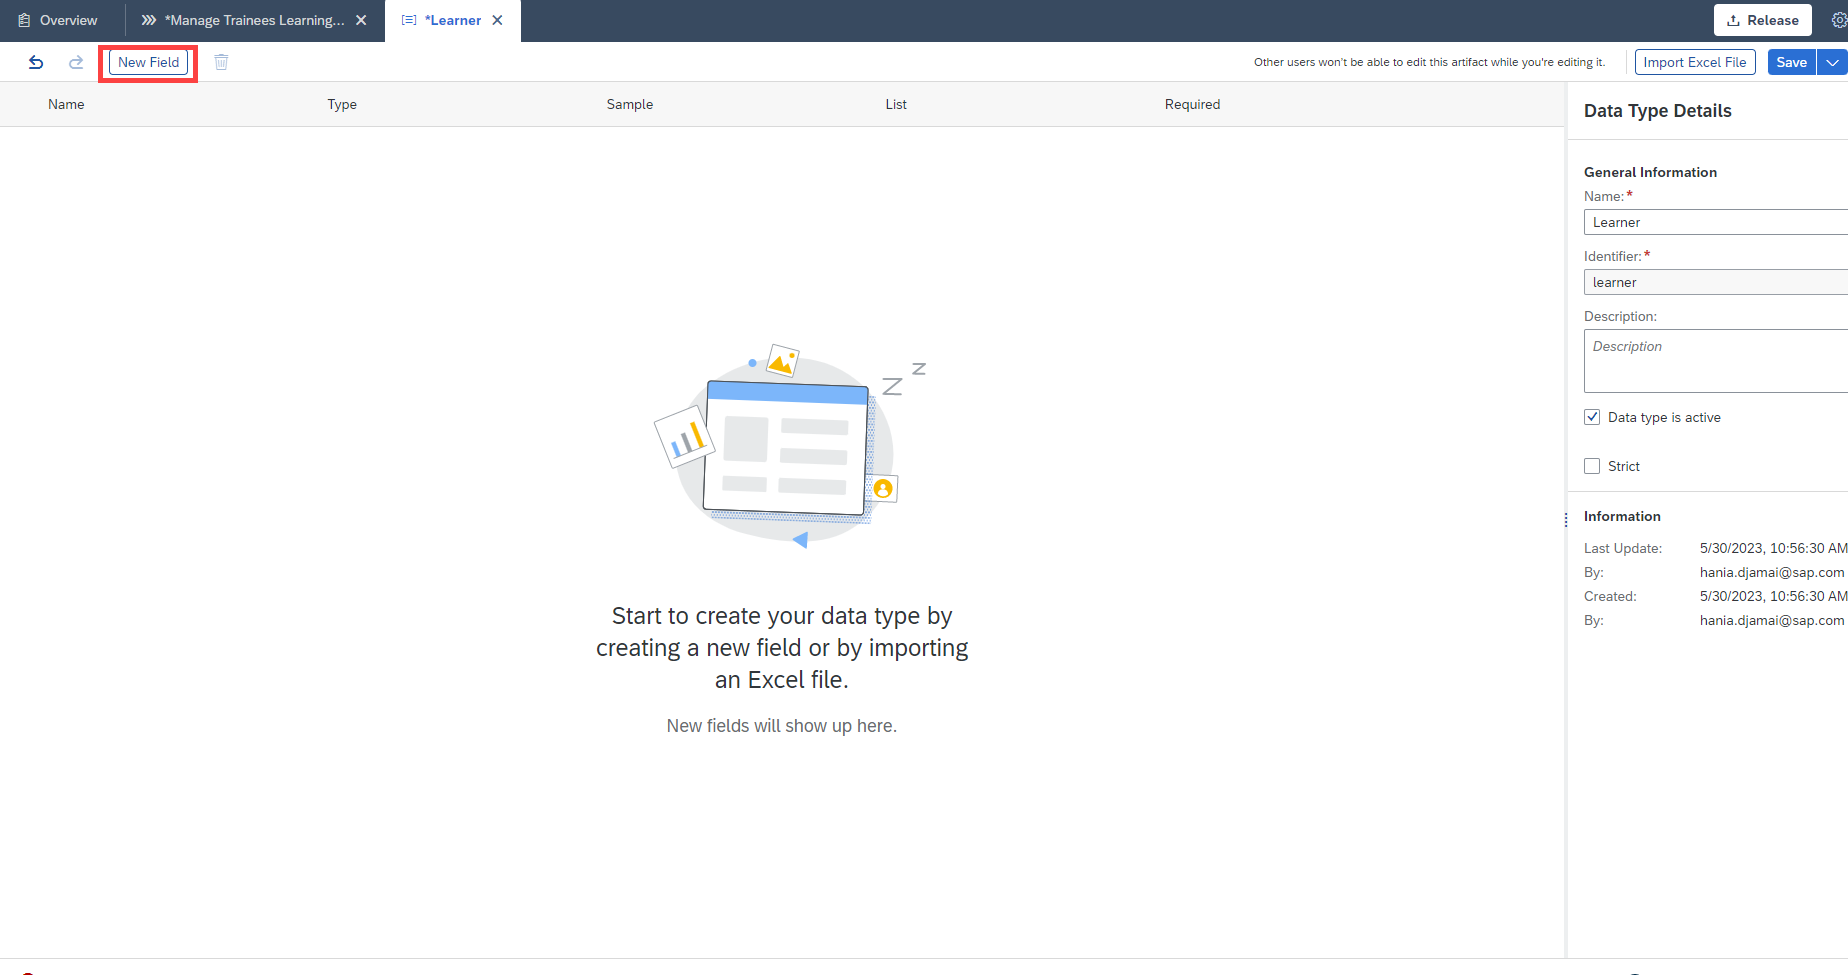

-
Choose Save.

Your data type gets created and you can view it in the list of artifacts in the Overview page.
Now you will create a second data type.
-
Similarly, go to the Overview tab. Choose the Create button. Create an artifact of the type Data Type.

-
A new pop-up will appear.
- Enter Name of the data type: dataset.
- Choose Create.

-
In the Data Type dataset add a new field such as:
Field Name Type LearnerLearner 
-
Check List.
-
Choose Save.

What are the benefits of using subprocesses?
-
- Step 6
-
Navigate back to the Manage Trainees Learning Journey process and select the three dots next to Assign Learning Journey automation, choose Open Editor.

-
In the Automation Details section on the right, search for the For Each activity and drag and drop the activity into the automation flow.

-
Select the Input/Output section in Automation Details.

-
Add an input parameter as following:
- In Parameter Name enter:
learners. - In Data Type choose: Learner.
- Check List.

- In Parameter Name enter:
-
Click on the For Each, enter the value of Set looping List as
learners.
-
Click on the canvas and select the Processes section in Automation Details.

-
Select Learning Path and drag and drop the activity into the automation flow inside the For Each loop.

-
Save your work.
-
- Step 7
-
Go to the Overview tab. Select the Learning Path process.

-
Open the Process Details side panel.

-
Select the Variables tab in Process Details.
-
For Process Inputs, select Configure.

-
Click on add input.

-
Configure the Process Input as such:
- In Inputs Name enter:
learner. - In Inputs Type choose: Learner.
- In Inputs Name enter:
-
Select Apply.

-
Now, click on Build Your First Business Process form and configure the General section.
-
In the Recipients section, under Users select email from Process Inputs.

-
Select the Boost Your Business Process with Automation form to configure the General section. In the Recipients section, under Users select email.

-
Similarly, select the Create Tables in the Form form to configure the General section. In the Recipients section, under Users select email.

-
Save your work.
-
Go to the Overview tab. Click on the Assign Learning Journey automation.

-
Select Learning Path and enter the value of learner as
currentMember.
-
Save your work.
-
Navigate back to Manage Trainees Learning Journey, select Assign Learning Journey automation to configure the Inputs parameters.
-
In the Inputs section, in Select list field, choose Learners.

-
Save your work.
-
- Step 8
After completing Agent Management Settings to Execute the Process with an Automation tutorial, you may release and deploy the process.
-
In the Manage Trainees Learning Journey process, choose the Release button on the top right corner.

-
In the Release Project popup, select Release.

-
In the Overview section that appears, choose Deploy.

-
Choose an Environment and click on Upgrade.

Your project is deployed.

-
- Step 9
-
In the Overview section, open the process Manage Trainees Learning Journey of the deployed version, select Registration Form and choose the Copy Link icon next to Form Link field.

-
In a new tab in your browser, paste the form link. Enter the information of the learners in the table for whom you intend to send the learning path and choose Start.

After clicking on Start, all the learners you have added to the table will receive the project tasks in their Inbox.
-
Navigate to SAP Build lobby, choose My Inbox icon.

-
You will see the first task First Learning Mission appear in the My Inbox application that ships with SAP Build. The task will have the description of the training to be followed and the link to the tutorial. After finishing the mission, select I have completed the first mission and click on Next.

-
Refresh the inbox again to get the second notification to the second mission. Now you can see task Second Learning Mission appear in My Inbox. After finishing the mission, click on Next.

-
Similarly, refresh the inbox again to get the third mission. Once the mission is completed, click on Done.

-
- Step 10
This sample project can be downloaded from the SAP Build Store.
To retrieve this sample, please follow these steps:
-
From the SAP Build Lobby, navigate to Store.
-
Search for the sample project: Learning Journey.
-
Choose Create from Template to retrieve the sample and save it as a new project in your lobby.

-
Give your project a name and choose Create.

Your project gets created in editable version. You may release and deploy it and run the project.
-
Navigate back to the lobby by clicking on the SAP logo.

You can see your project is available in the lobby.

-