Set Up SAP Build Work Zone, standard edition Using a Trial Account
- How to create an SAP Cloud Identity services tenant, and create a trust with SAP Business Technology Platform
- How to subscribe to SAP Build Work Zone, standard edition
- How to map the user you created in SAP Cloud Identity services to the Identity Authenticaton group you created
- How to access SAP Build Work Zone, standard edition


 jmmargo
 Michael Czadankiewicz
 Riley Rainey
Prerequisites
- If you want to use a trial environment, you need to first register it. You can register to a trial account using this link: Create a trial account. Scroll down and click Get trial now.
- If you’re using a production environment, you should have a subaccount configured. If you don’t have a configured subaccount, refer to this topic: Initial Setup.
- If you have an existing trial account, some of these configurations may already be there.
You can also do this tutorial using a SAP BTP free plan option. To do this, please follow this tutorial: Set Up SAP Build Work Zone, standard edition Using the Free Tier Model for SAP BTP.
In this group of tutorials our goal is to create a site using SAP Build Work Zone, standard edition. But before we can do this, there are some steps you’ll need to do in the SAP BTP cockpit and in SAP Cloud Identity services.
- Step 1
-
Log onto SAP BTP and click Go To Your Trial Account.

If this is your first time accessing your trial account, you’ll have to configure your account by choosing a region (select the region closest to you). Your user profile will be set up for you automatically.
Wait until your account is set up and ready to go. Your global account, your subaccount, your organization, and your space are launched. This may take a couple of minutes.
-
Click Continue if you get this popup.

-
Click the trial tile to navigate to your trial subaccount in the SAP BTP cockpit. If you’re using your own subaccount, you can select it instead.

-
- Step 2
To access SAP Build Work Zone, standard edition you need to first create a SAP Cloud Identity tenant for managing user access and authentication. To get an SAP Cloud Identity Services tenant, you need to create one manually as follows:
-
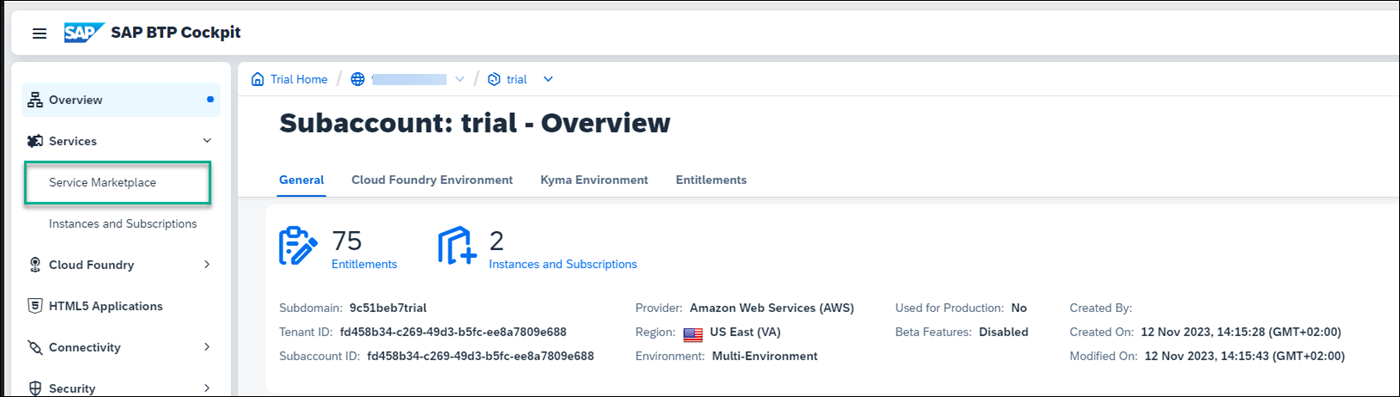
Click Service Marketplace in the left navigation panel.
The Service Marketplace provides you access to all services and applications that you can access from the SAP BTP cockpit.
-
In the Service Marketplace, search for the Cloud Identity Services tile.

-
Click the tile and then click Create.

-
In the New Instance or Subscription screen, under Subscriptions, select the
defaultplan and click Next.
-
Navigate to the next steps and then click Create.
-
You’ll receive an email to activate your account. Once you’ve activated your account and press Continue, the Cloud Identity Services Administration Console opens.

-
In the Administration Console, under the Users & Authorizations tab, select Groups.

-
Click Create Group

-
Name the group whatever you prefer. For this tutorial, let’s name it
Adminand under Display Name, re-enterAdmin.
-
Click Next Step, and then Next Step again, and then Finish.
-
Still under the Users & Authorizations tab, select User Management and add your user by clicking + Add.

-
Whether you add a new user or use an existing one, you must assign the group to this user. Click your user details, select Groups, and assign your user to the
Admingroup.
You now have a SAP Cloud Identity tenant.
-
- Step 3
-
In the SAP BTP cockpit, go to Security -> Trust Configuration and click Establish Trust.

-
In the Configure Tenant screen, select your SAP Cloud Identity tenant that you created and click through the wizard until you get to Finish.

You now have a trust between your SAP Cloud Identity services tenant and SAP BTP. You will see the following message:

-
- Step 4
Before you can access SAP Build Work Zone, standard edition, you first need to subscribe to it and expose the required
Launchpad_Adminrole.SAP Build Work Zone, standard edition offers 2 types of standard plans. The Applications Plan which is used to access your applications from a site. In this case, you need to create a subscription to SAP Build Work Zone, standard edition, which you will do in this step. The 2nd plan is the Service Plan which is used to integrate with other services. This plan is not required for the scope of this tutorial.
-
From your trial subaccount, go to the Service Marketplace from the side panel and search for
SAP Build Work Zone, standard.
If you aren’t able to find the SAP Build Work Zone, standard edition tile, or if you can’t access it, you may be using an older trial account. You can easily add it to your account via the Entitlements area. Click Edit and then Add Service Plans. Search for
SAP Build Work Zone, check the standard (applications) plan, and click Add 1 Service Plan. Don’t forget to save in the next screen. -
Click the tile. The SAP Build Work Zone, standard edition Overview tab is in focus.
-
Under the Applications Plans tab, click the Actions icon (…), and select Create to create a new subscription.

You can also use the Create button at the top right of the screen.
-
In the New Instance or Subscription dialog box that opens, leave the basic information that appears there and click Create.

Note that to work in SAP Build Work Zone, standard edition, to integrate content from the backend, you need to create a subscription. If you also want to integrate custom developed apps or plugins, you need to also create an instance.
-
You’ll get confirmation that your subscription is being created. Click View Subscription to see the progress.
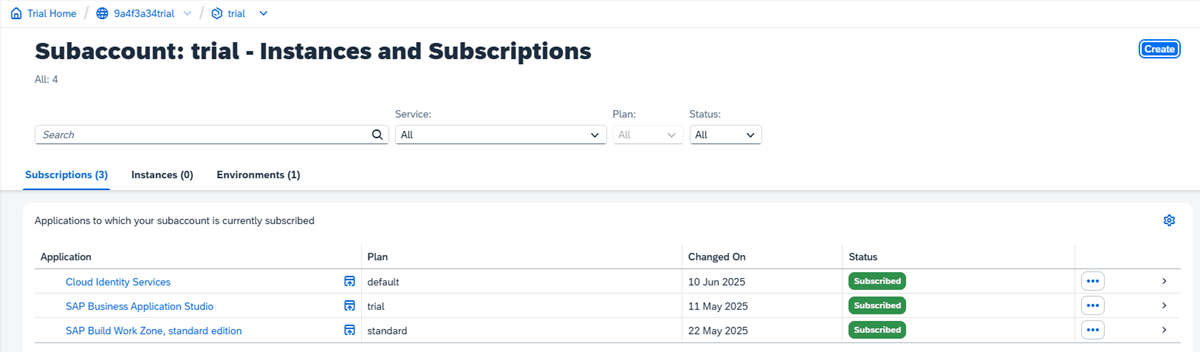
This step will redirect you to the Services -> Instances and Subscriptions screen. This screen provides you with an overview of all services and applications that are currently active.
-
From the Instances and Subscriptions screen, you’ll see that you are subscribed to SAP Build Work Zone, standard edition.
Now that you have a subscription, all the SAP Build Work Zone, standard edition role collections are exposed in the cockpit. You can now proceed to the mapping between the role collection and the group that you created in SAP Cloud Identity services.
-
- Step 5
-
From the side panel of the cockpit go back to Security -> Trust Configuration.
-
Click the tenant that you created in SAP Cloud Identity services.

-
On the right, in the screen that opens, click on the Attribute Mappings tab, and click Edit.

-
Under the Role Collection column, search for the
Launchpad_Adminrole from the dropdown list.
-
Enter the Attribute as
Groupsand enter the Value asAdmin. Now click the + to add the attributes and Save.
The mapping is complete. You can now go ahead and access SAP Build Work Zone, standard edition.
-
- Step 6
-
From the side panel, click Instances and Subscriptions.

-
Under the Subscriptions tab, click SAP Build Work Zone, standard edition. Click Go to Application on the right.
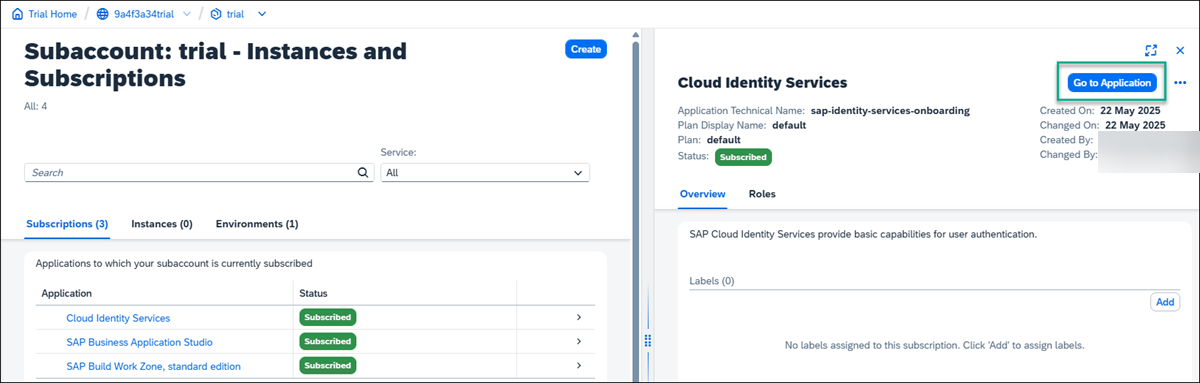
The Site Directory opens. From here you’ll create and manage your sites.

-