3 - Configure the Shopping Cart Page
- How to setup a destination to a CAP service
- How to connect to a CAP service
- How to set up filter condition on a data variable
- How to bind repeating data to the UI elements
- How to add a navigation menu


Prerequisites
- You have completed the previous tutorial for the SAP Build CodeJam, Configure the Product Details Page.
In this exercise, you will be enhancing the Cart page of the SAP Build CodeJam app.
You will:
-
Retrieve data from our CAP service – which we created for this CodeJam to maintain the data for your cart and later for the order once it is requested.
-
Bind that data to your UI components.
-
Create logic for deleting an order item from the cart (i.e., from the CAP service).
A CAP service is a service built with the Cloud Application Programming Model. CAP is beyond the scope of this CodeJam, though we offer a separate CodeJam just on CAP. For more information about CAP, see SAP Cloud Application Programming Model.
In the prerequisites you already created a destination to that CAP service.
- Step 1
Previously, we made a data resource to the CAP service and enabled the Products entity. Now we need some other entities.
-
Back in your ShoppingApp project, open the Integrations tab.
-
Look SAP Systems, and under CodeJamOrdersService
Click Enable More Data Entities.
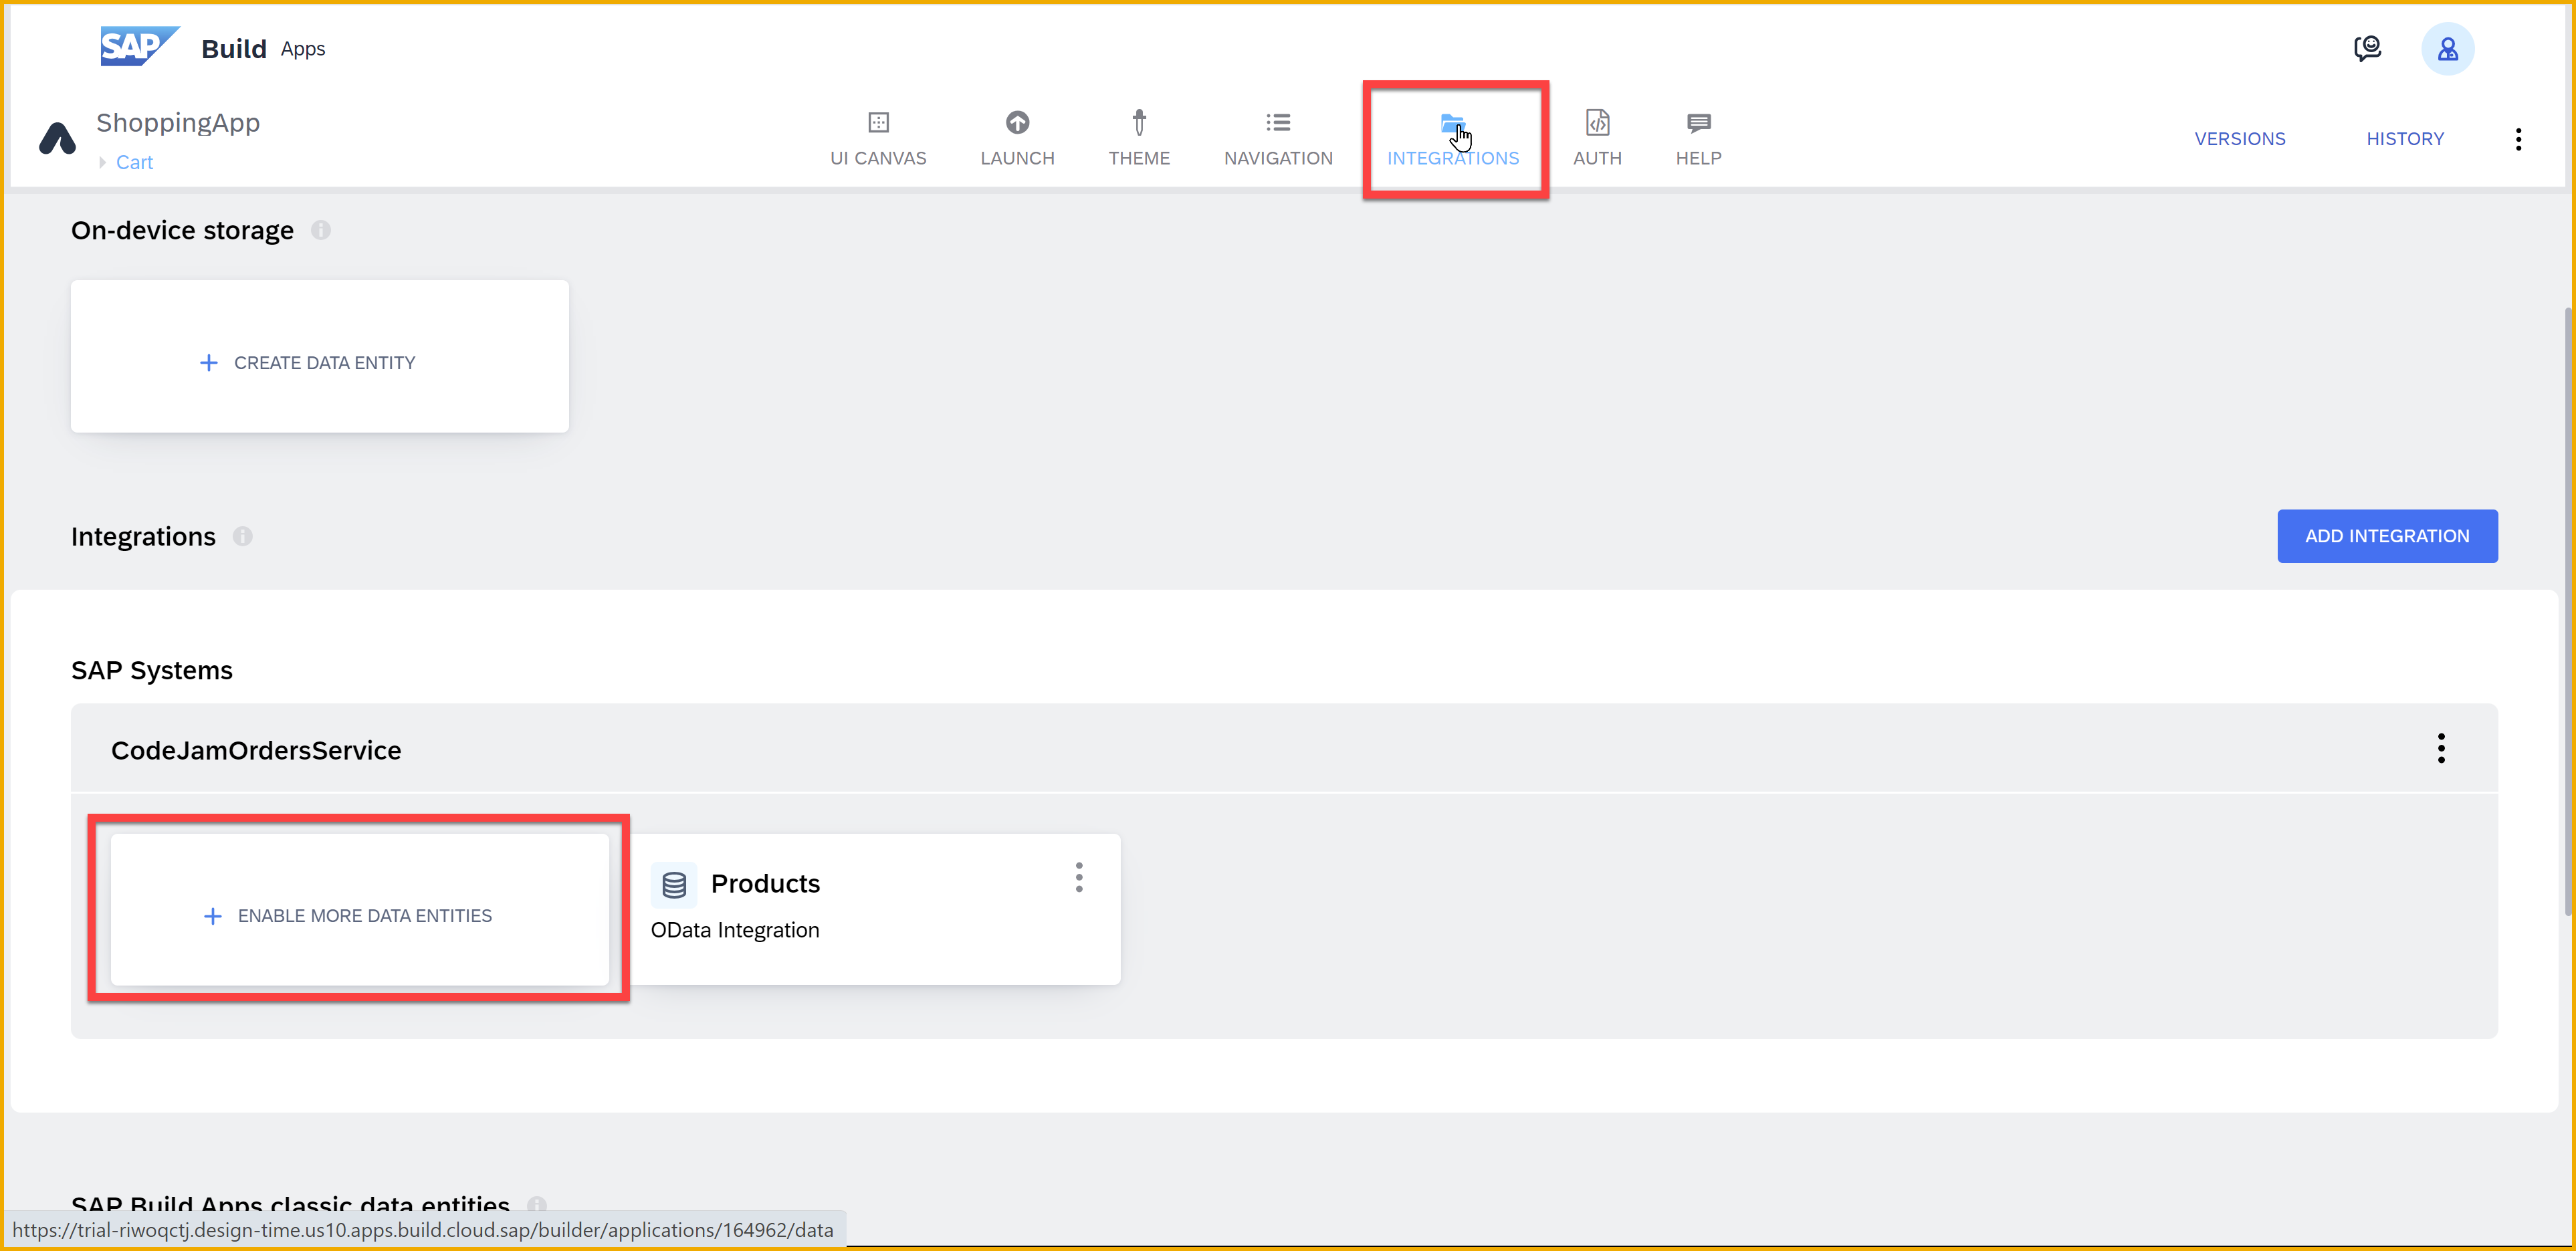
-
Select Orders, and click Enable Data Entity.

Select OrderItems, and click Enable Data Entity.

-
Click Save (upper right).
Click Exit to return to the previous screen.
You should now be able to see Orders and OrderItems appearing under the Integrations > CodeJamOrdersService section.

-
- Step 2
Now that you have defined the connection to the CAP service, let’s create a data variable, which will automatically include the logic for making the call as well as holding the retrieved data.
-
Navigate to the Cart page by clicking on the Home pages link on the upper-left corner, below the app name.
Select the Cart tile.

-
Toggle to Variables.
-
Click Data Variables on the left side.
Click Add Data Variable and choose OrderItems.

With OrderItems data variable selected, in the right pane, the type should already be set to Collection of data records. Keep this type.

-
Select the X next to Filter condition, then select Object with properties.

-
Click Add Condition.

Set up the condition as follows:
Property Condition type Compared value order_ID equal 6c25e827-15c2-4e7f-be1a-89fb4304d4faIMPORTANT: The order ID represents some dummy data we entered into the service so you will see some data in the UI. Later, you will update the condition so you only see your own data.
DO NOT delete any order items.
Click Save.
-
Click Save (upper right).
-
- Step 3
In order to display the data in the cart from the OrderItems entity, you need to map the backend data that is in the data variable to the UI components.
-
Toggle back to View.
-
Select the Row - Items component.
Set the Repeat with to the data variable OrderItems1 (you just created).

With the repeat set, we’ll bind the individual text components.
-
In the Tree View, select Row - Items > Cell #1 > Text - Product.
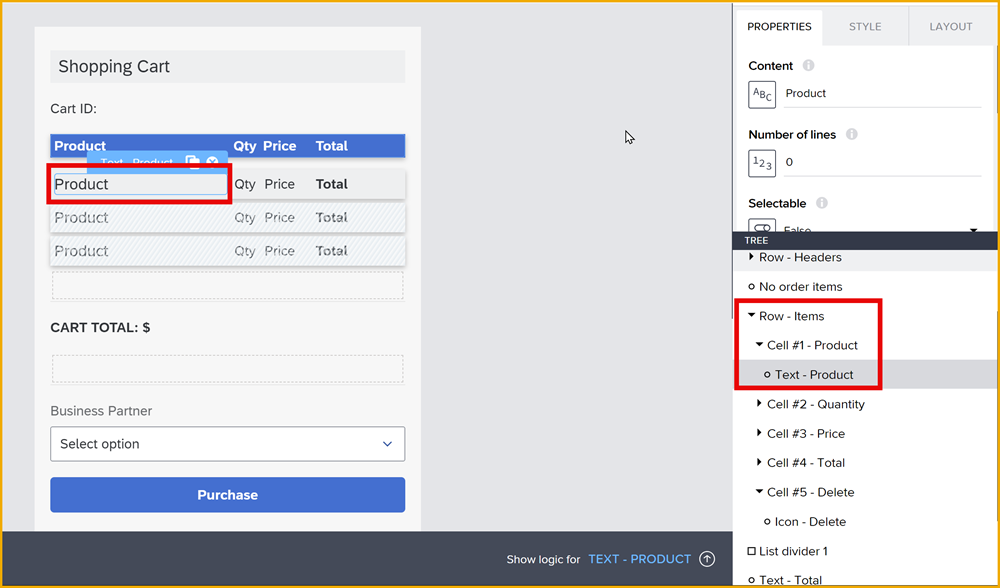
Once selected, in the Properties pane, click the ABC binding icon for the Content property.
Choose Data item in repeat > current > product, and set Preview Value to
Product.
Click Save.
-
Repeat the binding for Quantity, Price and Total as follows:
UI Component Tree View Location Binding Preview Quantity Cell #2 > Text - Quantity Data item in repeat > current > quantity QtyPrice Cell #3 > Text - Price Data item in repeat > current > price PriceTotal Cell #4 > Text - Total Data item in repeat > current > total Total -
Select the Cart Total: $ field and click the binding icon for its Content property.

Instead of Static value, change the binding type to Formula and replace the formula with the following formula:
JavaScriptCopy"CART TOTAL: $" + FORMAT_LOCALIZED_DECIMAL(NUMBER(SUM(MAP(data.OrderItems1,item.price * item.quantity))), "en", 2,2)What does the formula do?
The formula uses the MAP function, one of the more powerful and useful functions. Here, the function goes through all the order items, multiplies the quantity and the price, and creates a new list with just integers representing the total cost of each item.
The SUM function then adds it all together, and then the formula formats the result.
Click Save twice.
-
Click Save (upper right).
-
- Step 4
Now that you have set up the Cart page, you need to let users get to the page. There are 2 ways users can navigate between pages.
You can create a button or other UI component, and then create logic to respond to a button click or other event, and then use the Open Page flow function. That is what you did to navigate from the product list page to the product detail page.
But users might want to navigate to the Cart page at any time. So you can create a static menu that is available all the time. Every new app comes with a menu and a single item to return to the home page. In this step, you will create a new menu item for the Cart page.
-
Click the Navigation tab.
You will see the Home page menu item.

-
Click Add item.
This will add a menu item, but likely not to the page you want.
-
Select the new menu item, and set the following properties:
Icon Tab name Page shopping-basketCartCart
-
Click Save (upper right)
-
- Step 5
Return to your web preview.
Once you saved your app, the page should refresh and you should see the Cart menu item below the Homepage icon on the left navigation menu.
Click Cart.
The Cart page should open and you will see the order items for the dummy cart.
