Add a URL App to Your Workpage in SAP Build Work Zone, advanced edition
- How to configure a URL app and add it to your Home page


 Michael Czadankiewicz
Prerequisites
- A subaccount in SAP BTP that includes a subscription to the SAP Build Work Zone, advanced edition service has already been setup for you. Note that SAP Build Work Zone, advanced edition is not available in a trial account
- You’ve already designed the Home page where you’ll add this app
You’ve already added a SAPUI5 app to your Home page under the Most Popular Apps header. Now in this tutorial, you’ll use the Content Manager to add a URL app under the same header.
- Step 1
-
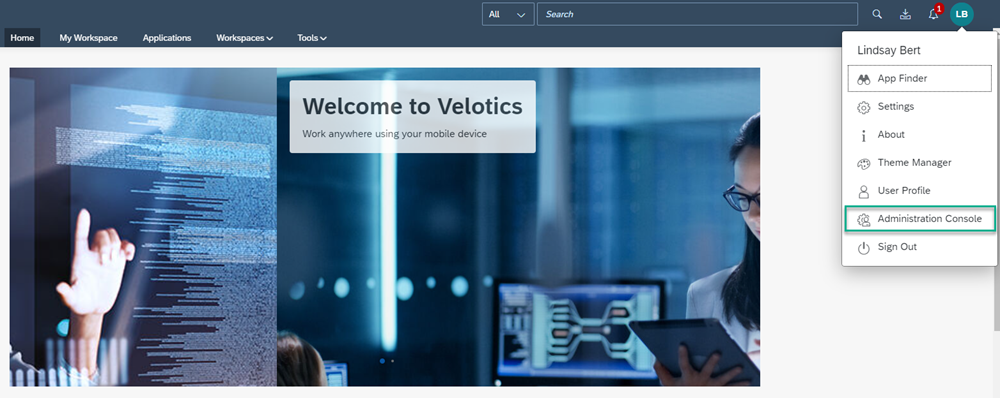
Access the Administration Console from the user actions dropdown menu under your avatar.
-
Go to the External Integrations section, expand it, and click Business Content.

-
Click Content Manager to open it.

-
- Step 2
-
From the Content Manager, click Create and select App from the list.

The App editor opens with the Configuration tab in focus.
-
Enter the following values:
-
Title:
Innovation at SAP -
Open App: In place
-
URL:
https://sap.io

-
-
Click the Navigation tab to specify the intent of your app.
The unique combination of a semantic object and an action is called an intent. It is used to define navigation to an application.
-
Enter the following values:
-
Semantic Object:
Innovation -
Action:
Display
-
-
Click the Visualization tab. In this tab, you specify how the app tile will appear in the Applications page of your site.
-
Enter the following values:
-
Subtitle:
SAP.iO program -
Information:
Learn about SAP.iO -
Icon: Click the browse icon, type
visits, click on the displayed icon to add it.
-
-
On the right, you can see a preview of the tile with all the properties you entered.
Click Save.
You’ve configured the URL app and in the next step you’ll go back to the Content Manager to see it in the list of content items.
-
- Step 3
Click Content Manager in the breadcrumbs in the header to navigate back to it.

You can see your app in the list of content items:

To view the app in runtime, you must assign the app to a role. You also need to assign the app to a group so that it’ll be visible in the Applications page of your site. This is described in the following steps.
- Step 4
The
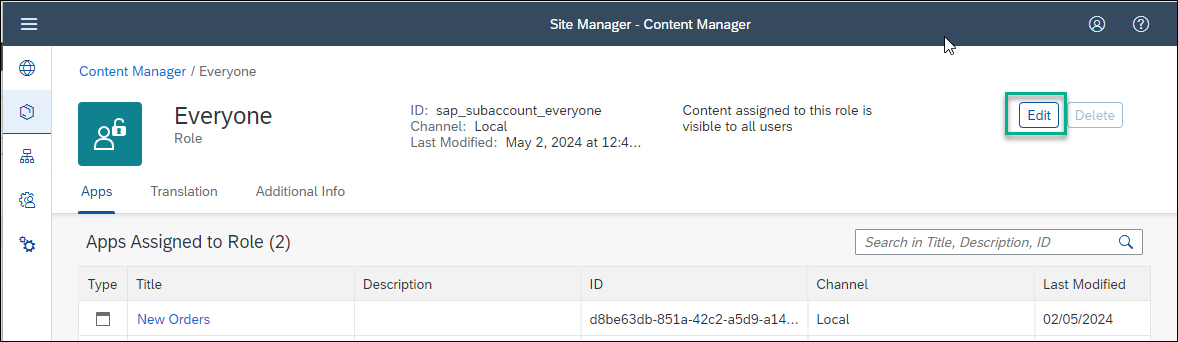
Everyonerole already exists in the Items list of the Content Manager by default. Content assigned to theEveryonerole is visible to all users.-
In the Items list, click the Everyone role to open the Role editor.

-
Click Edit.
-
Click the search box in the on the right to view any available apps in the list below.
If you have many apps, you can type some letters of your app name in the search bar, (for example,
In) to search for the app. -
In the Assignment Status column, drag the toggle switch to the right next to the
Innovation at SAPapp to assign this role to your app. You’ll see that the icon changes. -
Click Save.

-
- Step 5
A group is a set of one or more apps displayed together on the Applications page of your site. Assigning apps to groups, makes them visible to the user on the workpage. In this step you’ll create a new group and assign the app to it.
-
Click Content Manager in the breadcrumbs in the header to navigate back to it.

-
Click Create and select Group to create a group.

-
Enter
SAPas the Title. -
In the Assignment Status column, drag the toggle switch to the right next to the
Innovation at SAPapp to assign it to this group. You’ll see that the icon changes. -
Click Save.

Your app is configured. Now you’ll go to the Applications page to see that the app appears there.
-
- Step 6
-
Click the Site Directory icon in the side panel.

-
Click the Open site icon.

-
In the top-level menu of your site, click Applications.

You’ll see your app displayed as a tile in the new group you assigned it to:

Now you’re going to add this app to the Home page.
-
- Step 7
-
Click the back arrow to go back to the Home page.

You can also navigate back to the Home page from the top navigation bar. Click Home and then select Home next to the little house icon.
-
Click the pencil icon to open the Page Designer.

-
- Step 8
In the previous tutorial, you added a header to your Home page and underneath it, you added a SAPUI5 app. You’re now going to add the URL app next to the existing app.
-
Scroll down to the bottom of the page and in the same section as the
New Ordersapp, click the + Add Application Tiles.
-
In the Tiles screen, from the search box, start typing in the name of your app
Innovation at SAP, select the app, and then click Add. The app is added to the section on your workpage.
-
Scroll to the top of the screen and click Publish.
This is how your Home page looks now with the 2 added apps:

-
Click the apps to open them.
Which items must the app be assigned to, in order to make it visible in the Applications page of SAP Work Zone?
-