Create a Project in SAP Web IDE and Push into GitHub
- How to import an existing SAP Web IDE project into your previously created GitHub repository

Prerequisites
- IMPORTANT: This tutorial cannot be completed on a trial account
- Step 2
-
Click Neo Trial, and then open the Services tab.
-
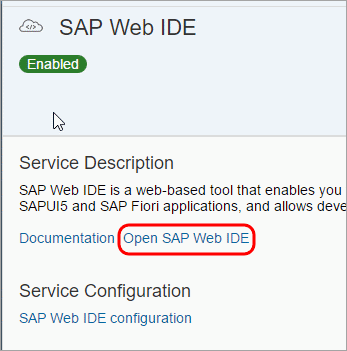
Scroll down and click the SAP Web IDE tile to open the SAP Web IDE service page.

-
Click Go to Service to launch SAP Web IDE.
-
- Step 4
Right-click on your project folder and click Git > Initialize Local Repository.

- Step 5
You need to connect the local Git repository in SAP Web IDE with your repository on GitHub.
-
Right-click on your project folder and click Git > Set Remote.
-
In the Configure Git Repository dialog box, enter your GitHub organization repository’s URL.
Get the remote repository URL by heading over to GitHub organization, and open your repository. Click the Clone or Download button and then select the icon to copy the URL to the clipboard.

Paste this URL into the remote repository textbox.

-
Click OK.
This automatically executes a fetch from the remote repository, and you can view the branches/commits that will be fetched. Click OK.

-
- Step 6
Your project is now initialized with a Git repository and linked to the GitHub platform. You can open the Git pane on the right sidebar to verify this.

- Step 7
Commit the project files to the local Git repository by doing the following:
-
Make sure the files are staged (the Stage checkbox is checked).
-
Enter a commit message.
-
Click Commit.

-
- Step 8
To synchronize the GitHub repository and local repository changes, click Pull. Enter your GitHub credentials.

- Step 9
Once the pull is complete, you’ll notice the
README.mdfile that was created on GitHub is now available in the SAP Web IDE project workspace.
- Step 10
Click Push and select Remote Branch

Select origin/master as the remote branch and click OK.

Enter your GitHub credentials and click OK.
Once the push is complete, you will see a notification message on the top-right corner.
