Build an SAP CAP Application to Access SAP HANA Cloud, data lake Relational Engine
- How to connect to an existing HANA-managed data lake Relational Engine instance using CAP

Prerequisites
- An SAP HANA Cloud data lake instance managed by an SAP HANA Cloud instance
- Experience working in SAP Business application Studios with HDI-based tables
- Experience building and running SAP Cloud Applications Programming (CAP) model applications in SAP Business Application Studios
To learn about SAP CAP and application development on SAP BTP, see Introduction to Application Development Using CAP and Node.js | Tutorials for SAP Developers.
- Step 1
-
From SAP HANA Cloud Central, open your SAP HANA database in Database Explorer by choosing Open in SAP HANA Database Explorer.
If you have not previously opened the database in Database Explorer, you will need to login using the
DBADMINcredentials specified upon the creation of your HANA database.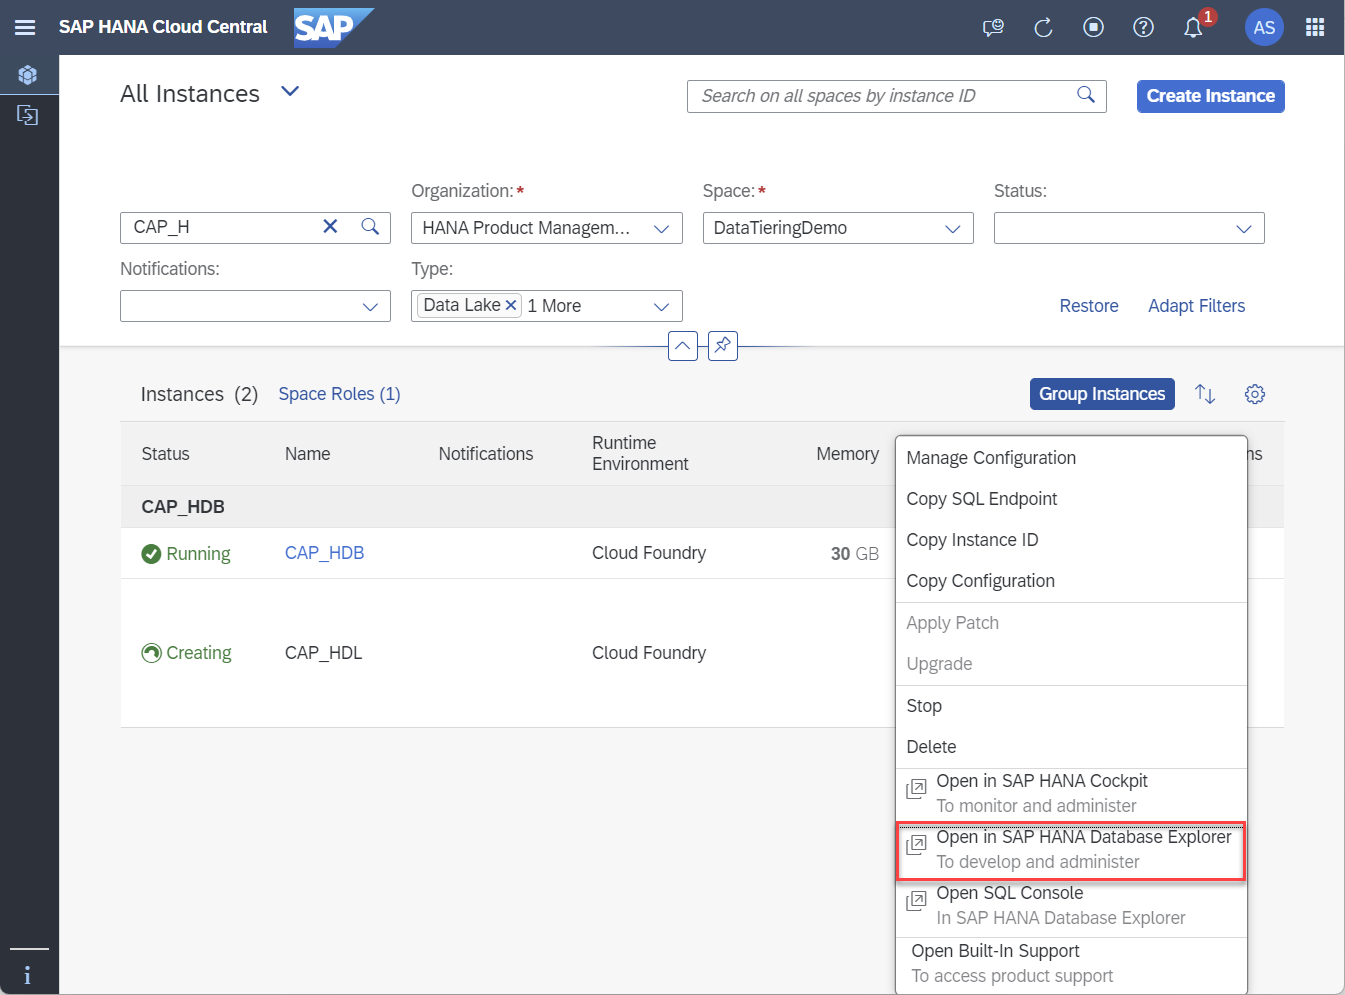
-
Within Database Explorer as
DBADMIN, run the following SQL script to create a new userHDB_BOOKSHOP_USERand a relational containerBOOKSHOP_CONTAINERin the attached HANA-managed data lake Relational Engine instance owned byHDB_BOOKSHOP_USER. and a new schemaBOOKSHOP. This script also grants privileges on theBOOKSHOPSCHEMA to theHDB_BOOKSHOP_USER.SQLCopy-- Create a new user called HDB_BOOKSHOP_USER CREATE USER HDB_BOOKSHOP_USER PASSWORD Password1 NO FORCE_FIRST_PASSWORD_CHANGE SET USERGROUP DEFAULT; -- Create a Relational Container in the attached HANA-managed HDLRE instance CALL SYSHDL.CREATE_CONTAINER('BOOKSHOP_CONTAINER', 'HDB_BOOKSHOP_USER');
Then, create a new schema
BOOKSHOP, and grant schema privileges onBOOKSHOPschema to theHDB_BOOKSHOP_USER.SQLCopy-- Create a new schema CREATE SCHEMA BOOKSHOP; -- Grant all BOOKSHOP schema privileges to HDB_BOOK_USER GRANT ALL PRIVILEGES ON SCHEMA BOOKSHOP TO HDB_BOOKSHOP_USER WITH GRANT OPTION;
-
You will now create database objects in the
BOOKSHOPschema in the HANA-managed data lake Relational Engine that map to objects in the HANA database. These commands will be executed as theHDB_BOOKSHOP_USERas the owner of the relational container created in the previous step.SQLCopy-- Connect as the HDB_BOOKSHOP_USER CONNECT HDB_BOOKSHOP_USER PASSWORD Password1; -- Create a virtual table in HANA that maps to a table in the attached HANA-managed HDLRE instance, also created here CREATE VIRTUAL TABLE BOOKSHOP.BOOK_REVIEWS ( REVIEW_ID INTEGER PRIMARY KEY, BOOK_ID INTEGER NOT NULL, RATING INTEGER NOT NULL, REVIEW VARCHAR(500) NOT NULL ) AT "SYSHDL_BOOKSHOP_CONTAINER_SOURCE"."NULL"."SYSHDL_BOOKSHOP_CONTAINER"."BOOK_REVIEWS" WITH REMOTE; -- Insert sample data into the virtual table INSERT INTO BOOKSHOP.BOOK_REVIEWS(REVIEW_ID, BOOK_ID, RATING, REVIEW) VALUES(1, 1, 5, 'I loved reading this novel since I love mysteries.'); INSERT INTO BOOKSHOP.BOOK_REVIEWS(REVIEW_ID, BOOK_ID, RATING, REVIEW) VALUES(2, 12, 4, 'This was a good fantasy book, but not as realistic as I had hoped.'); INSERT INTO BOOKSHOP.BOOK_REVIEWS(REVIEW_ID, BOOK_ID, RATING, REVIEW) VALUES(3, 7, 3, 'This book was slow but an interesting read overall.'); INSERT INTO BOOKSHOP.BOOK_REVIEWS(REVIEW_ID, BOOK_ID, RATING, REVIEW) VALUES(4, 3, 5, 'I could not put this book down. I truly get why this is a classic.'); INSERT INTO BOOKSHOP.BOOK_REVIEWS(REVIEW_ID, BOOK_ID, RATING, REVIEW) VALUES(5, 12, 3, 'I wish there was more action and less romance.');
For additional details consult Creating Virtual Tables
-
Query the local SAP HANA table and the equivalent SAP HANA Cloud, data lake Relational Engine table. Note that both results should be identical.
SQLCopySELECT * FROM BOOKSHOP.BOOK_REVIEWS; SELECT * FROM SYSHDL_BOOKSHOP_CONTAINER.BOOK_REVIEWS;
-
- Step 2
-
In SAP BTP Cockpit, navigate to the Service Marketplace at the subaccount level.

Search for SAP Business Application Studio and launch the application by clicking the Go to Application button.

-
Within Business Application Studio, create a Full Stack Cloud Application dev space with the following three additional SAP Extensions: SAP HANA Calculation View Editor, SAP HANA Performance Tools, SAP HANA Tools.

Your dev space is created instantly and automatically started, which can take a minute or so.
-
Once it is running, click on the name of your dev space to open it.

-
- Step 3
-
Before you create an application, you will need to sign in to Cloud Foundry. Navigate to the Cloud Foundry page using the left menu bar.

Expand the Services directory and click the circled arrow icon to open the Cloud Foundry sign in page.

Sign in using SSO and select the correct organization and space where your HANA database is located.

Ensure to click Apply to save your organization and space targets.

-
Navigate to the Explorer page using the left menu bar and select Create Project to create a new project using a template.

-
Use the CAP Project template and select Start to open the project creation wizard using the CAP template.

-
Name your project
My_HDL_CAP_Projectand ensure your project uses the Node.js runtime environment, all available features, and includes basic sample files. Click Finish to create your project.
-
- Step 4
-
To specify the specific pre-existing SAP HANA database you would like to configure your CAP application with, you will need to provide the instance ID, which can be found in SAP HANA Cloud Central.
In HANA Cloud Central, copy the Instance ID of your SAP HANA database.
-
In your project workspace in Business Application Studio, right click on the
mta.yamlfile and select Open With….
Select Text Editor.

-
Under the resources header, edit the file to add your instance ID from your clipboard.

-
Next, you will create the service instance which will connect to our specified HANA database.
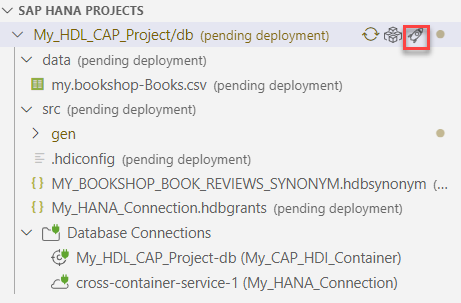
In your project workspace under SAP HANA PROJECTS, select the icon to add a new database connection.

-
Create a user-provided service instance and provide the information for the
HDB_BOOKSHOP_USERcreated in a previous step.Ensure you use the
BOOKSHOPschema since this is where theBOOK_REVIEWStable is located in our HANA database.Additionally, check the box to generate hdbgrants file which will give the runtime user the same permissions as
HDB_BOOKSHOP_USERin theBOOKSHOPschema.
-
Once the service is created and bound, you will be able to see it in the workspace under SAP HANA PROJECTS.

-
Next you will create an HDI container within your existing SAP HANA database.

Select Bind to an HDI container and Create a new service instance. Call the container
My_CAP_HDI_Container.You will receive the following two notifications once your service instance has been created and bound to your project.
-
Create an hdbsynonym by opening the Command Palette.

-
Search for SAP HANA: Create SAP HANA Database Artifact. Select the artifact type as Synonym (hdbsynonym) and name the synonym
MY_BOOKSHOP_BOOK_REVIEWS_SYNONYM.
-
Open the file
MY_BOOKSHOP_BOOK_REVIEWS_SYNONYM.hdbsynoymand click on … under the Object Name column. - Ensure the connection
My_HANA_Connectionis selected, and select theBOOKSHOP.BOOK_REVIEWStable.

-
Open the
data-model.cdsfile and replace the contents with the following code.data-model.cdsCopynamespace MY.BOOKSHOP; entity Books { key ID : Integer; title : String; stock : Integer; } @cds.persistence.exists entity BOOK_REVIEWS_SYNONYM { key REVIEW_ID : Integer; BOOK_ID : Integer; RATING : Integer; REVIEW : String(500) }
-
Open the
cat-service.cdsfile and replace the contents with the following code.cat-service.cdsCopyusing MY.BOOKSHOP as my from '../db/data-model'; service CatalogService { @readonly entity Books as projection on my.Books; @readonly entity BOOK_REVIEWS_SYNONYM as projection on my.BOOK_REVIEWS_SYNONYM; }
-
Deploy the project using the rocket icon.
-
In the left navigation menu, navigate to Run Configurations and create a new configuration. Select your current project and name the configuration using the default name.

-
Bind the configuration to your HDI container,
My_HANA_HDI_Container, by clicking the bind icon and selecting the HDI container.
-
Then, run the configuration by clicking the bind icon.

-
You will be prompted to open a service in a new tab. Click Open in a New Tab.

-
Select Fiori preview for the
BOOK_REVIEWStable.
-
Click the gear icon to open the table settings.

Ensure all the columns are selected.

-
You are now able to view the data in the
BOOK_REVIEWStable.
-