Access a Classic Schema from SAP Web IDE Full-Stack
- How to create a plain schema, with a table and user to simulate a replicated schema
- How to create a user-provided service to access a database in SAP HANA service for SAP BTP
- How to grant permissions to the technical users in your HDI container to access the database


Prerequisites
- This tutorial is designed for SAP HANA service for SAP Business Technology Platform. Consider newer tutorials designed for SAP HANA Cloud.
- You have access to the database and SAP BTP cockpit.
- You have created a multi-target application with a database module as explained in this tutorial.
- Optionally, you have created a remote source as explained in this tutorial.
This tutorial is meant to be an example of cross-container access. Simple data models and loading mechanisms were chosen to simulate a schema replicated using tools such as SAP Landscape Transformation or an ABAP schema.
For more information on this process and additional syntax options, refer to the official documentation on SAP Help.
If you are looking for the steps for an on-premise SAP HANA instance with XS Advanced, such as SAP HANA, express edition, refer to this tutorial.
This tutorial cannot be completed with a trial account.
- Step 1
Connect to SAP Web IDE Full Stack and enter the Database Explorer. You will see your instance of the SAP HANA database.
If you cannot see the database, try entering the database explorer from the Database Cockpit and make sure the setting in
Preferences->Database Explorerare set to the correct region.
Use the following code to create a schema and a user. You will also create a simple table to use as an example for cross-container access.
You will create a SQL role and assign it to the user
PLUSRwith the permissions granted manually before. This user will be used for the connection between the HDI container and the plain schema, and will grant the role to the HDI container technical user.sqlCopyCREATE SCHEMA "PLAIN"; CREATE USER PLUSR PASSWORD "HanaRocks01" NO FORCE_FIRST_PASSWORD_CHANGE ; CREATE ROW TABLE "PLAIN"."REGIONS" (REGION NVARCHAR(5), DESCRIPTION NVARCHAR(100) ); CREATE ROLE CCROLE; grant SELECT, UPDATE, INSERT, DELETE, EXECUTE, SELECT METADATA ON SCHEMA "PLAIN" TO CCROLE with grant option; grant CCROLE to PLUSR with admin option;Use the green play button or press
F8to execute the statement.
What is going on?
You have created a plain schema in your SAP HANA database. When you created a database module in SAP Web IDE, an HDI container was automatically generated.

You can see the SAP HANA service (a database instance, from which you access to the Database Cockpit) of service type
hana-dband the HDI container of service typehanaand planhdi-sharedlisted in the service marketplace

You can also see both connections in the Database Explorer

- Step 2
Download this CSV file into your local computer.
Use the search help to locate schema
PLAIN.
Click on Tables. Right-click on the
REGIONStable and select Import Data
Browse for the file you have just downloaded. Keep
PLAINandREGIONSas the target and click Step 2
Keep the default table mapping and click Step 3

Click Show Import Summary

Use Import Into Database to load the records

You should see the wizard has imported 4 records

Right-click on the table and choose Open Data to see the records loaded into the table.
- Step 3
You now have a schema with a table and data in it. You have also created a user called
PLUSRwith permissions to perform basic operations on that schema. You will now create a user-provided service to access the schema through the userPLUSRfrom your Multi-Target Application.Use
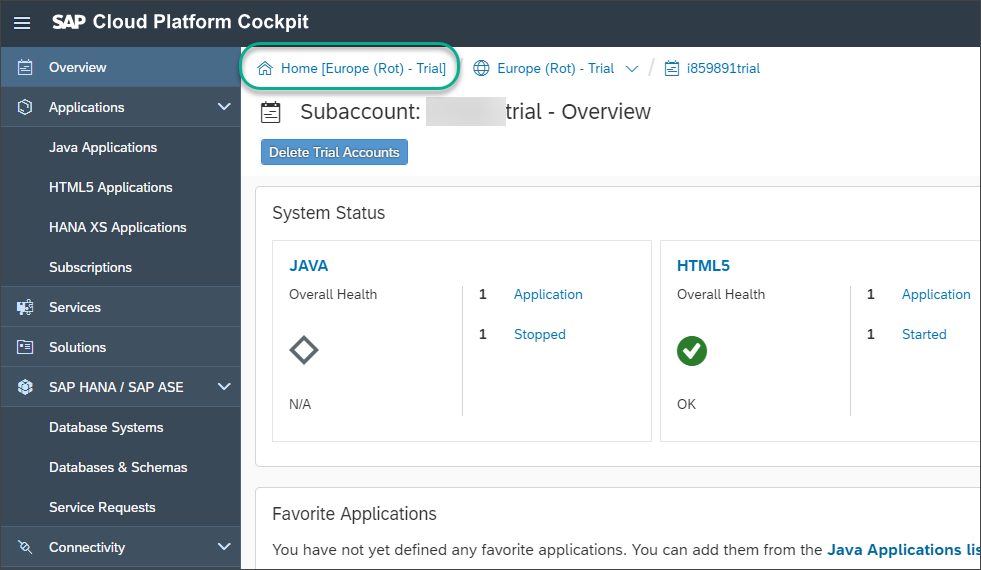
Tools -> SAP Cloud Platform Cockpitto open the cockpit.
Navigate to your Cloud Foundry account by going back to the Home
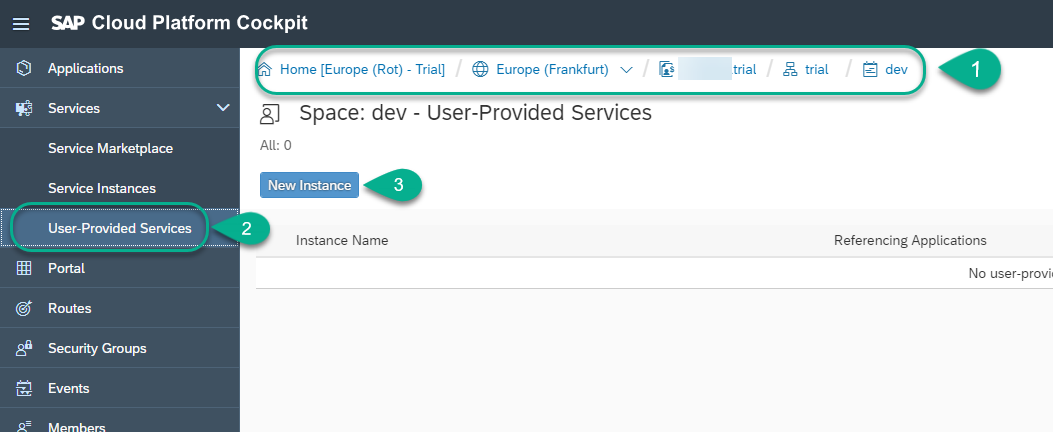
Enter the Cloud Foundry subaccount and into the space in which you are deploying the application. Click User Provided Services and New Instance
Call the service
CC_ACCESSand use the code below in CredentialssshCopy{ "user": "PLUSR", "password": "HanaRocks01", "schema": "PLAIN", "tags": "[ \"hana\" ]" }
You can use the Command Line Interface instead of the graphical tools. The sample command for this to prompt for each of the values would be:
sshCopycf cups CC_ACCESS -p "user","password","tags","schema"Press Save.
- Step 4
You will now add the user-provided service as a dependency and configure it as part of a database module. You will also set the original HDI container as the default service for database artifacts.
Go back into SAP Web IDE Full-Stack. Open the file
mta.yamlin the MTA Editor and use the + sign to add a resource.
Call the service
external_accessof typeorg.cloudfoundry.existing-service.Use the following key value pair under parameters.
key Value service-nameCC_ACCESSUse the following key value pair as properties.
key Value ups-service-name${service-name}
Save the file.
Click on the Modules tab and add
external_accessin theRequiressection.
Use
SERVICE-REPLACEMENTSas the value for Groups.Name Group external_accessSERVICE-REPLACEMENTSUse the following key-value pair as the properties of
external_accesskey Value keyexternal_accessservice~{ups-service-name}Click on
hdi_dband set the following key-value pair as propertieskey Value TARGET_CONTAINER~{hdi-container-name}
Click Save

If you switch to the Code Editor for the
mta.yamlfile, it should look similar to this:
- Step 5
You will now create an artifact that grants access to the two technical users of your HDI container. These are not real users, but technical ones.
Create a new file under
db.
Call it
cfg/plain.hdbgrants
And use the following code in it:
jsonCopy
{
  "CC_ACCESS": {
    "object_owner" : {
      "roles" : ["CCROLE" ]
    },
    "application_user" : {
      "roles" : ["CCROLE" ]
    }
  }
}
Save the file.
- Step 6
This step works only if you have created a remote source to access a text file using SAP HANA service smart data integration for SAP BTP in this tutorial, go back to the Database Explorer and open a new SQL console to your instance of SAP HANA service for SAP BTP.
Execute the following SQL command
sqlCopy
grant "CREATE VIRTUAL TABLE", "DROP", "CREATE REMOTE SUBSCRIPTION", "PROCESS REMOTE SUBSCRIPTION EXCEPTION" on remote source "LocalFile" to CCROLE with grant option;
Alternatively, you can grant the same permissions to the user in the user-provided service,
PLUSR, and create a separate grants file with them or a new role.
Here is an example for that.hdbgrantsfilejsonCopy{ "CC_ACCESS": { "object_owner" : { "global_object_privileges" : [ { "name" : "LocalFile", "type" : "REMOTE SOURCE", "privileges" : [ "CREATE VIRTUAL TABLE", "DROP", "CREATE REMOTE SUBSCRIPTION", "PROCESS REMOTE SUBSCRITPION EXCEPTION" ] } ] } } }Save the files. Build the database module.

- Step 7
You can now create a synonym to access the table in the plain schema. Create a new file in
db\src\data
Call it
regions.hdbsynonym.
Add a new record with name
REGIONS, object nameREGIONSand schemaPLAIN
Alternatively, you can use the value help under
Object name…

…and check
CC_ACCESSin the drop-down menu for external services.
Build the synonym.

- Step 8
You can now use the table in the classic schema with other objects created in your HDI container. In
data, create a new database artifact
Choose
hdbviewand call itRegiontextsView
Paste the following code into the view.
sqlCopyVIEW "RegionTextsView" ("REGION", "DESCRIPTION" ) as select "REGIONS"."REGION", "REGIONS"."DESCRIPTION" from "REGIONS"Build and save.
Right-click on the view and choose Open HDI Container.

Right-click on the view and choose Open Data. Paste the generated SQL statement in the box below to complete the validation.
