Refine the List Report with Annotations
- How to add additional columns and filter fields
- How to update the frontend application
- How to add list report header information
- How to define a value help as a drop-down list
- How to define criticality ratings


Prerequisites
- Ensure that you have finished all steps in previous tutorials:
Prepare the RAP-Based Travel Service
Generate an SAP Fiori Elements Application based on a RAP-based Service
Whenever your unique suffix for creating objects is needed, the object names within this tutorial are named with suffix “######”. For the screenshots, the suffix “000100” was used.
In the CDS files of your RAP-based service you can add annotations to refine the user interface. These CDS annotations will be translated into OData annotations used by SAP Fiori elements to generate the UIs. UI annotations are stored within metadata extension files to separate them from the CDS view structure for better reading.
- Step 1
Annotations controlling the UI can be stored in metadata extension files. In this section such a file will be created for the Travel entity and a first annotation will be added.
Right click the
ZC_FE_TRAVEL_######projection view for the Travel entity to open the context menu. Choose New Metadata Extension.
Enter the name of your metadata extension file. Choose the same name as your projection view file name
ZC_FE_TRAVEL_######and enter a description as well. Choose Next.
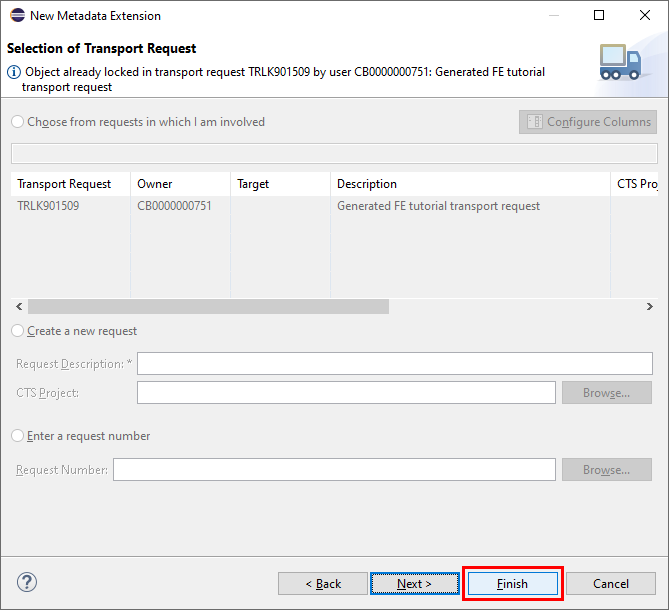
A transport request is already assigned to the metadata extension file. Choose Finish to confirm the creation of the file.
Now open the new metadata extension file
ZC_FE_TRAVEL_######within the Metadata Extensions folder. To show a first column within the list report table, add the content shown in the coding example below. You can use code completion by pressingCTRL-SPACEat the related coding positions, e.g. when adding the@UI.lineItemannotation, just type@UIand then pressCTRL-SPACEto choose the entry from the list of proposals.CDSCopy@Metadata.layer: #CORE annotate view ZC_FE_TRAVEL_###### with { @UI.lineItem: [{ position: 10 }] TravelID; }To finish this step, choose Save and Activate to take over the changes in your metadata extensions file.

Check your changes by refreshing of your real application preview in BAS or use the quick service preview in ADT. Choose Go to load the data.

You will now see the column Travel ID made visible on the list report table by the
@UI.lineItemannotation added to the metadata extensions file. The data shown in the column is loaded from the database with the request triggered by the Go button.UI annotations are usually stored within the...
- Step 2
To see some more data on the list report you are now adding more columns to the table, and to simplify the selection of data you will add filter fields to the filter bar.
Please open the metadata extensions file
ZC_FE_TRAVEL_######located in folderCore Data Services>Metadata Extensions.Now add the fields with the corresponding
lineItemannotations to the metadata extensions file as shown in the code fragment below. The propertypositioncontrols the order of the columns within the list report table.CDSCopy@UI.lineItem: [{ position: 20 }] AgencyID; @UI.lineItem: [{ position: 30 }] CustomerID; @UI.lineItem: [{ position: 40 }] BeginDate; @UI.lineItem: [{ position: 50 }] EndDate; @UI.lineItem: [{ position: 60 }] BookingFee; @UI.lineItem: [{ position: 70 }] TotalPrice; @UI.lineItem: [{ position: 80 }] OverallStatus; @UI.lineItem: [{ position: 90 }] LocalLastChangedAt;As a result, after saving and activating the metadata extensions file and then refreshing the preview of your application, you will see the additional columns shown in the list report table.

Note: The default table type of a list report is the responsive table. If you reduce the size of your browser window, some columns will disappear and an action
Show Detailsappears in the table toolbar (as of SAPUI5 version 1.90). If you use the propertyimportance: #HIGHin yourlineItemannotation, you can make sure that the information of the column will be shown independently of the browser window size.To assign specific fields to the filter bar you will use the
selectionFieldannotation. Add this annotation to the three existing fieldsAgencyID,CustomerIDandOverallStatusas shown in the coding example below.CDSCopy@UI.lineItem: [{ position: 20 }] @UI.selectionField: [{ position: 10 }] AgencyID; @UI.lineItem: [{ position: 30 }] @UI.selectionField: [{ position: 20 }] CustomerID; @UI.lineItem: [{ position: 80 }] @UI.selectionField: [{ position: 30 }] OverallStatus;Again save and activate the file and refresh the application to see the changes on the UI.
You can now filter the data loaded into the list report by specifying values for these additional selection fields.

- Step 3
Now the list report table will be sorted by the last updated travel records and also the number of records available in the database will be made visible. To achieve this, add header information to the metadata extensions file right above the view annotation:
CDSCopy@Metadata.layer: #CORE @UI: { headerInfo: { typeName: 'Travel', typeNamePlural: 'Travels' }, presentationVariant: [{ sortOrder: [{ by: 'LocalLastChangedAt', direction: #DESC }], visualizations: [{ type: #AS_LINEITEM }] }] } annotate view ZC_FE_TRAVEL_###### with { ...The
@UI.headerInfoannotation contains information about the naming of the main entity in singular and plural format and it shows the number of records available in the database in the table title. The table title is determined by thetypeNamePluralproperty.The
@UI.presentationVariantannotation controls the sorting of the table by fieldLocalLastChangedAtviasortOrderproperty. Thevisualizationsproperty determines that the sorting is applied to the list report table.Save and activate the metadata extensions file and refresh the application preview to see the result on the UI.

- Step 4
Instead of showing IDs for the fields Travel ID, Agency ID and Customer ID, one would preferably show descriptions or names. Additionally, some labels of specific fields will be changed globally to make the new label accessible wherever the fields are used on the list report or object page.
You will achieve this by using specific annotations which are implemented within the projection view
ZC_FE_TRAVEL_######. Therefore, open the projection view located in folder Core Data Services > Data Definitions which contains the root view definitions for the Travel entity.
Add the
@EndUserTextand@ObjectModelannotations to the fields as shown in the coding fragments below.Annotation
@EndUserText.labeldefines the column label for the related fields.@ObjectModel.text.elementcontrols the source of the content shown for the related field. For fieldTravelIDthis will be theDescriptionfield from this view.AgencyIDandCustomerIDwill get their content from the related field through the corresponding association.CDSCopy@EndUserText.label: 'Travel' @ObjectModel.text.element: [ 'Description' ] TravelID,CDSCopy@EndUserText.label: 'Agency' @ObjectModel.text.element: ['AgencyName'] AgencyID, _Agency.Name as AgencyName,CDSCopy@EndUserText.label: 'Customer' @ObjectModel.text.element: ['LastName'] CustomerID, _Customer.LastName as LastName,CDSCopy@EndUserText.label: 'Status' OverallStatus,CDSCopy@EndUserText.label: 'Last Changed At' LocalLastChangedAt,The semantic key for the view will be
TravelID. The content of the field will be highlighted, and the draft indicator will be shown while the Travel item is being worked on.Add the corresponding annotation
@ObjectModel.semanticKeybefore the definition of the view.CDSCopy... @Search.searchable: true @ObjectModel.semanticKey: ['TravelID'] define root view entity ZC_FE_TRAVEL_###### ...After saving and activating the file and refreshing the application, you will see the changed labels and content for the fields Travel, Agency, Customer, Status and Last Changed At.

Projection views contain the fields that can be shown on the UI. How can content be accessed from an entity that is defined externally?
- Step 5
When you choose the value help icon of the selection field Customer in the filter bar, you get a dialog which provides the option to conditionally load data by the customer ID. For better usability you would rather select customer data like name or address from a list.
-
To implement the value help, assign the annotation
@Consumption.valueHelpDefinitionto the fieldCustomerIDwithin the projection viewZC_FE_TRAVEL_######.CDSCopy@EndUserText.label: 'Customer' @ObjectModel.text.element: ['LastName'] @Consumption.valueHelpDefinition: [{ entity : {name: '/DMO/I_Customer', element: 'CustomerID' } }] CustomerID, _Customer.LastName as LastName,The entity property
namepoints to the data view andelementcontains the key for the selection. -
After saving, activating and refreshing your application, the field Customer provides the improved value help that allows a user-friendly selection of customer data within the Search and Select tab. You are still able to do a conditional selection by choosing the Define Conditions tab on the dialog. By entering search values such as the Last Name and choosing Go, the result is shown in the table. Selecting specific lines in the table and choosing OK will load a selected list of Travel items into the list report.

Selection field Status also shows a conditional value help by default. From a user perspective it would be nice to get a list of values presented as a drop-down list, since the number of different values is very limited.
-
In the projection view for the Travel entity
ZC_FE_TRAVEL_######the annotation for the value help has to be defined for theOverallStatusfield. As with the fieldCustomerID(see above), the annotation@Consumption.valueHelpDefinitionis used with propertiesnameandelementcontaining the appropriate values.CDSCopy... @EndUserText.label: 'Status' @Consumption.valueHelpDefinition: [{ entity : {name: 'ZI_FE_STAT_######', element: 'TravelStatusId' } }] OverallStatus, ...Save and activate the view.
-
Open the CDS view for the status description
ZI_FE_STAT_######. Just above the view definition, insert an@ObjectModel.resultSet.sizeCategoryannotation with value#XS. This results in a drop-down list.CDSCopy... @EndUserText.label: 'Travel Status view entity' @ObjectModel.resultSet.sizeCategory: #XS -- drop down menu for value help define view ZI_FE_STAT_###### ...Save and activate the view.
-
After refreshing the application the Status field is now a drop-down list. Select one or more of the available status codes and choose Go to load the filtered list.

-
- Step 6
The column Status currently shows the internal codes stored within
OverallStatus, but instead the description for these codes should be displayed.Although the related association is set correctly for
ZI_FE_TRAVEL_######and descriptions are available throughZI_FE_STAT_######, the corresponding text annotation for the projection view is missing.-
You can check the association already available within the CDS view for the Travel entity
ZI_FE_TRAVEL_######in folder Data Definitions (line 6) and the publication of this association to make it available for projection views (line 14).CDSCopydefine root view entity ZI_FE_TRAVEL_###### as select from ZFE_ATRAV_###### association [0..1] to /DMO/I_Agency as _Agency on $projection.AgencyID = _Agency.AgencyID association [0..1] to I_Currency as _Currency on $projection.CurrencyCode = _Currency.Currency association [0..1] to /DMO/I_Customer as _Customer on $projection.CustomerID = _Customer.CustomerID association [0..1] to ZI_FE_STAT_###### as _TravelStatus on $projection.OverallStatus = _TravelStatus.TravelStatusId composition [0..*] of ZI_FE_Booking_###### as _Booking { key TRAVEL_UUID as TravelUUID, ... ... _Customer, _TravelStatus } -
Now the access to the status description has to be set within the projection view
ZC_FE_TRAVEL_######. Add the text annotation@ObjectModel.text.elementfor fieldOverallStatusas shown below (line 2). To load the description the corresponding field from the status description view has to be accessed by the association_TravelStatus(line 5).CDSCopy@EndUserText.label: 'Status' @ObjectModel.text.element: ['TravelStatusText'] @Consumption.valueHelpDefinition: [{ entity : {name: 'ZI_FE_STAT_######', element: 'TravelStatusId' } }] OverallStatus, _TravelStatus.TravelStatusText as TravelStatusText,Save and activate the view.
-
With these settings the description is displayed in the column Status but additionally, the key is shown within parentheses. You can use the
@UI.textArrangementannotation with value#TEXT_ONLYto omit the key. Open the metadata extensions fileZC_FE_TRAVEL_######and add the text arrangement annotation to the fieldOverallStatus(line 3).CDSCopy@UI.lineItem: [{ position: 80 }] @UI.selectionField: [{ position: 30 }] @UI.textArrangement: #TEXT_ONLY OverallStatus;Save and activate the metadata extensions file.
-
After refreshing your application you will see the status description within the Status column.

-
- Step 7
The values of the Status field can be semantically colored to visually differentiate the meaning. This can be achieved by using the criticality property for the
@UI.lineItemannotation.-
The criticality feature requires specific values for the different colors to be shown on the UI. Therefore, a new field
OverallStatusCriticalitywill be defined in the CDS viewZI_FE_TRAVEL_######. This field will be filled with color codes derived from the values of the fieldoverall_status. See the coding fragment below which shows a case structure to define the content of the new fieldOverallStatusCriticalitywithin lines 5 to 10.CDSCopy... description as Description, overall_status as OverallStatus, case overall_status when 'O' then 2 -- 'open' | 2: yellow colour when 'A' then 3 -- 'accepted' | 3: green colour when 'X' then 1 -- 'rejected' | 1: red colour else 0 -- 'nothing' | 0: unknown end as OverallStatusCriticality, @Semantics.user.createdBy: true created_by as CreatedBy, ...Take over the case structure into the CDS view just below the field
overall_status. Save and activate the view. -
Adding a new field to the CDS view is a structural change which requires a recreation of the corresponding draft table
ZFE_DTRAV_######. This draft table contains all the fields of the CDS view.You can apply a quick fix within the behavior definition file
ZI_FE_TRAVEL_######in folder Core Data Services > Behavior Definitions. Open this file in your editor and you will immediately see the error shown in the line where the draft table for the Travel entity is referenced.Click on the light bulb icon on the left in that line or position your cursor on the draft table file name
ZFE_DTRAV_######and pressCTRL + 1. The system proposes to recreate the draft table. By double-clicking on the proposal, the recreation of the table will be started.
As soon as the recreation is finished, you will see the draft table
ZFE_DTRAV_######loaded into the editor containing the new fieldOverallStatusCriticality.
Save and activate the draft table and then also activate the behavior definition file
ZI_FE_TRAVEL_######which is still open in your editor. The error disappears as soon as the behavior definition is activated. -
To be able to use the new field within UI annotations you need to take it over to the projection view of the travel entity
ZC_FE_TRAVEL_######. Insert the fieldOverallStatusCriticalityjust below the definition for the fieldOverallStatus(see line 7 in the coding fragment).CDSCopy... @ObjectModel.text.element: ['TravelStatusText'] @Consumption.valueHelpDefinition: [{ entity : {name: 'ZI_FE_STAT_######', element: 'TravelStatusId' } }] OverallStatus, _TravelStatus.TravelStatusText as TravelStatusText, OverallStatusCriticality, CreatedBy, ...Save and activate the projection view.
-
As a last step you need to add the criticality to the metadata extensions file for the Travel entity
ZC_FE_TRAVEL_######.This can be done by adding the property
criticalitywith valueOverallStatusCriticalityto the@UI.lineItemannotation of fieldOverallStatus(see line 5 in the coding fragment).CDSCopy... @UI.lineItem: [{ position: 70 }] TotalPrice; @UI.lineItem: [{ position: 80, criticality: 'OverallStatusCriticality' }] @UI.selectionField: [{ position: 30 }] @UI.textArrangement: #TEXT_ONLY OverallStatus; @UI.lineItem: [{ position: 90 }] LocalLastChangedAt; ...Save and activate the metadata extension file.
Refresh your application and reload the data by choosing Go in the list report. Now the content of column Status is shown in different colors depending on the value of the field.

What is the consequence if an additional field is defined within the CDS view of a draft-enabled application?
-