Add Styling to an MDK App
- How to change color of action bar and tool bar
- How to change font color and background color of MDK control properties in a section page


Prerequisites
- Tutorial group: Set Up for the Mobile Development Kit (MDK)
- Install SAP Mobile Services Client on your iOS or Android device

Android
iOS
(If you are connecting toAliCloudaccounts, you will need to brand your custom MDK client by allowing custom domains.)
You may clone an existing metadata project from the MDK Tutorial GitHub repository and start directly with step 4 in this tutorial.

- Step 1
This step includes creating a mobile project in SAP Build Lobby.
-
In the SAP Build Lobby, click Create > Create to start the creation process.

-
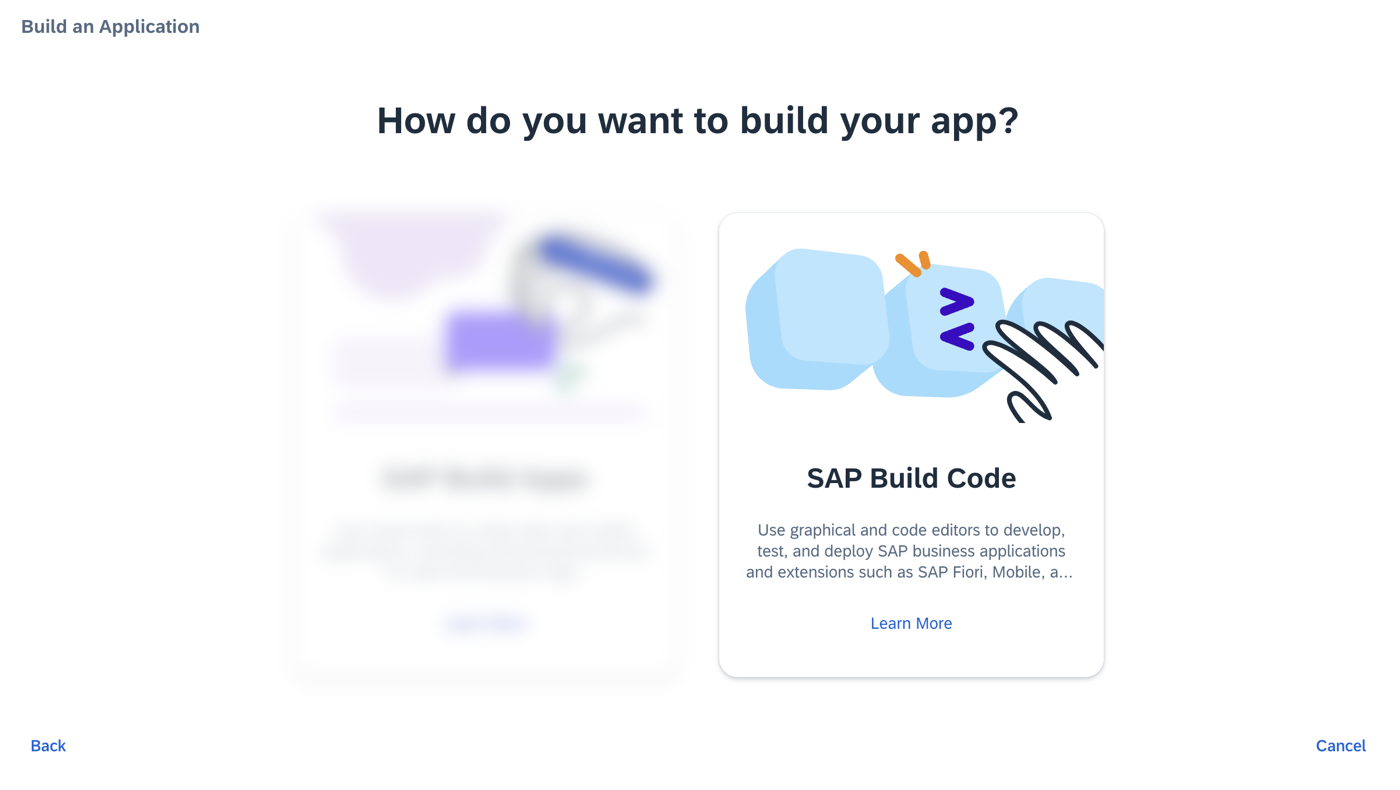
Click the Build an Application tile.

-
Click the SAP Build Code tile to develop your project in SAP Business Application Studio, the SAP Build Code development environment, leveraging the capabilities of the services included in SAP Build Code.
-
Click the Mobile Application tile.

-
Enter the project name
MDK_Stylingcp-mobile-dev-kit-style(used for this tutorial) , add a description (optional), and click Create.
SAP Build Code recommends the dev space it deems most suitable, and it will automatically create a new one for you if you don’t already have one. If you have other dev spaces of the Mobile Application type, you can select between them. If you want to create a different dev space, go to the Dev Space Manager. See Working in the Dev Space Manager.
-
Your project is being created in the Project table of the lobby. The creation of the project may take a few moments. After the project has been created successfully, click the project to open it.

-
The project opens in SAP Business Application Studio, the SAP Build Code development environment.

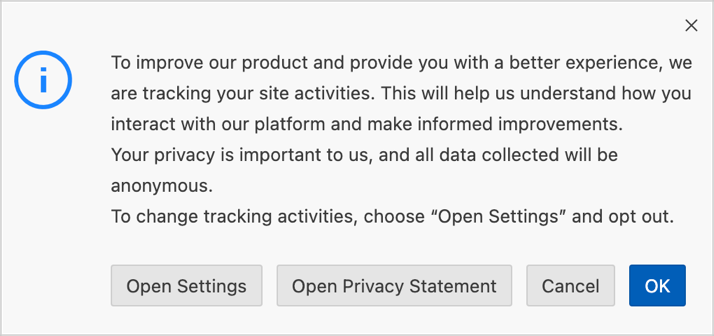
When you open the SAP Business Application Studio for the first time, a consent window may appear asking for permission to track your usage. Please review and provide your consent accordingly before proceeding.
-
- Step 2
The Storyboard provides a graphical view of the application’s runtime resources, external resources, UI of the application, and the connections between them. This allows for a quick understanding of the application’s structure and components.
- Runtime Resources: In the Runtime Resources section, you can see the mobile services application and mobile destination used in the project, with a dotted-line connected to the External Resources.
- External Resources: In the External Resources section, you can see the external services used in the project, with a dotted-line connection to the Runtime Resource or the UI app.
- UI Application: In the UI Applications section, you can see the mobile applications.
-
Click on + button in the Runtime Resources column to add a mobile services app to your project.

This screen will only show up when your CF login session has expired. Use either
CredentialsORSSO Passcodeoption for authentication. After successful signed in to Cloud Foundry, select your Cloud Foundry Organization and Space where you have set up the initial configuration for your MDK app and click Apply.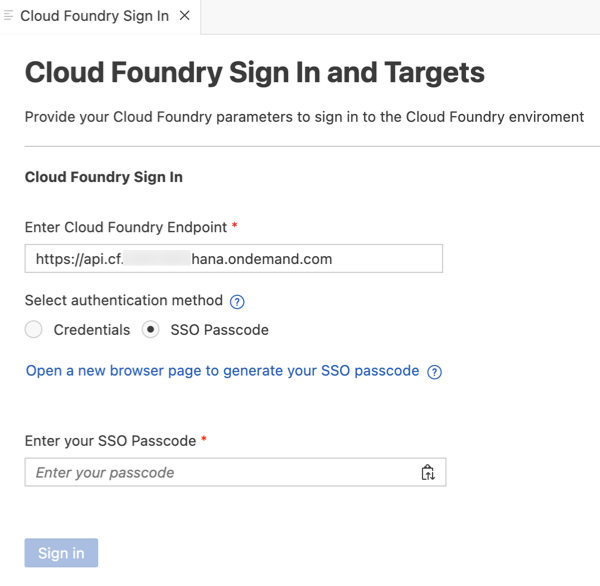
-
Choose
myapp.mdk.demofrom the applications list in the Mobile Application Services editor.
-
Select
SampleServiceV4from the destinations list and click Add App to Project.
You can access the mobile services admin UI by clicking on the Mobile Services option on the right hand side.
In the storyboard window, the app and mobile destination will be added under the Runtime Resources column. The mobile destination will also be added under the External Resources with a dotted-line connection to the Runtime Resource. The External Resource will be used to create the UI application.

-
Click the + button in the UI application column header to add mobile UI for your project.

-
In the Basic Information step, select the MDK Template Type as CRUD, leave the other options as they are, and click Next.

More details on MDK template is available in help documentation.
-
In the Data Collections step, provide the below information and click Finish:
Field Value Enter a path to service (e.g. /sap/opu/odata/sap/SERVICE_NAME)Leave it as it is Enable OfflineIt’s enabled by default Select all data collectionsLeave it as it is What types of data will your application contain?Select CustomersandProducts
Regardless of whether you are creating an online or offline application, this step is needed for app to connect to an OData service. When building an MDK Mobile application, it assumes the OData service created and the destination that points to this service is set up in Mobile Services. For MDK Web application, destination is set up in SAP BTP cockpit.
Since you have Enable Offline set to Yes, the generated application will be offline enabled in the MDK Mobile client and will run as online in Web environment.
Data Collections step retrieves the entity sets information for the selected destination.
-
After clicking Finish, the storyboard is updated displaying the UI component. The MDK project is generated in the project explorer based on your selections.

- Step 3
The
LESSstylesheet provides the ability to define styling styles that can be used to style the UI in the MDK app.You can find more details about styling in MDK.
-
In
MDK_Stylingproject, expand the Styles folder and open theStyles.lessfile.
-
Replace the generated code with below:
LESSCopy@mdkYellow1: #ffbb33; @mdkRed1: #ff0000; //// This style applies to all the ActionBars in the application ActionBar { color: white; background-color: red; } //// This style applies to all the ToolBars in the application ToolBar { color: white; background-color: gray; /* Android */ bartintcolor: gray; /* iOS */ } //// LogoutToolbarItem is tool bar item for Logout in Main.page #LogoutToolbarItem { color: brown; } //// UploadToolbarItem is tool bar item for Sync in Main.page #UploadToolbarItem { color: blue; } //// By-Class style: These style classes can be referenced from rules and set using ClientAPI setStyle function //// below snippet is to style Customers button on Main.page .MyCustomerButton{ font-color: @mdkRed1; background-color: cyan; } //// below snippet is to style Title property of an Object Table control in Customers_List.page .ObjectTableTitle { color: @mdkYellow1; } //// below snippet is to style Object Header control in Customers_Detail.page /* Object Header - BodyText */ .objectHeaderBodyText { color: red; } /* Object Header - Description */ .objectHeaderDescription { color: blue; } /* Object Header - Footnote */ .objectHeaderFootNote { color: green; } /* Object Header - Headline */ .objectHeaderHeadline { color: #ff00ff; } /* Object Header - Background */ .objectHeaderBackground { background-color: #DC143C; } /* Object Header - StatusText */ .objectHeaderStatus { color: red; font-style: italic; font-size: 18; } /* Object Header - Subhead */ .objectHeaderSubhead { color: yellow; } /* Object Header - SubstatusText */ .objectHeaderSubStatus { color: blue; font-style: italic; font-size: 18; }Styles.lessis already bound to Styles properties inApplication.appfile.
Which language extension for CSS is used by the Mobile Development Kit for styling applications?
-
- Step 4
In this step, you will bind style classes:
MyCustomerButtontoCustomerssection button control onMain.pageObjectTableTitleto Title property of Object Table inCustomers_List.pageobjectHeaderBodyTexttoBodyTextproperty of Object Header inCustomers_Detail.pageobjectHeaderDescriptiontoDescriptionproperty of Object Header inCustomers_Detail.pageobjectHeaderFootNotetoFootnoteproperty of Object Header inCustomers_Detail.pageobjectHeaderHeadlinetoHeadlineTextproperty of Object Header inCustomers_Detail.pageobjectHeaderBackgroundtoObjectHeaderproperty of Object Header inCustomers_Detail.pageobjectHeaderStatustoStatusTextproperty of Object Header inCustomers_Detail.pageobjectHeaderSubheadtoSubheadproperty of Object Header inCustomers_Detail.pageobjectHeaderSubStatustoSubstatusTextproperty of Object Header inCustomers_Detail.page
-
In the
Main.page, selectCustomersbutton, click link icon next to Button property under Style.In Object browser, double click
MyCustomerButtonclass to bind style property and click OK.
-
Navigate to Pages |
SampleServiceV4_Customers, clickCustomers_List.page, select Object Table control, scroll-down to Style section.Click link icon next to Title property.
In Object browser, double-click
ObjectTableTitleclass to bind style property and click OK.
-
Navigate to Pages |
SampleServiceV4_Customers, clickCustomers_Detail.page, select Object Header control, scroll-down to Style section and bind control properties to style properties.
If you want to style 2 toolbar items with the same color, which syntax is correct?
- Step 5
So far, you have learned how to build an MDK application in the SAP Business Application Studio editor. Now, you will deploy the application definitions to Mobile Services and Cloud Foundry to use it in the Mobile client and Web application respectively.
-
Right-click
Application.appand select MDK: Deploy.
-
Select deploy target as Mobile & Cloud.
MDK editor will deploy the metadata to Mobile Services (for Mobile client) followed by to Cloud Foundry (for Web application).

Ensure that you see successful messages for both deployments.

-
- Step 6
SAP Business Application Studio has a feature to display the QR code for onboarding in the Mobile client. Click on
Application.appto open it in MDK Application Editor, and then click the Application QR Code icon.
The On-boarding QR code is now displayed.

Leave the Onboarding dialog box open for the next step.
What is the class name being used to style the Customer button?