Send and Receive Test SAP Event Mesh
- Send and Receive message to and from a queue using Postman, a REST-based tool
- IMPORTANT: It is really important to understand the concept of Service Key of an SAP Event Mesh instance. Check out Step 2 of Create Instance of SAP Event Mesh Service.

Prerequisites
- Postman, API Development environment Tool is available to publish & receive message from queue using REST Protocol
- Step 1
-
Open the Postman.
-
Click on “New” to open a new tab on Postman to work on.

-
Fetch the OAuth2.0 access token to be used for authorization on all subsequent operations in same session

-
Provide the token endpoint URL in Postman URL from the Service Keys for the protocol type HTTPREST.
Build the postman URL by appending the
GRANTTYPEas CLIENTCREDENTIALS andRESPONSETYPEas tokenSo the final postman URL should look like this:
<<tokenendpoint>>?grant_type=client_credentials&response_type=token

<<tokenendpoint>> is to be replaced with the 'tokenendpoint' field of the service key.
In the Headers tab, enter `Content-Type` as KEY and `application/x-www-form-urlencoded` as VALUE.
In the Authorization tab, select the Type as
Basic Authfrom the dropdown.- In Username, provide the <
clientid> value from the Service Keys forhttprestprotocol. - In Password, provide the <
clientsecret> value from the Service Keys forhttprestprotocol.
Select the POST option in Postman and click on the Send button. You will get the
access_token. -
- Step 2
Open a new tab in the Postman.
-
Build the postman URL as below
https://<uriof the rest protocol based section from Service Keys>/messagingrest/v1/queues/<Queue name>/messages.
Queue nameis queue name along with the namespace. Replace the/present in the namespace with%2fwhile executing. -
Open the Headers tab add below two key-value pairs.
KEY VALUE x-qos 0 or 1 authorization Bearer <the retrieved access_token>
-
Open the Authorization tab and select the TYPE as
No Auth.
-
Open the Body tab and select the type as raw. And enter some test message in the body.

-
Select the POST option in Postman and click on the Send button. If sending message is successful, you shall get a status as
204 No Content.
-
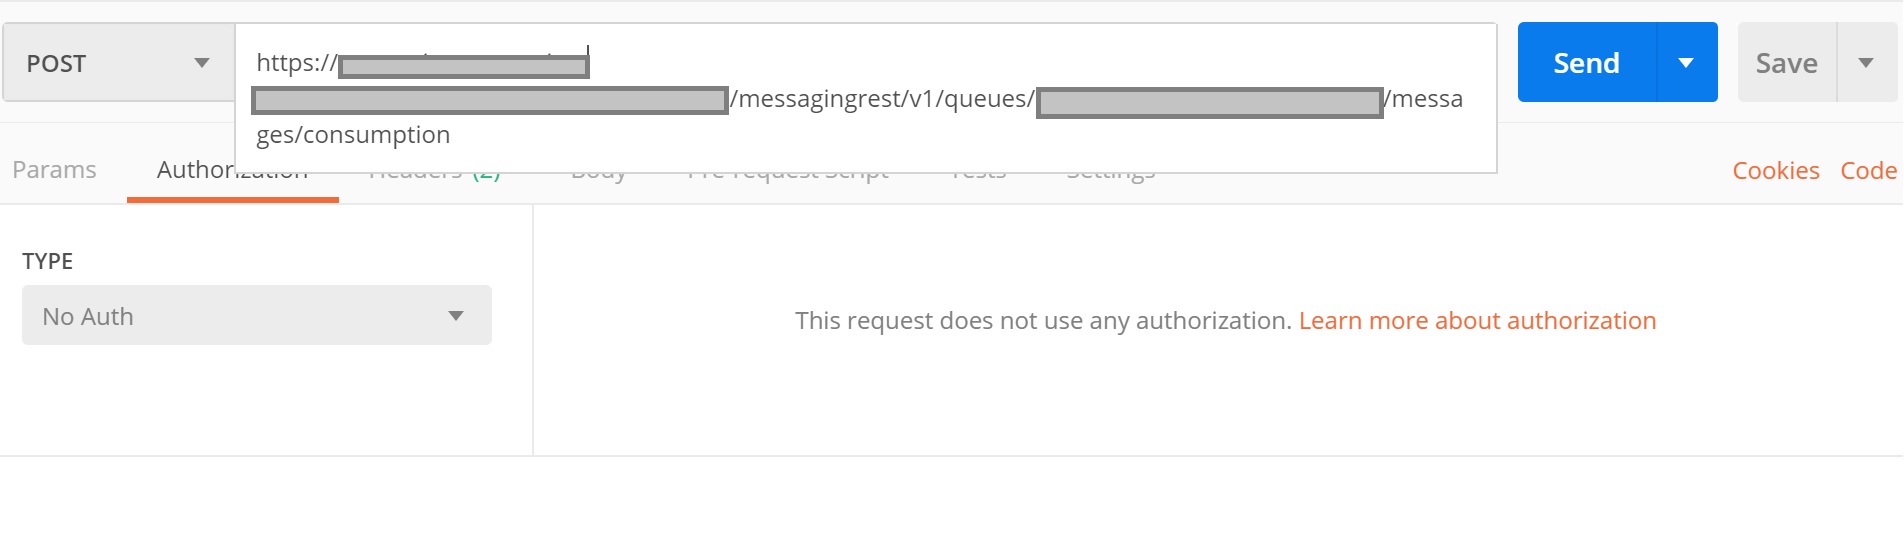
- Step 3
Open a new tab in the Postman.
-
Build the postman URL as below
https://<uriof the rest protocol based section from Service Keys>/messagingrest/v1/queues/<Queue name>/messages/consumption -
Open the Headers tab add below two key value pair.
KEY VALUE x-qos 0 or 1 authorization Bearer <the retrieved access_token>
-
Open the Authorization tab and select the TYPE as No Auth.
-
Open the Body tab and select the type as raw. And enter some test message in the body.
-
Select the POST option in Postman and click on the Send button. If sending message is successful, you shall get a status as
200 OK. And in the body tab you can view the message.
Which options are true while using postman
-