Develop an SAPUI5 Application for SAP BTP on Cloud Foundry
- How to create a new SAPUI5 application for SAP Business Technology Platform (BTP), Cloud Foundry environment
- How to configure your Cloud Foundry settings in SAP Web IDE
- How to build and deploy your application to Cloud Foundry


Prerequisites
- Make sure you have access to the trial version of SAP Web IDE Full-Stack.
Create, configure, build, and deploy a simple application on Cloud Foundry in SAP Web IDE Full-Stack.
We would like to invite you to switch to SAP Business Application Studio since it’s better suited for developing applications for Cloud Foundry. SAP Business Application Studio has built-in productivity tools for the Cloud Foundry environment, such as command line and command palette dedicated tools. During development, SAP Business Application Studio saves you a lot of time since you can test run the app locally in the dev space without needing to go through a time consuming build and deploy.
- Step 1
-
In SAP Web IDE Full-Stack, right-click your workspace choose New > Project from Template.

-
In the template wizard that opens, in the Environment dropdown list, make sure that Cloud Foundry is selected and Category should be Featured otherwise the SAPUI5 Application tile will not appear.

-
Scroll down and click the SAPUI5 Application tile and then click Next.

-
In the Basic Information screen, in the Module Name field, enter
FioriDemo. In the Namespace field, entermynamespaceand then choose Next.
-
In the Template Customization screen, accept the default values shown below and choose Finish.

A new MTA project called
mta_FioriDemocontaining theFioriDemoHTML5 module now appears in your SAP Web IDE workspace. When developing apps in the Cloud Foundry environment, you create a Multi-Target Application (MTA) file in SAP Web IDE. Each SAP Fiori app is developed as an SAPUI5 module of the MTA.
You can alternatively choose the Multi-Target Application template which will create an MTA project structure and then add new modules to the project.
-
- Step 2
Now you need to open the layout editor in SAP Web IDE to easily make a few changes.
-
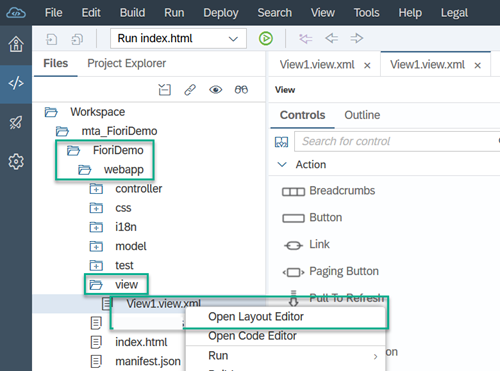
Choose
FioriDemo>webapp>viewand right-click theView1.view.xmlfile that you created in the wizard in the previous step. -
Choose Open Layout Editor.
-
- Step 3
Now you will make some changes using the layout editor, with no need to do any coding.
-
In the layout editor, in the Controls pane, in the Search box on the top enter
Textto filter the controls list. Select the Text control.
-
Drag the Text control and drop it on the View control in the canvas to the right.

-
Select the Text control, and in the Properties pane on the right, in the Text property, clear the default text and enter
SAP Fiori on Cloud Foundry.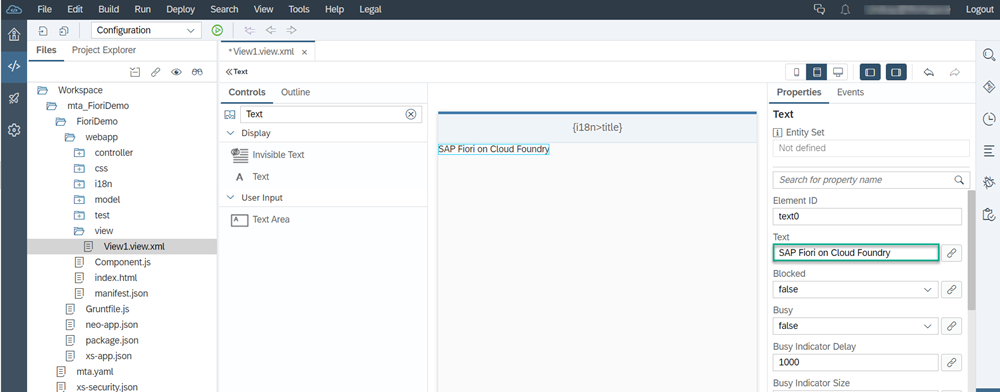
Save your work by clicking either the Save or Save All icon located at the top of the workspace.

-
- Step 4
Now, before you can build and deploy your new application, check your Cloud Foundry preferences.
-
Open the Preferences perspective in SAP Web IDE by clicking the Preferences icon and then select Cloud Foundry.

-
In the pane on the right, select the API endpoint, organization and space for your project.
If you are using a trial account, these values are automatically populated.

-
Click Save.
-
- Step 5
Now you need to run your new application to test it.
But first, check the project settings to make sure that Cloud Foundry is enabled for your project.
By default, the target environment in your run configuration is set to Cloud Foundry.
-
In the workspace, right-click the
FioriDemofolder, then choose Run > Run Configurations.
-
In the Run Configurations for
FioriDemowindow that opens, click+and then select Run as Web Application.
-
Click on the Configuration and then select
indexhtmlas the File Name from the dropdown list.
-
Click Save and Run.

-
- Step 6
Now you need to build your application.
In your workspace, right-click the
mta_FioriDemofolder and choose Build > Build.
The build process creates a multi-target archive (
MTAR) file in your workspace that packages all the project modules for deployment.
- Step 7
Now, you need to deploy your application to SAP BTP, Cloud Foundry environment.
In your workspace, locate and right-click the new
mta_FioriDemo_0.0.1.mtarfile in themta_archivesfolder, and select Deploy > Deploy to SAP BTP.
The Deploy to SAP BTP dialog box opens. The fields are automatically populated. Click Deploy.

The deployment process takes a few minutes. You can see that the deployment is still in progress in the status bar at the bottom right of your screen.
When the deployment process is complete, you should see the notification in the console at the bottom of your screen and also at the top right of the screen.

- Step 8
Now you can access your deployed application in the SAP Business Technology Platform cockpit. The steps below show you how to create a URL that you can use to access your new application.
-
From the Tools menu click SAP BTP Cockpit.

-
Click Home [Europe (Rot)-Trial] at the top of the screen.

-
Click Enter your Trial Account.

-
Click the trial subaccount box, assuming you are working on the trial version of SAP Web IDE. Otherwise, your subaccount will have a different name.

-
Click Spaces in the side navigation panel and then click the number link to your Cloud Foundry spaces.

-
Click your space box to open it.

-
On your Applications page, you should see your new application in the list:
mta_FioriDemo_appRouterand that it has a Started status. Click this link.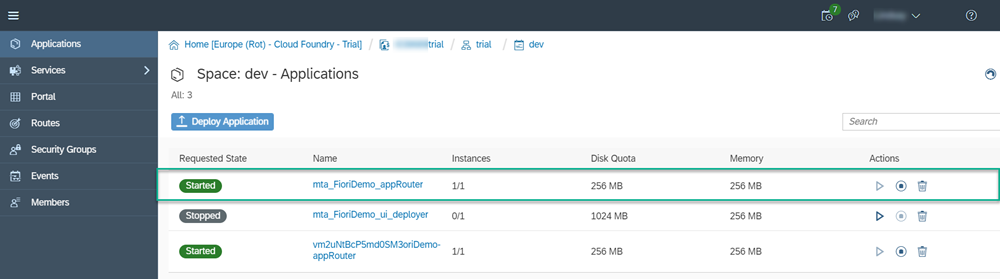
-
A new page opens: Application:
mta-FioriDemo_appRouter- Overview. Right-click the URL under Application Routes and save the URL in a text file such as in Notepad or Notes.
-
In your text editor you need to add the following suffix to the URL that you saved in step 8:
/mynamespaceFioriDemo-1.0.0/index.html
The construct of the final URL is:
<URL_from_application_overview_page>/<project_name>-<application_version>/index.htmlYou can use this URL in any browser to access your new application.
Where can you see if the deployment of your application is still in process in SAP Web IDE?
-