Fetch Data from Public API to Your App
- How to fetch records from a public API
- How to configure data variables

In the previous tutorial, you learned how to connect your application to a public API. From here, you now need to configure the application to read specific information from that API once a barcode has been scanned.
This again uses the Retrieve request, as when you were testing the data resource, but this time the request is triggered with a logic flow.
- Step 1
As you no longer need your application to send an alert, as this was just used as a test, you need to remove this flow function.
-
Open your app, and go to User Interface tab.
-
Click the Scan button, then click Add Logic for Button1.

If the logic canvas is already open, you can just click the button.
-
Select the Alert flow function, and click the X.

-
- Step 2
You now need to add your new logic flow for what should happen after the barcode has been scanned. For your application, you want the barcode scanner to fetch data from the data resource you configured in the previous tutorial.
-
In the Core logic tab, scroll down and drag a Get Record flow function.

-
Connect the top output of the Scan QR/Barcode flow function to the input of the Get Record flow function.

-
- Step 3
After adding a Get Record, you need to indicate what backend you want to make a request to and what data you want to send (if any).
-
In the logic canvas, select Get Record element.
The Resource Name is already set to the OpenFoodFacts data resource since this is the only data resource in the app.

-
Next to the barcode input, click the X.

Since we want to send the barcode the user scanned (which the Scan QR/Barcode flow function will output), we select Output value of another node.

Select Scan QR/Barcode as the logic node to get the data from.
Select QR barcode content as the specific output.

Click Save.
The Get Record flow function should now be able to fetch data for any food barcode you scan with your application.
-
- Step 4
You now need to configure your application to store the data it receives. To do this, you need to add data variables.
-
Switch to the Variables tab.

-
Click Data Variables (on the left).

After reading, click the Welcome to variables message to hide it (if the message appears).

-
Click Add Data Variable.

Select your Open Food Facts data resource, whose schema will be used for the data variable as well.

As the barcode will be for a single product, select Data variable type – Single data record.

-
Data variables come with default logic that fetches new information when the page loads. But you want to fetch data only when the user clicks the button and scans a barcode, so you will remove the default logic and later add logic on the button click.
Select the Get record and Set data variable flow functions by drawing a rectangle around them.

Press the Delete key.
-
Click Save (upper right).
-
- Step 5
Finally, we want to store the data we retrieve when the user scans a barcode into the data variable.
-
Click User Interface.

-
Click your Scan button to open the relevant logic panel.

This is where we added the logic to scan a barcode and retrieve the data for that product.
-
Drag a Set Data Variable flow function onto the logic canvas.
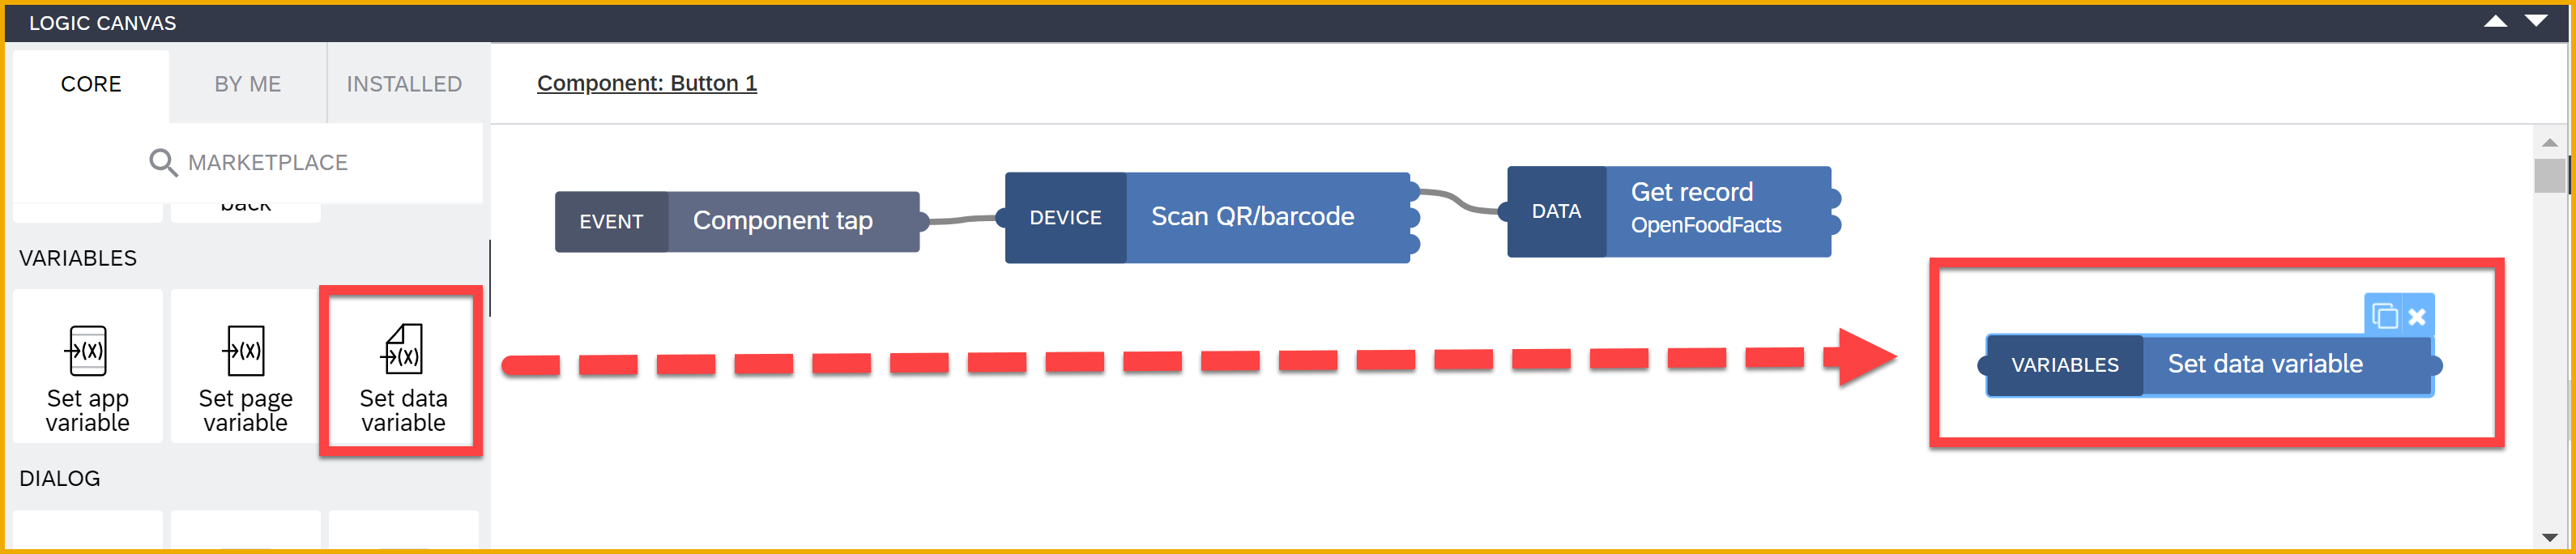
Connect the top Get record output to the Set data variable input.

-
Select the Set data variable flow function.
Since you only have one data variable, it is already selected.

-
Now you will select the data to store in the variable.
Under data, select the binding type square.

Select Output value of another node.
Select Get Record.
Select Record.
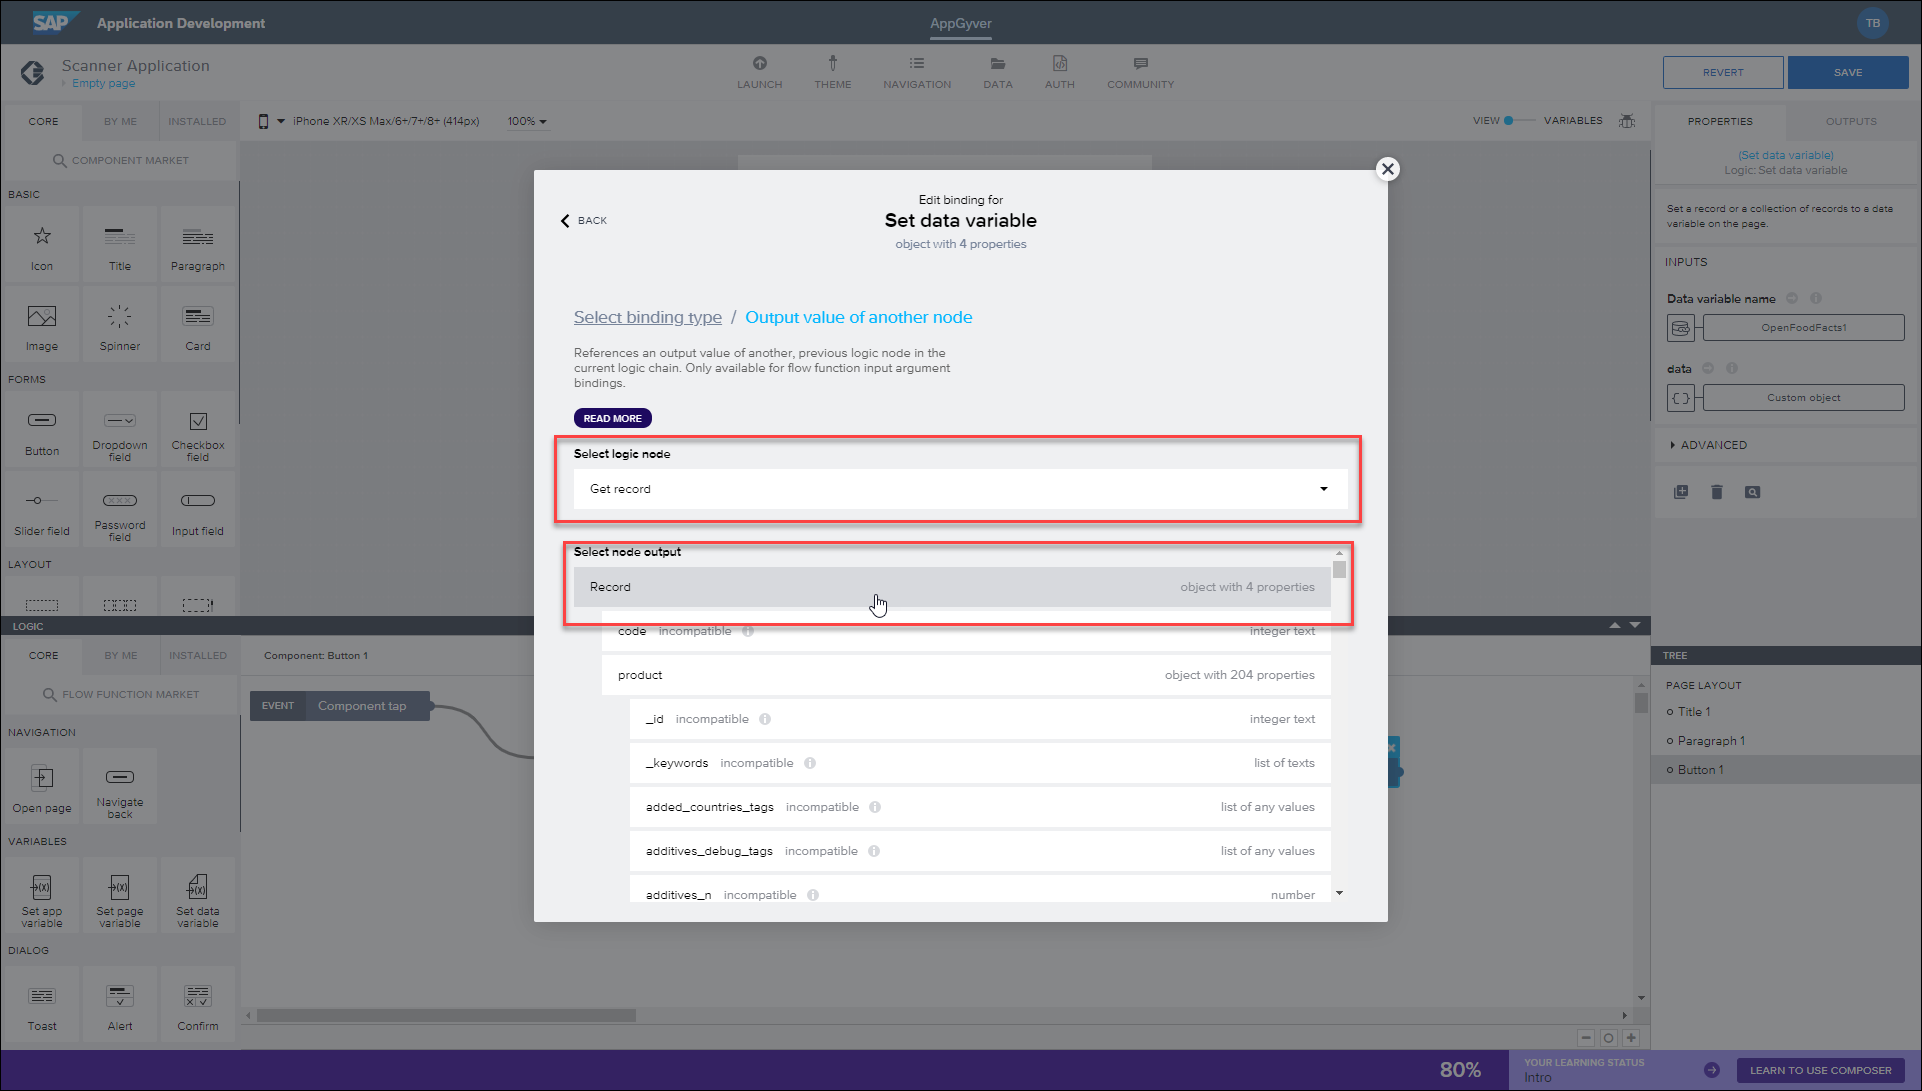
Click Save.

-
Click Save (upper right) to save your draft application.

The logic has now been added to your draft application.
When will your app fetch new information from the API?
-