Transport a Software Component Between two Systems Using Any Git Repository (BYOG)
- How to create and clone a remote repository
- How to create a software component and link the remote repository
- How to clone the software component
- How to create a branch
- How to delete a software component
- How to create and delete tags

Prerequisites
- You have two service instances of SAP BTP ABAP Environment on the same global account
- In the source system, you have assigned the copies of the business role templates
SAP_BR_ADMINISTRATORandSAP_BR_DEVELOPERto your user - In the target system, you have assigned a copy of the business role template
SAP_BR_ADMINISTRATORto your user - You have installed the latest version of ABAP in Eclipse (ADT)
- You have created a new empty repository with the preferred git provider. The repository must be publicly accessible on the internet - repositories hosted on a private company network are currently not supported
- You have administrative authorizations to push, pull and clone from this repository; credentials must include a username and a password or token
This will give you a better overview of your own code, branches, and commits.
Throughout this tutorial, replace ### or 000 with your initials or group number.
- Step 2
First, open your preferred Git provider and create a new repository; here, we are using
Github.IMPORTANT: Create a branch at the same time. In
Github, adding a readme file will automatically create a main branch for the repository.
- Step 3
- In Manage Software Components, create a new software component. Enter the following and choose Create:
- Namespace: For test purposes, usually Z.
- Name: Based on remote repo name, here
BYOG_REPO_###. - Description: Bring your own git
- Repository URL:
Githubrepo from previous step - Type: Development


-
Choose Clone in the top right corner.

-
Enter the following and choose Next.
- User name and the password or token of your git credentials
- *Appropriate radio button for your authentication method, either password or OAuth token.
Important: The credentials must be for a user who has administrative rights to the repository and is allowed to push and pull changes.
-
From the dropdown select the name of the branch you want to clone and choose Clone.

When the cloning is finished, the status changes to Success.

In the remote repository, a new commit has been generated from
noreply@example.comand a new file added.
Important: This file is necessary for pushing and pulling changes into the SAP system. Therefore this file should never be deleted or modified at any time.
- Step 4
-
Open ABAP in Eclipse (ADT.) You will see that a structure package has been automatically created, with the same name as the software component.
-
Create an ABAP package of type development: Select your structure package, then choose New > ABAP Package from the context menu.
-
Enter the following, then choose Next.
- Name:
ZBYOG_TEST_GITHUB_###if you are usingGithub - Description:
Test gCTS with Github Superpackage: Should be added automatically- Package Type: Development

- Name:
-
The software component and transport layer are automatically derived from the generated structure package. Choose Next, then Finish.


-
- Step 5
-
Create a new ABAP class: Choose File > New > Other… > ABAP Class.
-
Enter the following for your class, then choose Next.
- Name:
ZCL_HELLO_WORLD_### - Description for your class, e.g.
Test gCTS with Github - Interface:
if_oo_adt_classrun. This enables you to run the class in the console.
- Name:
-
Choose the same transport request.
-
Add the following code to your class:
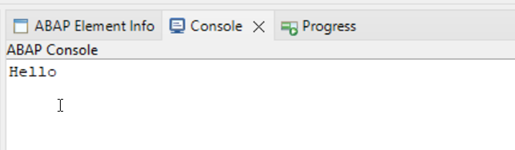
ABAPCopyCLASS zcl_hello_world_### DEFINITION PUBLIC FINAL CREATE PUBLIC . PUBLIC SECTION. INTERFACES if_oo_adt_classrun . PROTECTED SECTION. PRIVATE SECTION. ENDCLASS. CLASS zcl_hello_world_### IMPLEMENTATION. METHOD if_oo_adt_classrun~main. out->write( 'Hello' ). ENDMETHOD. ENDCLASS. -
Format, save, and activate your class (**
Sh+F1,Ctrl+S,Ctrl+F3**). -
Run your class as a console application. The output should look roughly like this:
-
- Step 6
-
Release the transport task (**F9**).
-
Release the transport request (**F9**).

The transport request number and the transported objects are now visible in your remote repository.
-
- Step 7
To import your released transport into a target system (e.g., your test or production system), you must clone the same repository into this target system.
-
Repeat step 3.2 to 3.4. The only difference is the “Repository Role”, which now must be set to “Target”.

-
Open the target system in ADT. You can see the transported objects.

-
- Step 8
Currently, creating a new branch for BYOG is not supported in Manage Software Components. Therefore, create the branch using the native interface of your git provider linked to your repository.

In Manage Software Components, you can see the new branch by refreshing the Branches table. You can then proceed as usual with checkout.
