Expose Custom Business Object as External Web Service
- How to create the OData service for a custom business object
- How to expose the custom business object’s service to the internet


Prerequisites
- Tutorial:
Create a Custom Business Object - Authorizations: Your user needs (a) business role(s) with business catalogs Extensibility - Custom Business Objects (ID:
SAP_CORE_BC_EXT_CBO), Extensibility - Custom Communication Scenarios (ID:SAP_CORE_BC_EXT_CCS) and Communication Management (ID:SAP_CORE_BC_COM)
This tutorial shows how to generate the OData service for an existing custom business object. Furthermore this service is exposed to the internet via the creation of a custom communication scenario. The creation of a communication arrangement for the Bonusplan scenario is the second part of the exposure.
Additional Information
- SAP S/4HANA Cloud Release (tutorial’s last update): 1902
- Step 1
Navigate to Custom Business Objects tile to start the application.

- Step 2
Open details of your custom business object
Bonusplanand Edit Draft.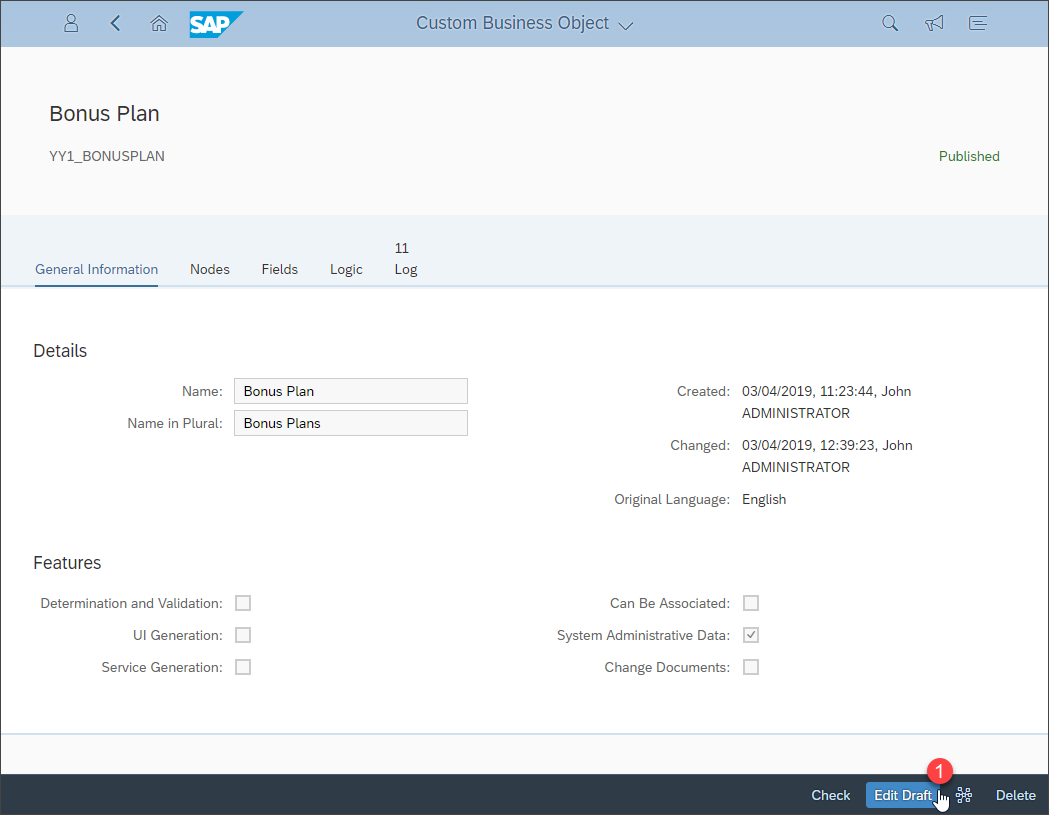
Select the Service Generation checkbox and click Publish. With this step an OData service is created.

Be aware that UI Generation needs to stay de-selected as otherwise due to a limitation you wouldn’t get the label texts automatically in the custom UI.
- Step 3
Open Custom Communication Scenarios application.

- Step 4
A communication scenario is the basis definition for a communication between systems. It defines a solution to be made available for external systems. Click New, give your scenario a name, description and click New again.

Enter
Bonusplan Scenarioas description and click New.
- Step 5
Add service
YY1_BONUSPLAN_CDSby clicking + and Publish it.
- Step 6
Open Communication Arrangements application.

- Step 7
Create a communication arrangement. This time you create it for your
Bonusplanscenario.
- Step 8
Select
SCP_DEV_SYSTEMas your communication system. SelectSCP_DEVas communication user withOAuth 2.0as authentication method.Click Save.

By exposing the service via custom communication scenario and communication arrangement, you will be able to select it from the list of services in a SAP Web IDE project.