Register SAP BTP, Cloud Foundry Subaccount in Identity Authentication Service
- How to establish trust between your SAP BTP, Cloud Foundry subaccount and the Identity Authentication service
- How to configure users for single sign-on usage


Prerequisites
- You have a Free Trial Account on SAP Business Technology Platform. See Get a Free Account on SAP BTP Trial.
- You have a tenant of Identity Authentication service. See Tenant Model and Licensing.
- You have an Azure Active Directory (Azure AD) account. See Sign Up for Microsoft Azure
Congratulations!
You have successfully connected Azure Active Directory with your Identity Authentication tenant. Furthermore, the SAP BTP, Cloud Foundry subaccount can now: leverage all the capabilities of Identity Authentication service, for instance users can login with their mail address of Azure Active Directory (as long as their account is part of the Azure Active Directory and the enterprise application).
Good Job!
- Step 2
This step is optional if you have already downloaded the metadata file in the previous tutorial.
Go to the Tenant Settings in the administration console for Identity Authentication and navigate to the SAML 2.0 Configuration list item.

Scroll down to the bottom of the page and download the metadata file.

- Step 3
-
Navigate to your SAP BTP, Cloud Foundry subaccount. Therefore, go to the SAP BTP cockpit and click Enter Your Trial Account.
-
Click the tile of your subaccount where you want to establish trust with the Identity Authentication service.

-
Note down the subdomain (in this case demos) and the region (in this case eu20) for later use (in Step 8).
-
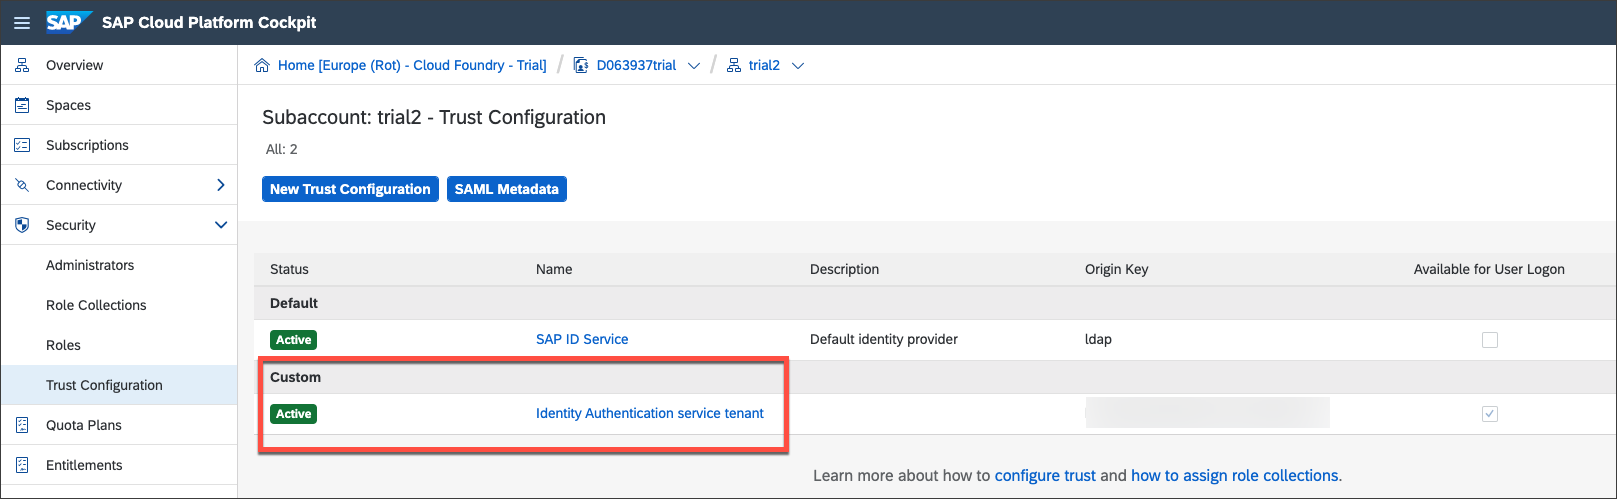
Open the submenu Trust Configuration in the Security section, and click New Trust Configuration.

-
Upload the metadata file of the Identity Authentication tenant, which you downloaded in the previous step (or previous tutorial).
A message Metadata parsed successfully should appear.
Enter Identity Authentication service tenant as the name for the trust configuration.

-
Set
Azure Active Directory Tutorialas Link Text for User Logon. This will appear on the login screen once a user tries to log in.Continue with Save.
You should now see an additional trust configuration.
-
- Step 4
Download the SAML Metadata file of your subaccount.

- Step 5
-
Go back to the administration console for Identity Authentication service through your particular URL.
The URL is the same as the one in Step 1 of this tutorial:
https://[TENANT_ID].accounts.ondemand.com/admin -
Choose Applications in the Applications & Resources Applications menu section to go to the service provider configuration.
-
Create a new application by using the + Add button to add a new SAML service provider.

-
Enter SAP Cloud Platform CF subaccount as the name for the application that clearly identifies it as your new service provider. Save your changes.
Users see this name in the login screen when the authentication is requested by the UAA service. Seeing the name, they know which application they currently access after authentication.
-
- Step 6
-
Choose SAML 2.0 Configuration in the recently created application.
-
Import the relevant metadata XML file of the SAP BTP, Cloud Foundry subaccount.
-
Click Save.

-
- Step 7
-
Choose Default Name ID Format in the list of configurations.
-
Select E-Mail as a unique attribute.
-
Save the changes.

-
- Step 8
Choose Assertion Attributes in the list of configurations.

Use +Add and enter Groups (case-sensitive) as assertion attribute name for the Groups user attribute, and click Save.

- Step 9
-
Open a new browser window and replace the
and region placeholder with the information you have noted down in Step 3. https://<subdomain>.authentication.<region>.hana.ondemand.comYou will still be able to log in with your S-User/P-User e-mail and password. You will see a link to Azure AD below the form. In Trust Configuration, you can enable/disable the SAP ID Service or any other trust configuration you have configured.
If you disable the SAP ID Service, you will only see the links to the external identity providers. If there is only one identity provider configured, you will be automatically redirected to it.
-
Log in via the Microsoft Azure AD Link
Azure Active Directory Tutorialand enter your Azure Active Directory user.One of the following error messages should appear:
AADSTS50105: The signed in user ‘
xyz’ is not assigned to a role for the application ‘abc’(MyAzureTutorial).or:
AADSTS700016: Application with identifier ‘https://
.authentication. .hana.ondemand.com’ was not found in the directory ‘ xyz’.Until now, you don’t have any users assigned to this enterprise application in Microsoft Azure AD. Only your Microsoft Azure AD is known as an Identity Provider in your Identity Authentication service, but so far no users are allowed to log in with it.
-
Go back to your overview of enterprise applications in Microsoft Azure AD and click your application.
Add a new user by clicking Add user in the Users and groups submenu, as shown on the screenshot.

-
For this tutorial, you only want to add a single user (instead of, for example, whole groups).
Continue by clicking Users (so far the application has no users assigned, accordingly None Selected should appear). Search for either your name or the email address you want to continue working with.

By hitting the result tile, you select the user, which should appear under
Selected memberspanel. Finish your user assignment with clicks on Select and Assign.
-
- Step 10
Check if your user assignment was successful. Open a new browser window again and enter the UAA tenant URL again:
https://<subdomain>.authentication.<region>.hana.ondemand.com
Log in via the Microsoft Azure AD Link
Azure Active Directory Tutorialand enter your Azure Active Directory user you previously assigned to the enterprise application in Microsoft Azure AD. You will be redirected back to UAA afterwards.You should not see any particular application, because you did not access a CF application, only the UAA tenant page.
You can check the users details, including the groups mapped, by accessing the following URL:
https://<subdomain>.authentication.<region>.hana.ondemand.com/config?action=who&details=trueWhich text appears on the UAA tenant page, after you completed the last step?