
Overview
You will learn
- How to model constraints
- What annotations exist for this
- How to use them


Prerequisites
/workspaces/cap-nodejs-dev-env. If you
have your own CAP Node.js development environment setup, then please make the
appropriate adjustments where necessary.Steps
Intro
CDS is a great example of a declarative or “intent” based approach to defining a solution - you declare what you want, and let the system (CAP) take care of how that’s implemented. With a combination of CDL and CXL, plus annotations, we have a “solid state” language with which to define what the business and the solution requires.
In this tutorial we’ll gradually add constraints to a CDS model, to understand what they can do and how they are applied.
To keep things simple, let’s use an existing “base project” from an SAP CodeJam on CAP. It’s an extremely cut down version of the classic Northwind service, even more reduced than Northbreeze in the OData Deep Dive Server repo.
It’s called Northwhisper, with just a very small amount of product, category and supplier data.
👉 Clone the repository:
git clone https://github.com/SAP-samples/cap-tour-hands-on👉 Now open the baseproj/ directory within the cloned repository in a new VS
Code / Codespace window:
code cap-tour-hands-on/baseproj/This should present just the base project in the Explorer, at the root.
👉 Open up a terminal window and start a CAP server running with:
cds watchWe’ll start exploring constraints with the categories data, and we’ll be using the REST Client extension in VS Code to make HTTP calls (this is already available to you if you’ve chosen option 1 or 2 in the prerequisites).
👉 Use the http facet to have a .http file created in a reasonable place
(within a new test/ directory in the project):
cds add httpThis will create the file test/http/Main.http with some content already in
there.
👉 Take a brief look at the content, just to get an idea of how HTTP calls are defined and structured (we’ll be building a similar set of calls in this file throughout the rest of the tutorial) and then delete that content.
Once the file is empty, add this at the start:
@server=http://localhost:4004

### List categories
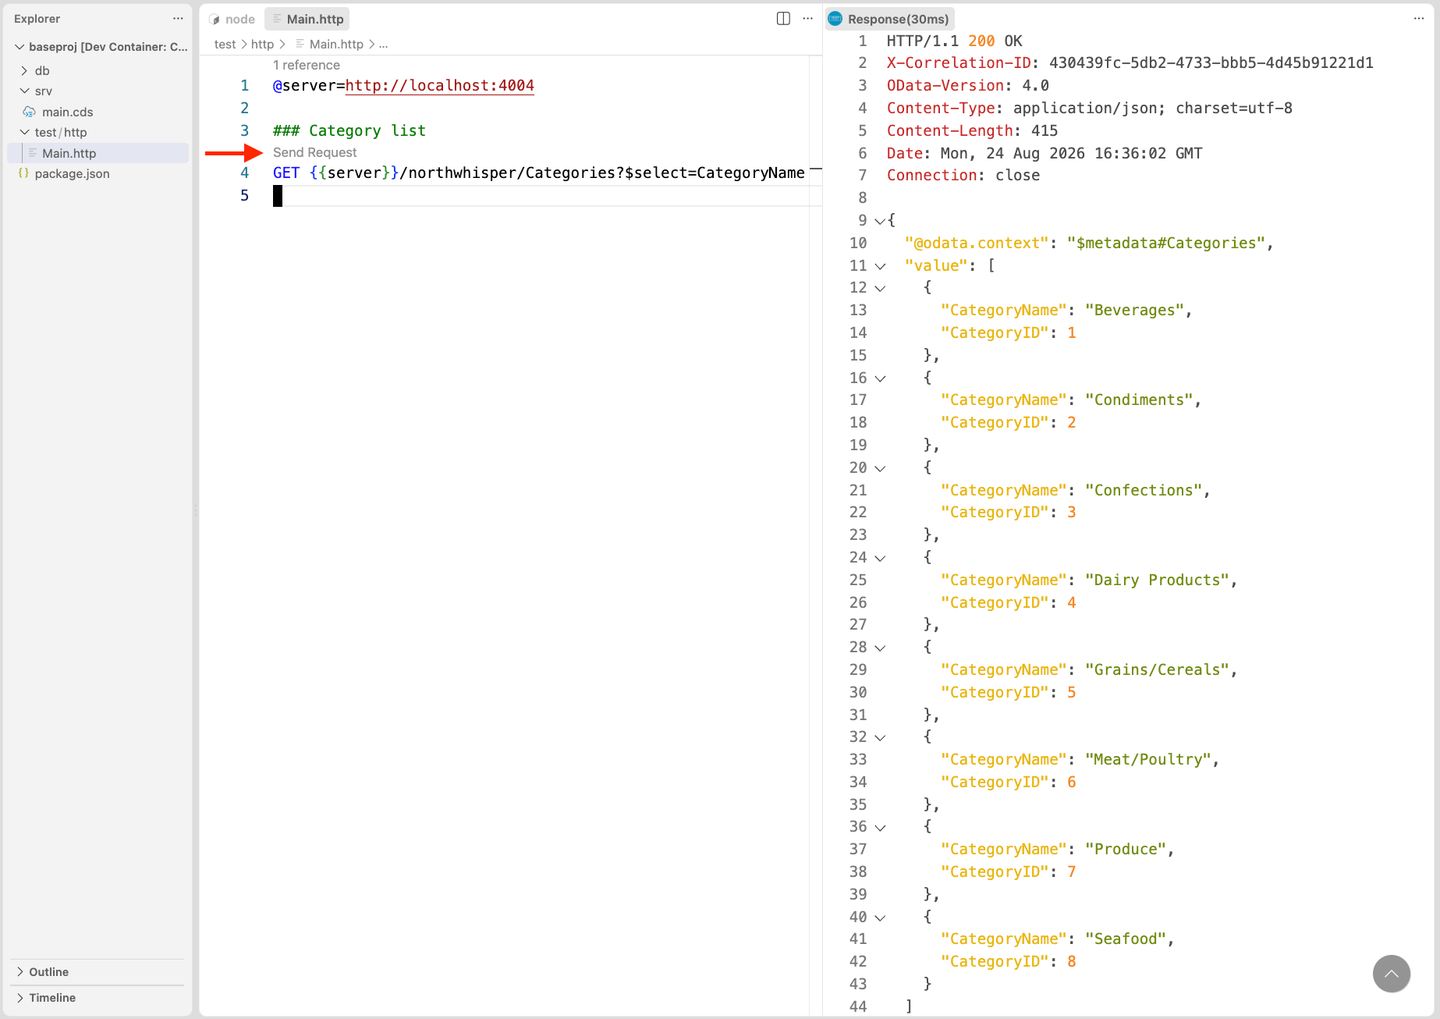
GET {{server}}/northwhisper/Categories?$select=CategoryName
👉 A “Send Request” line should appear, which you should select. This will cause the request to be sent, with a result should look something like this, where the categories are listed:
So far, so good.
Let’s add a new category. This first attempt, we’ll be rather “loose” with the category name.
👉 Append this new request definition to test/http/Main.http:
### Add new category with inappropriate name
POST {{server}}/northwhisper/Categories
Content-Type: application/json

{
  "CategoryID": 9,
  "CategoryName": "a new category"
}
👉 Send the request, which should be successful, showing a response something like this:
HTTP/1.1 201 Created
OData-Version: 4.0
location: Categories(9)
Content-Type: application/json; charset=utf-8
Content-Length: 115

{
  "@odata.context": "$metadata#Categories/$entity",
  "CategoryID": 9,
  "CategoryName": "a new category",
  "Description": null
}
However, there are two issues here:
- the category name doesn’t conform to the naming pattern of categories that already exist
- we didn’t supply a category description, leaving us with a
nullvalue for that property
We’ll address them both by adding constraints.
Let’s deal with the second issue first, by making the description mandatory. Following best practices, we’ll put the annotations in a separate file.
👉 In a new file srv/constraints.cds, add this:
using Main from './main';

annotate Main.Categories with {

  Description @mandatory;

}
👉 Now retry the previous POST request, which should be rejected, emitting a response like this:
HTTP/1.1 400 Bad Request
OData-Version: 4.0
Content-Type: application/json; charset=utf-8
Content-Length: 127

{
  "error": {
    "message": "Provide the missing value.",
    "code": "ASSERT_MANDATORY",
    "target": "Description",
    "@Common.numericSeverity": 4
  }
}
Better!
Here, and subsequently, because we’re running the CAP server in “watch” mode, it should restart automatically when such CDS files are saved, meaning the data will be reset and ready for fresh POST requests like this.
Annotations such as @readonly, @mandatory, @assert.range and so on have
been around for a while. Introduced in the December 2025 CAP release is the
more general @assert annotation which goes nicely with expressions in CXL.
Let’s get a taste of @assert by using it instead of @mandatory.
👉 Replace Description @mandatory in srv/constraints.cds so it looks like
this:
using Main from './main';

annotate Main.Categories with {

  Description @assert: (case
    when Description is null then 'Description must be supplied'
    when length(Description) < 3 then 'Description too short'
  end);

}
👉 Now retry the POST request again, using various combinations for the
Description property (none, one that is only a couple of characters long,
and one that is three or more characters long), and observe that the
appropriate responses are returned. Note that the error messages better
reflect the actual circumstances, too.
Now let’s address the first issue from earlier. We want the names of new categories to follow the pattern we have already, which is that each word in the name is capitalized (“Condiments”, “Dairy Products”, “Meat/Poultry”, etc).
👉 Add a new @assert.format annotation on the CategoryName element
with a regular expression, like this:
using Main from './main';

annotate Main.Categories with {

  Description  @assert: (case
    when Description is null then 'Description must be supplied'
    when length(Description) < 3 then 'Description too short'
  end);

  CategoryName @assert.format: '^[A-Z][a-z]+(?:\W[A-Z][a-z]+)*$';

}
👉 Ensure the POST request in the test/http/Main.http file has a valid
Description property in the payload, and retry the request again. This
time the request should be rejected, with a response like this:
HTTP/1.1 400 Bad Request
OData-Version: 4.0
Content-Type: application/json; charset=utf-8
Content-Length: 167

{
  "error": {
    "message": "Enter a value matching the pattern ^[A-Z][a-z]+(?:\\W[A-Z][a-z]+)*$.",
    "code": "ASSERT_FORMAT",
    "target": "CategoryName",
    "@Common.numericSeverity": 4
  }
}
The category name that didn’t comply with the pattern is caught. Good. But while the message returned is accurate, it’s a bit technical.
So let’s address that.
👉 Add a @assert.format.message annotation so that it appears in
srv/constraints.cds like this:
using Main from './main';

annotate Main.Categories with {

  Description  @assert: (case
    when Description is null then 'Description must be supplied'
    when length(Description) < 3 then 'Description too short'
  end);

  CategoryName @assert.format        : '^[A-Z][a-z]+(?:\W[A-Z][a-z]+)*$'
               @assert.format.message: 'Follow the category naming conventions';

}👉 To the test/http/Main.http file, append a second POST request like this:
### Add new category with valid name and description
POST {{server}}/northwhisper/Categories
Content-Type: application/json

{
  "CategoryID": 9,
  "CategoryName": "Pulses/Seeds",
  "Description": "Lentils, chickpeas, kidney beans, black gram and similar."
}
👉 Now use that request to attempt a new category creation. This should be successful, as there’s a description, and the name conforms to the capitalization requirements:
HTTP/1.1 201 Created
OData-Version: 4.0
location: Categories(9)
Content-Type: application/json; charset=utf-8
Content-Length: 168

{
  "@odata.context": "$metadata#Categories/$entity",
  "CategoryID": 9,
  "CategoryName": "Pulses/Seeds",
  "Description": "Lentils, chickpeas, kidney beans, black gram and similar."
}
Great!
- There are more constraint assertions, enabling us to, for example, check for
existing associated entities, using either
@assert.targetor theexistspredicate within a more general@assertconstruct. - The Declarative Constraints topic in Capire has a great overview, including some best practice tips.
After first making the category description mandatory with Description @mandatory;, we retried the POST request, the payload for which didn’t include
a Description property at all. The result was an HTTP 400 with an
ASSERT_MANDATORY code.
Resources
Discussion
Share feedback on this tutorial or join the conversation in SAP Community.