
Overview
You will learn
- How to turn a CAP service in to a fully functioning agent with a single annotation


Prerequisites
/workspaces/cap-nodejs-dev-env. If you
have your own CAP Node.js development environment setup, then please make the
appropriate adjustments where necessary.Steps
Intro
The agentic AI era is truly upon us. Agents, as independent self-contained units of reasoning & acting towards a goal, accessed via natural language conveyed over the open agent-to-agent (A2A) protocol, are important components.
There are many ways to create agents, but perhaps one of the most
straightforward, especially in the context of a service that we want an agent
to help us with and be an expert in, is to use CAP and the @agent annotation.
To have a service from which we can create an agent, let’s set up a very
simple CAP project with a basic “books” oriented service. Conveniently there’s
the tiny-sample facet which we can use.
👉 Create a new CAP project using this facet, plus the nodejs facet:
cds init --add tiny-sample,nodejs cap-create-agentWe’re adding the
nodejsfacet so that we have apackage.jsonfile, as we’ll be installing a package withnpmlater.
👉 Now open the new cap-create-agent/ directory in a new VS Code /
Codespace window:
code cap-create-agent/This should place you and any new terminal session in the new
cap-create-agent/ directory.
There’s a simple CatalogService with a single Books entity, for which
there are a handful of records. Let’s have a quick look.
👉 Start the server with cds watch, which should cause log lines as shown
below to be emitted:
[cds] - loaded model from 1 file(s):

  srv/cat-service.cds

[cds] - using bindings from: { registry: '~/.cds-services.json' }
[cds] - connect to db > sqlite { database: ':memory:' }
  > init from db/data/CatalogService.Books.csv
/> successfully deployed to in-memory database.

[cds] - serving CatalogService {
  at: [ '/odata/v4/catalog' ],
  decl: 'srv/cat-service.cds:1'
}
[cds] - server listening on { url: 'http://localhost:4004' }
The path on which
CatalogServiceis served -/odata/v4/catalog- indicates that this is OData v4.
The agentic facilities that we can summon with the use of a single annotation are provided in the form of a plugin.
👉 Stop the currently running CAP server (with Ctrl-C) and add that plugin
now:
npm add @cap-js/agentsThis will cause the installation of quite a few packages. Beneath the calm surface of the CAP framework, which allows us to work declaratively and use the power of the framework rather than write (or, worse, generate) more code ourselves, the heavy lifting is being done for us, with extra features too for local-first development.
👉 Take a quick peek at those packages, upon which the @cap-js/agents package
depends:
npm info @cap-js/agents dependenciesThis should emit something like this:
{
  zod: '^4.0.0',
  marked: '^18',
  langchain: '^1.5.0',
  deepagents: '^1.10.0',
  '@a2a-js/sdk': '^0.3.12',
  '@cap-js/mcp': '^1.5',
  '@langchain/core': '^1',
  '@langchain/openai': '^1.5.13',
  '@cap-js/attachments': '>=3',
  '@langchain/anthropic': '^1.5.1',
  '@langchain/langgraph': '^1',
  '@sap-ai-sdk/langchain': '^2.13.0',
  '@langchain/mcp-adapters': '^1.1.3',
  '@sap-ai-sdk/orchestration': '^2.11.0',
  '@sap-cloud-sdk/http-client': '^4.9.1',
  '@sap-cloud-sdk/connectivity': '^4.7.0'
}The CDS model for this service is deliberately very simple and defined in a
single file, srv/cat-service.cds.
👉 Add an @agent annotation so that it looks something like this:
@agent
@odata
service CatalogService {
  entity Books {
    key ID     : Integer;
        title  : String;
        author : String;
  }
}Now restart the CAP server, this time specifying the agents component in the
DEBUG environment variable, so that we can get to see the details of what’s
happening:
DEBUG=agents cds watchThis time there’s more in the CAP server log, which now looks something like this:
[cds] - loaded model from 5 file(s):

  srv/cat-service.cds
  node_modules/@cap-js/agents/srv/entities.cds
  node_modules/@cap-js/attachments/index.cds
  node_modules/@cap-js/attachments/db/index.cds
  node_modules/@sap/cds/common.cds

[cds] - using bindings from: { registry: '~/.cds-services.json' }
[cds] - connect to db > sqlite { url: ':memory:' }
  > init from db/data/CatalogService.Books.csv
  > init from node_modules/@cap-js/attachments/db/data/sap.attachments-ScanStates_texts.csv
  > init from node_modules/@cap-js/attachments/db/data/sap.attachments-ScanStates.csv
/> successfully deployed to in-memory database.

...
[cds] - serving CatalogService {
  at: [ '/odata/v4/catalog', '/a2a/catalog' ],
  decl: 'srv/cat-service.cds:2'
}
[agents] - Failed loading Claude settings from ~/.claude/settings.json
[agents] - Failed loading OpenCode settings from ~/.config/opencode/opencode.json
[agents] - Failed loading Codex settings from ~/.codex/config.toml
[agents] - Failed loading OpenCode settings from ~/.config/opencode/opencode.json
...
👉 Take a moment to stare at this output. It shows us quite a few interesting things:
- The simple model is now extended via both the
@cap-js/agentsplugin that we added explicitly, and via further plugins that were also installed as dependencies. - There are some corresponding CSV files included in initial data loading too.
- The
CatalogServiceis now also served at/a2a/catalog
Additionally:
The debug output for the
agentscomponent shows the default automatic config feature which looks for LLM configuration in places that may exist on your local machine, if you use tools such as Claude Code, OpenCode or similar.If you’re using a self-contained development environment as described in the prerequisites, then it’s unlikely that you’ll have configuration like this, so you will probably also see the “Failed loading” debug log records as shown here.
👉 Head over to the CAP server welcome page at http://localhost:4004 where there should be two service endpoints for the catalog service - one where it’s served via the OData protocol, and one where it’s served via the A2A protocol.
An agent!
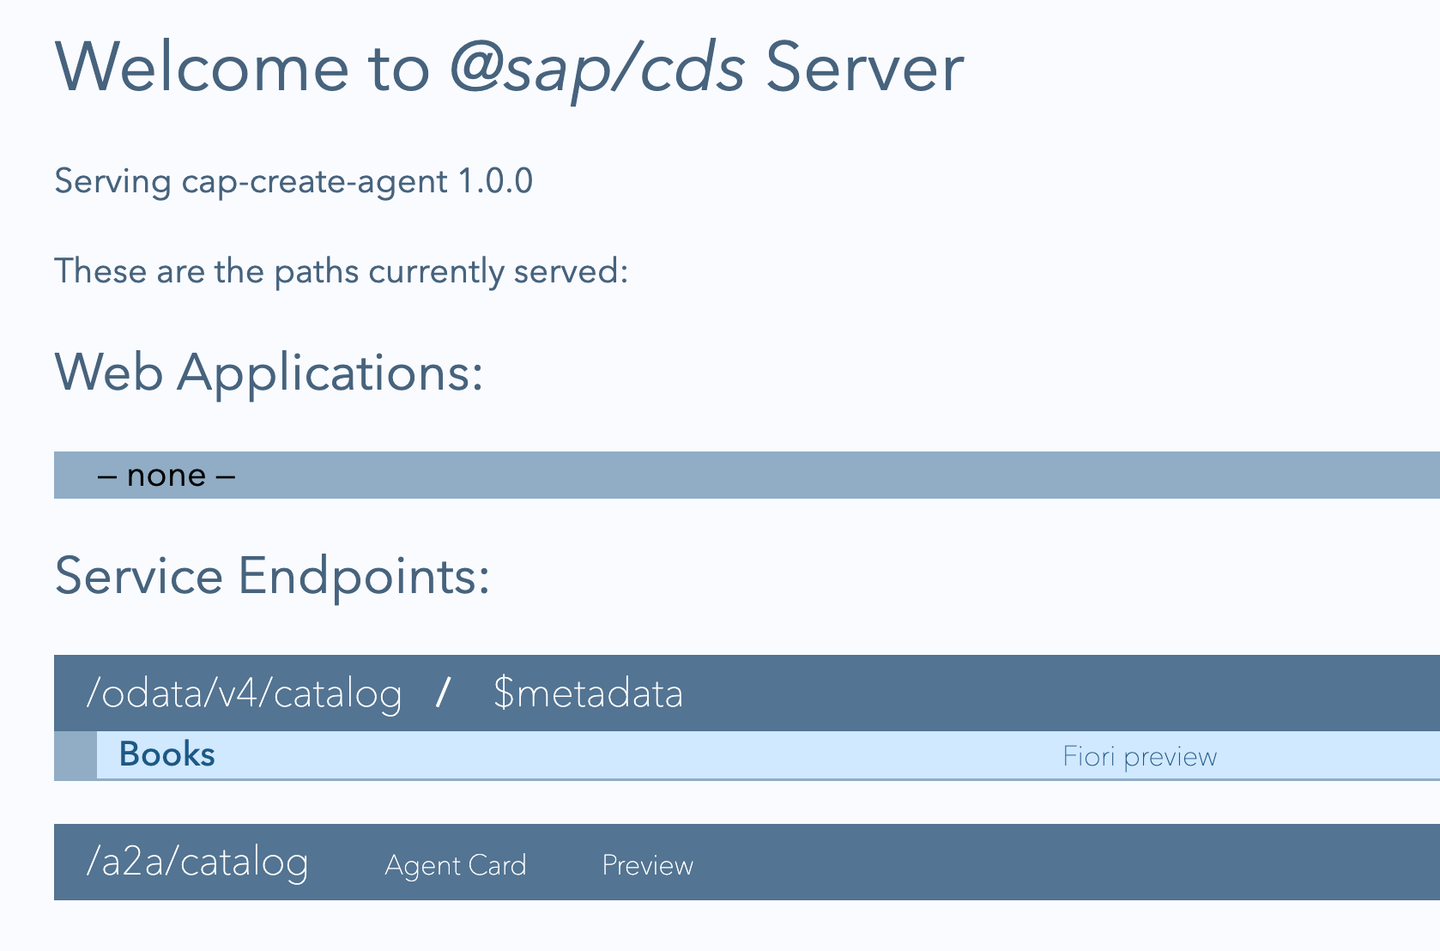
👉 Explore the first two resources listed for the agent service endpoint:
/a2a/catalog is the root resource for the A2A endpoint for this agent. A2A uses JSON-RPC which, while readable (the representations are JSON), is somewhat unfriendly to humans as the protocol uses HTTP
POSTpredominantly. This is why an error is returned when youGETthe resource by visiting it in the browser:JSON{ "jsonrpc": "2.0", "error": { "code": -32000, "message": "Method not allowed." }, "id": null }Agent Card is a “well-known” resource in the A2A protocol and describes an agent’s capabilities. Notably, this includes a
skillsproperty which looks like this, for theCatalogService:JSON{ "name": "CatalogService", "description": "Agent for CatalogService", "url": "http://localhost:4004/a2a/catalog", "...": "...", "skills": [ { "id": "query", "name": "Data Query", "description": "Query data from the service. Available entities: \n Books", "examples": [ "Show me all Books" ], "tags": [ "query", "data", "read", "books" ] } ] }
To finish off our first foray into the agentic world with CAP-level agents, we’ll explore the third resource listed for the agent service endpoint, namely the “Preview”, a simple and experimental chat preview for local development use.
We’ll explore it in pure local-first development mode, and in line with many other mocking facilities, there’s a “mock LLM” facility which we’ll make use of here.
👉 First, stop the current CAP server (with Ctrl-C).
👉 Next, restart it, specifying mock as the value for the LLM requirement:
cds_requires_llm_kind=mock cds watchUsing snake case names that represent nodes in the effective environment is one of many ways we can provide values like this; alternatives would be to use a file like
.cdsrc.json,.env, or put the configuration directly intopackage.json.
Amidst the normal CAP server log output, we should see something like this:
[agents] - cds.connect.to 'llm' with: {
  impl: '@cap-js/agents/lib/models/mock',
  kind: 'mock',
  credentials: {}
}
The Preview facility is now ready for us with a mocked LLM, which responds the same way each time, to whatever we send in chat. Here’s an example:
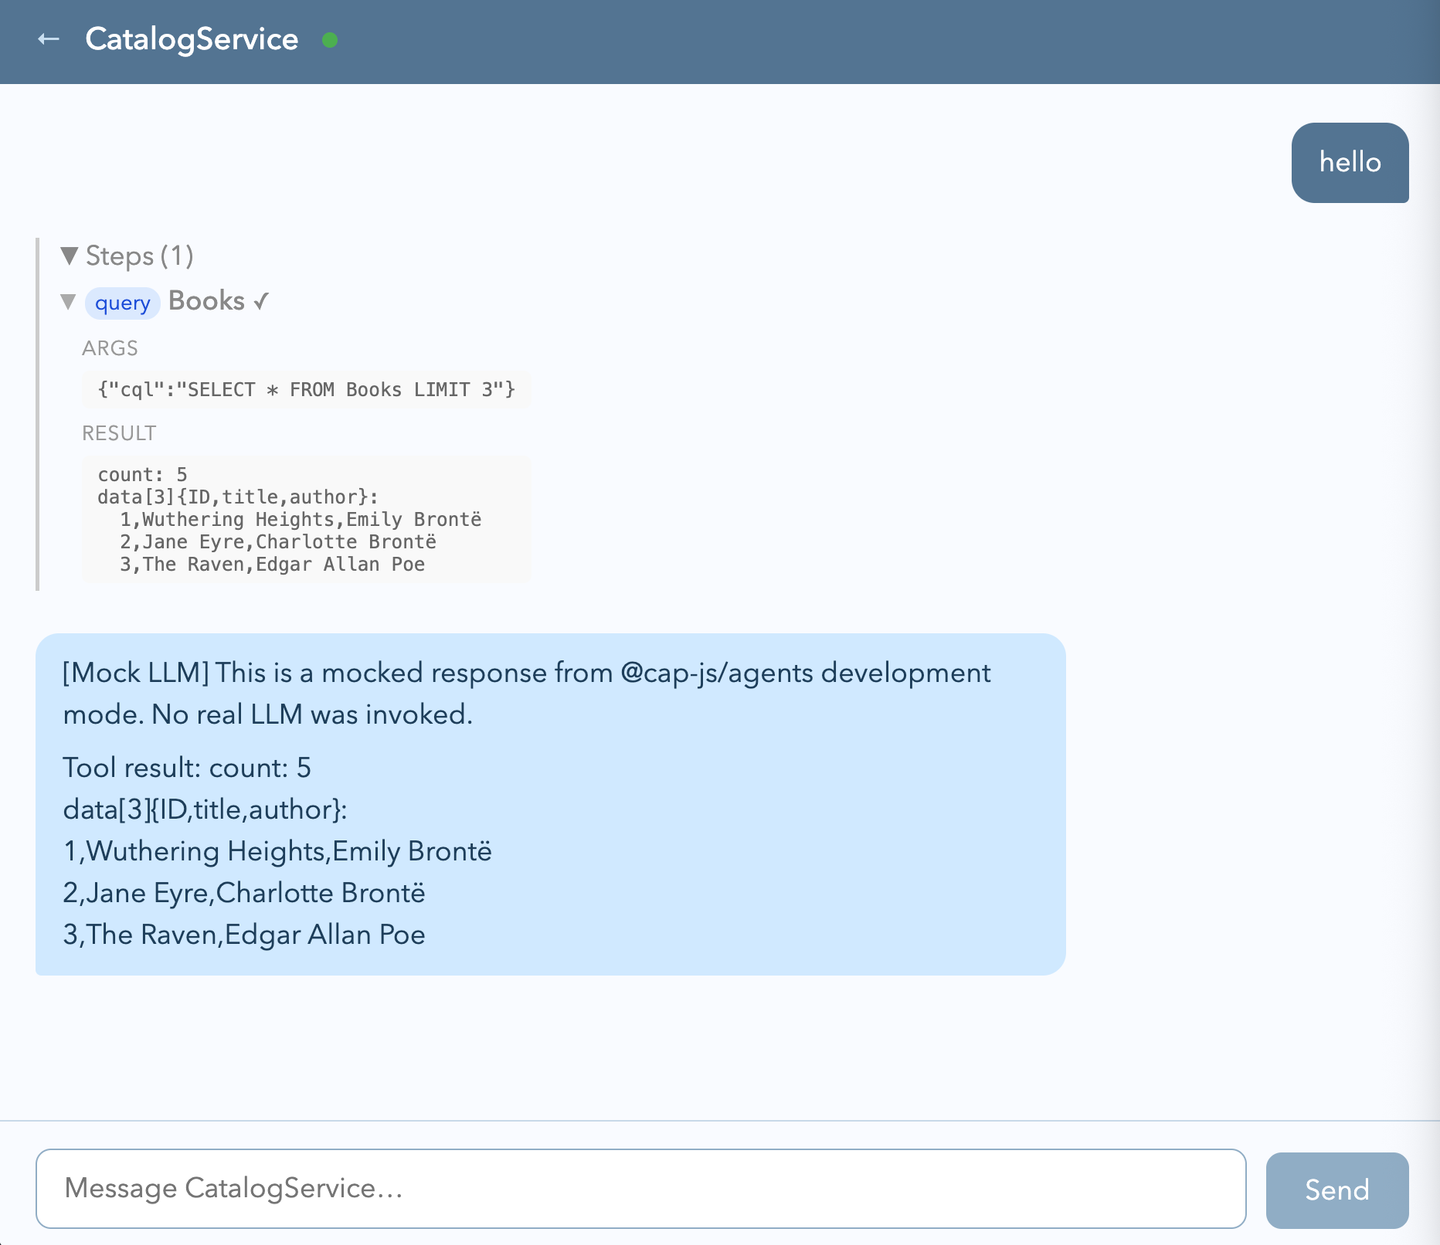
What’s happened is that we get a full chat roundtrip, without having to have a connection to a real LLM.
Nice!
In the next tutorial Connect a CAP-level agent to an LLM, we’ll connect this agent to a real LLM and put it through its paces.
- CAP-level agents are covered in Capire’s Native AI guide
As described in the CAP-level agents configuration in
Capire, we see
that while the mock LLM kind is available for pure local-first development,
the default kind of LLM for development is auto, which attempts to use local
agent harness tooling configuration for an LLM connection.
Resources
Discussion
Share feedback on this tutorial or join the conversation in SAP Community.